Zero Touch Provisioning for Bitbucket
This tutorial walks you through the process of setting up ZTP for Bitbucket.
Prerequisites
Before you begin, ensure you have:
- Integrated Bitbucket to BoostSecurity.
- Allowed development apps to be installed. You can do this by navigating to this url
https://bitbucket.org/<your-bitbucket-org>/workspace/settings/addon-management. Replace<your-bitbucket-org>with the name of your Bitbucket organization. -
Created a non-empty
.boostrepo in the Bitbucket workspace. To do this, go to your Bitbucket workspace where you installed BoostSecurity and create a new.boostrepo that contains a Readme file.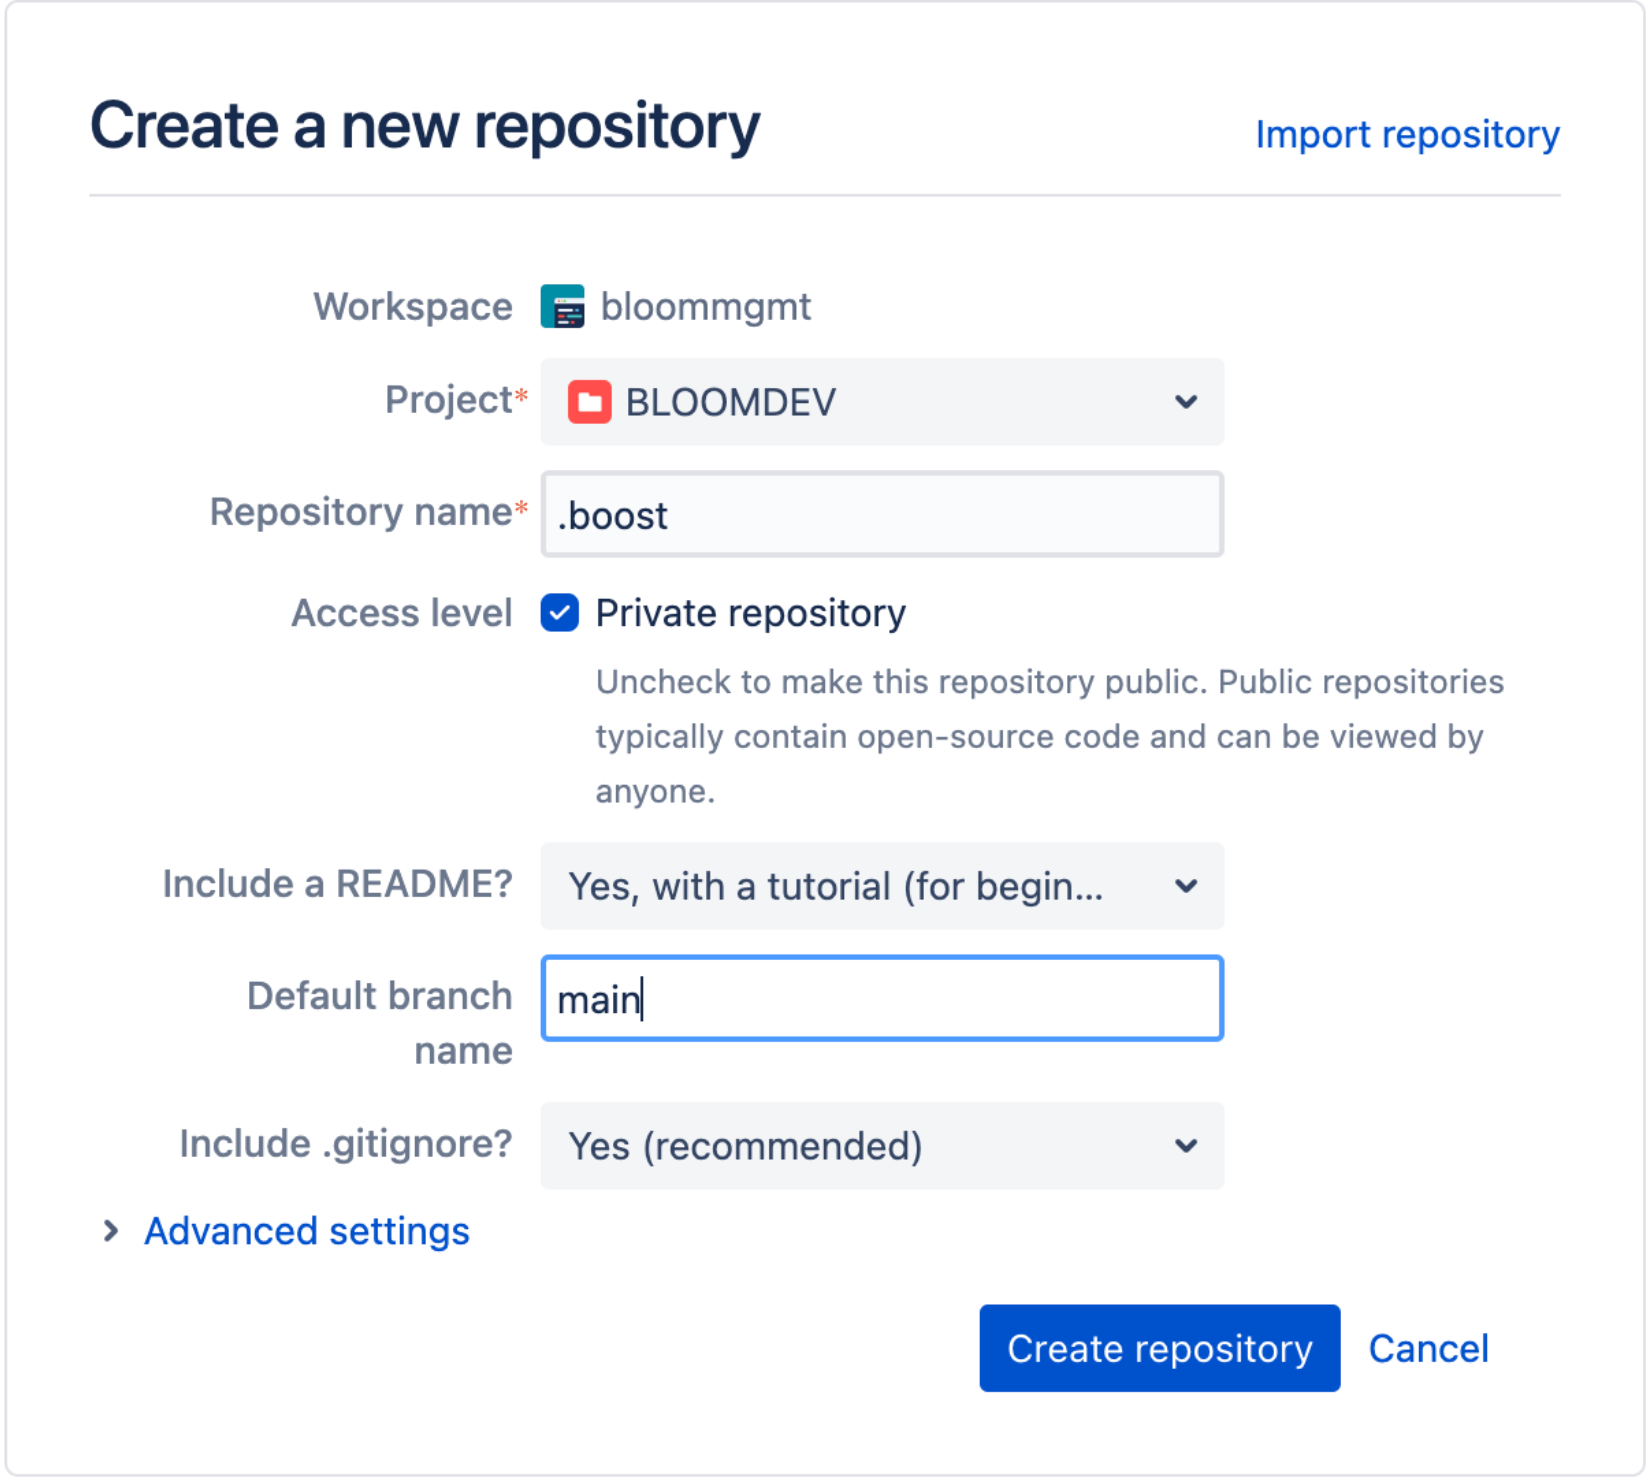
-
Turned on the Enable Pipelines settings for your workspaces'
.boostrepository, i.e,https://bitbucket.org/<your-bitbucket-org>/.boost/admin/pipelines/settings. You can do this by clicking the Enable Pipelines button as shown above and turning it on.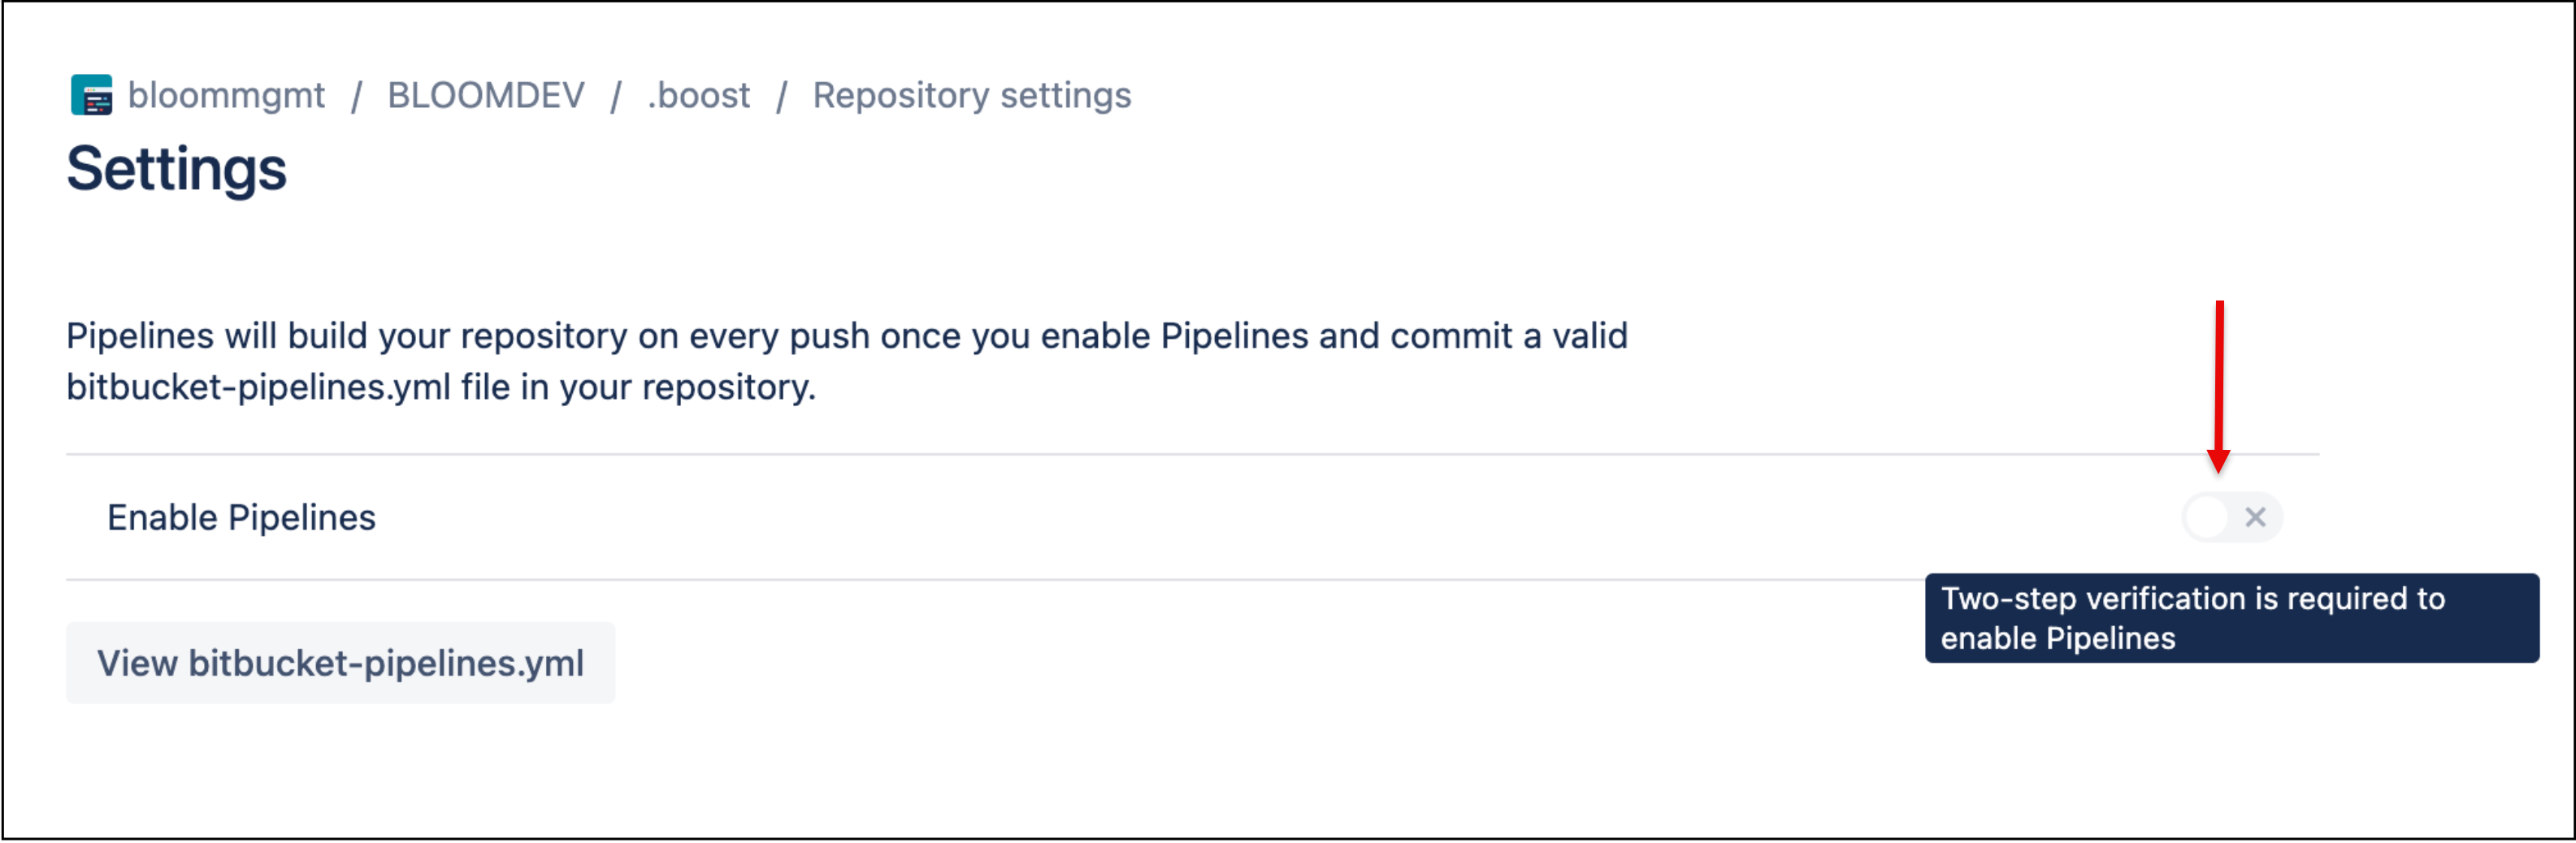
Integration Steps
-
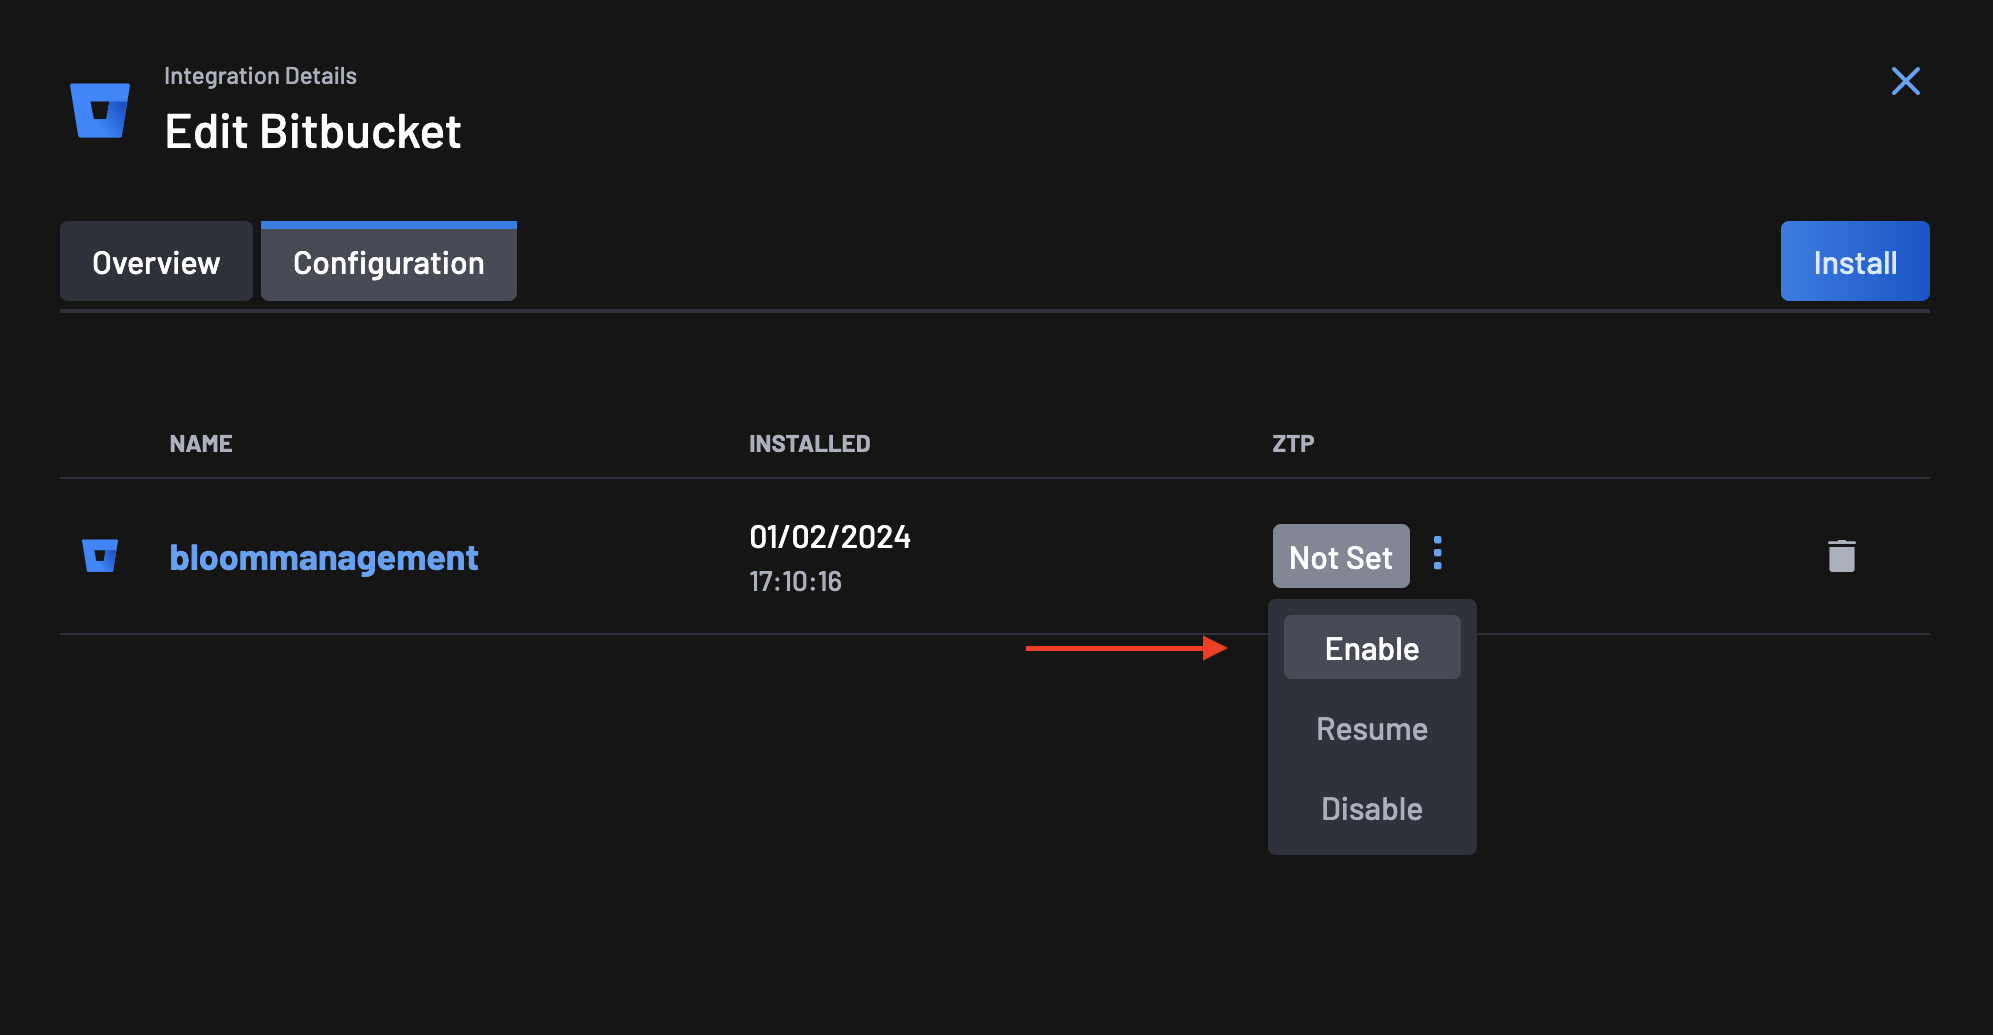
Go to the Integrations page, select your Bitbucket integration, and click on the configuration tab.
-
On the ZTP column, you will notice that the status is set to Not Set. Click on the menu next to the status and select Enable.
-
The first step on the ZTP Wizard is to give BoostSecurity permissions for the Zero Touch Flow on your Bitbucket organization.
-
Click the Install ZTP Application button to redirect you to your Bitbucket organization.

-
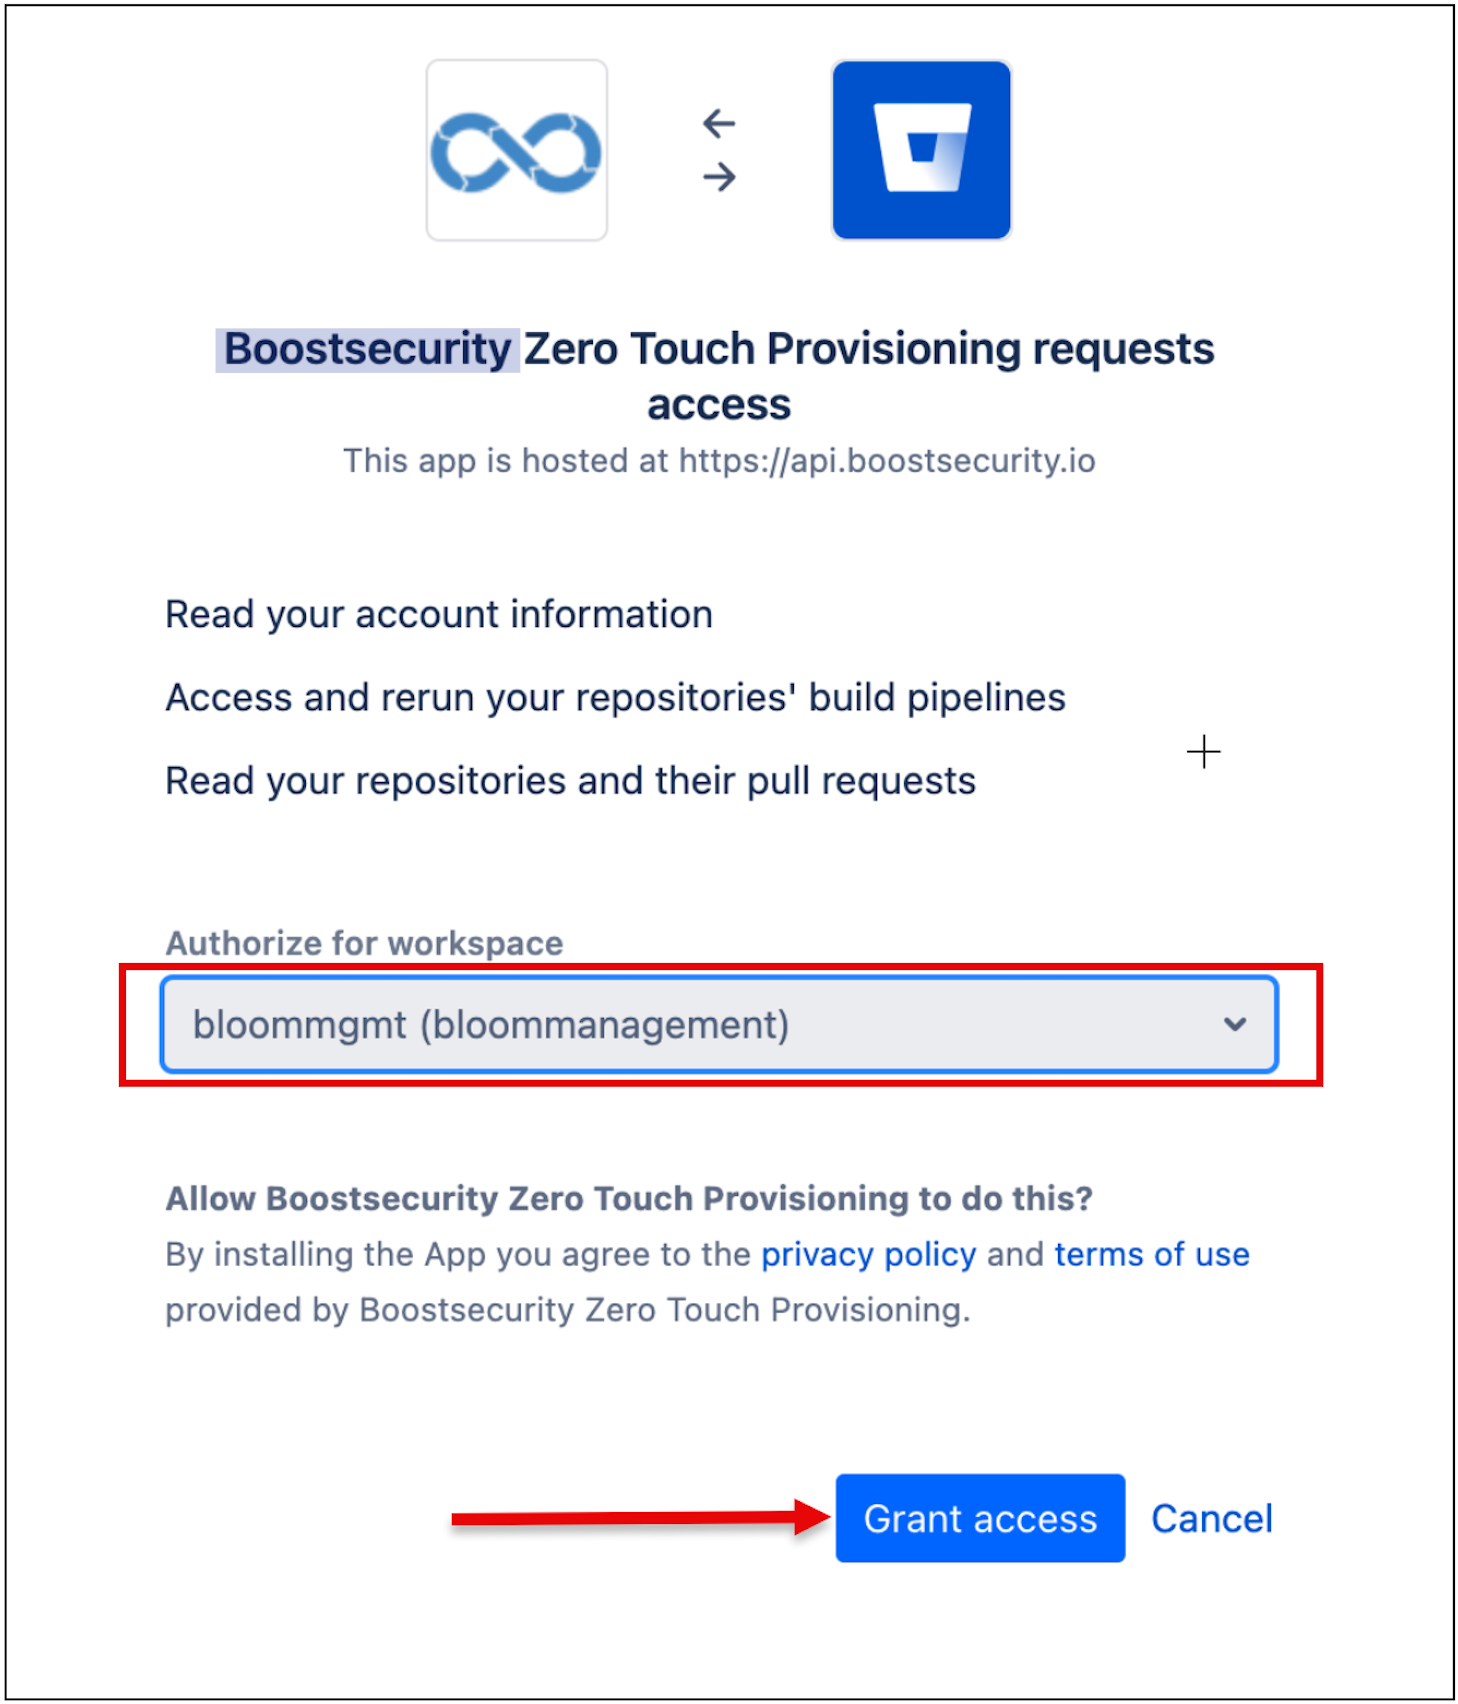
Install and authorize the BoostSecurity.io Zero Touch provisioning on all organizations. Click on the Grant Access button at the bottom of the page.
-
BoostSecurity configures the
.boostrepo on successful BoostSecurity.io Zero Touch Provisioning installation. -
You are required to grant access to BoostSecurity.io CI provisioning on your account.
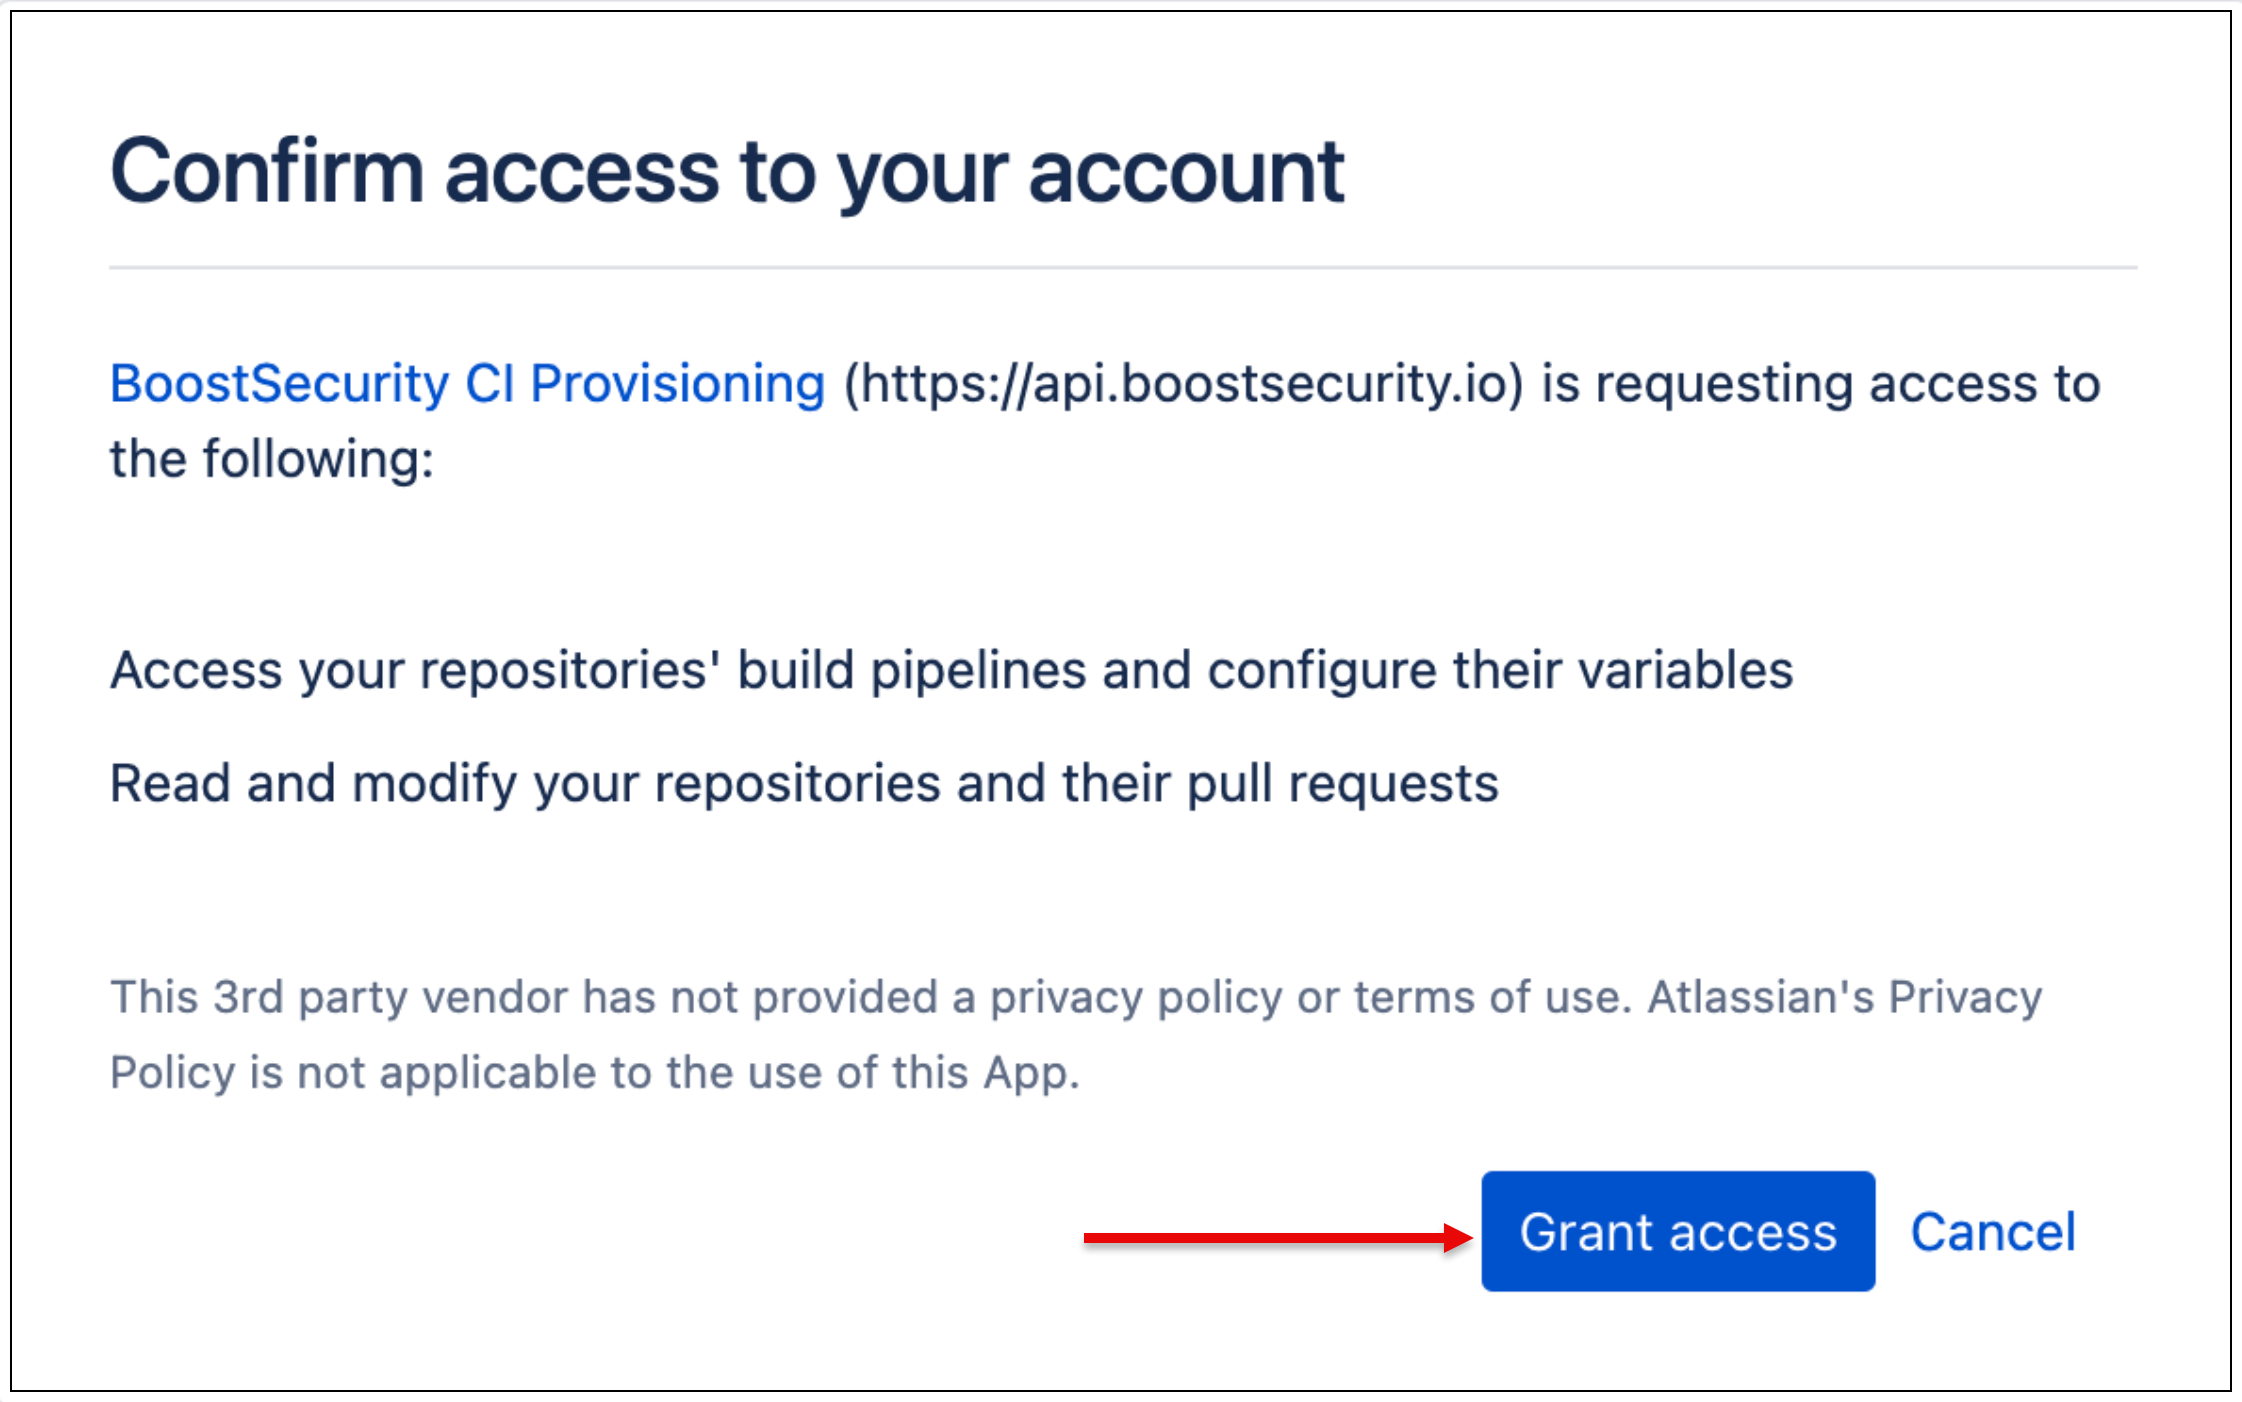
-
The pipeline configuration is ready after a successful CI pipeline configuration!
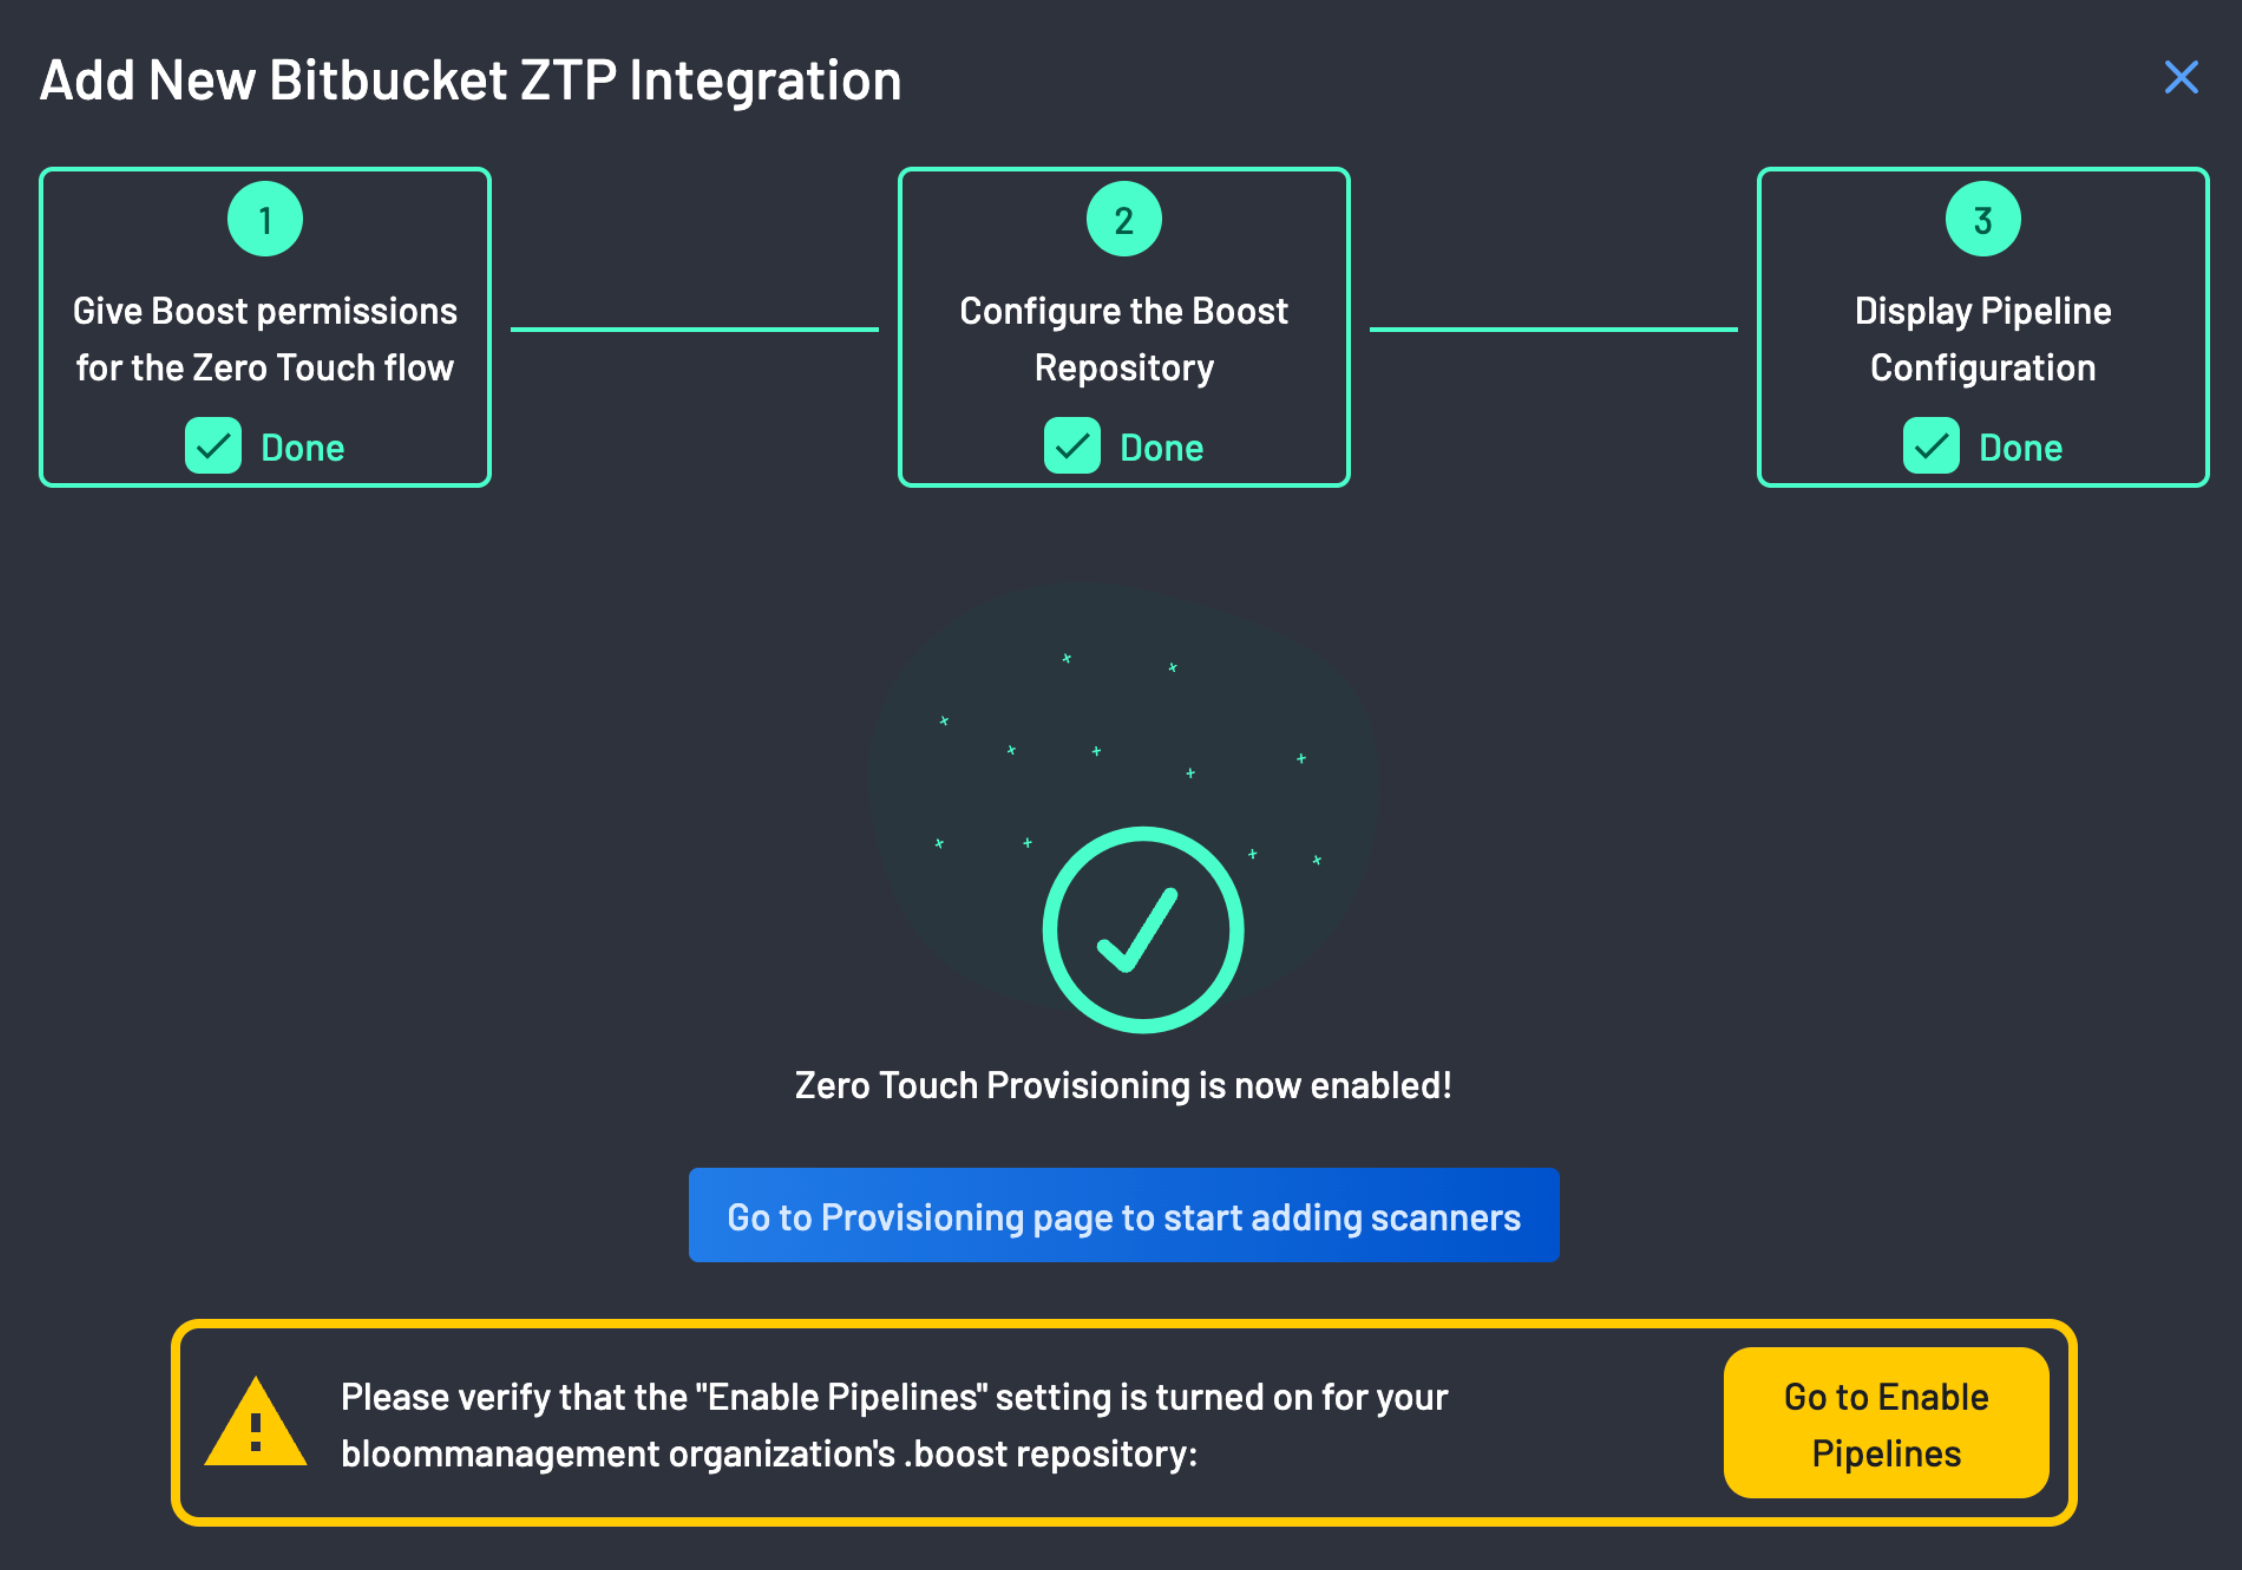
Zero Touch Provisioning is now enabled!!!
Next Steps
Proceed to build your first custom policy, where you would define specific actions for security events identified by configured scanners.