How to Create a New Policy
Creating a policy involves establishing specific rules and assigning automatic actions when those rules are triggered.
Use a Base Policy (Optional)
A base policy is a parent policy that your new policy can inherit from. This is useful when you want to standardize policy configuration across teams (for example, a shared “company baseline”), while still allowing individual policies to add or override specific behavior.
When you select a base policy, the new policy can inherit:
- Rules (conditions + actions)
- Scanners (which scanners/rulesets are active)
- Components (license and AI component restrictions)
How inheritance works
Inheritance behaves differently depending on what you configure in the child policy:
- Rules: Rules defined in the new policy are added on top of the base policy rules.
- Scanners: Scanners defined in the new policy override the base policy scanner selection.
- To inherit scanners from the base policy, leave the child policy’s Active Scanners empty.
- Components: Component restrictions defined in the new policy override the base policy components.
Tip
If you want to reuse an existing scanner configuration from the base policy, DO NOT select scanners in the child policy. If scanners are selected, BoostSecurity uses the child policy’s scanner configuration instead of inheriting.
Policy Creation Workflow
Follow this step-by-step guide to configure a new policy:
-
Navigate to the Policy page and click on the New Policy button at the top-right corner.

-
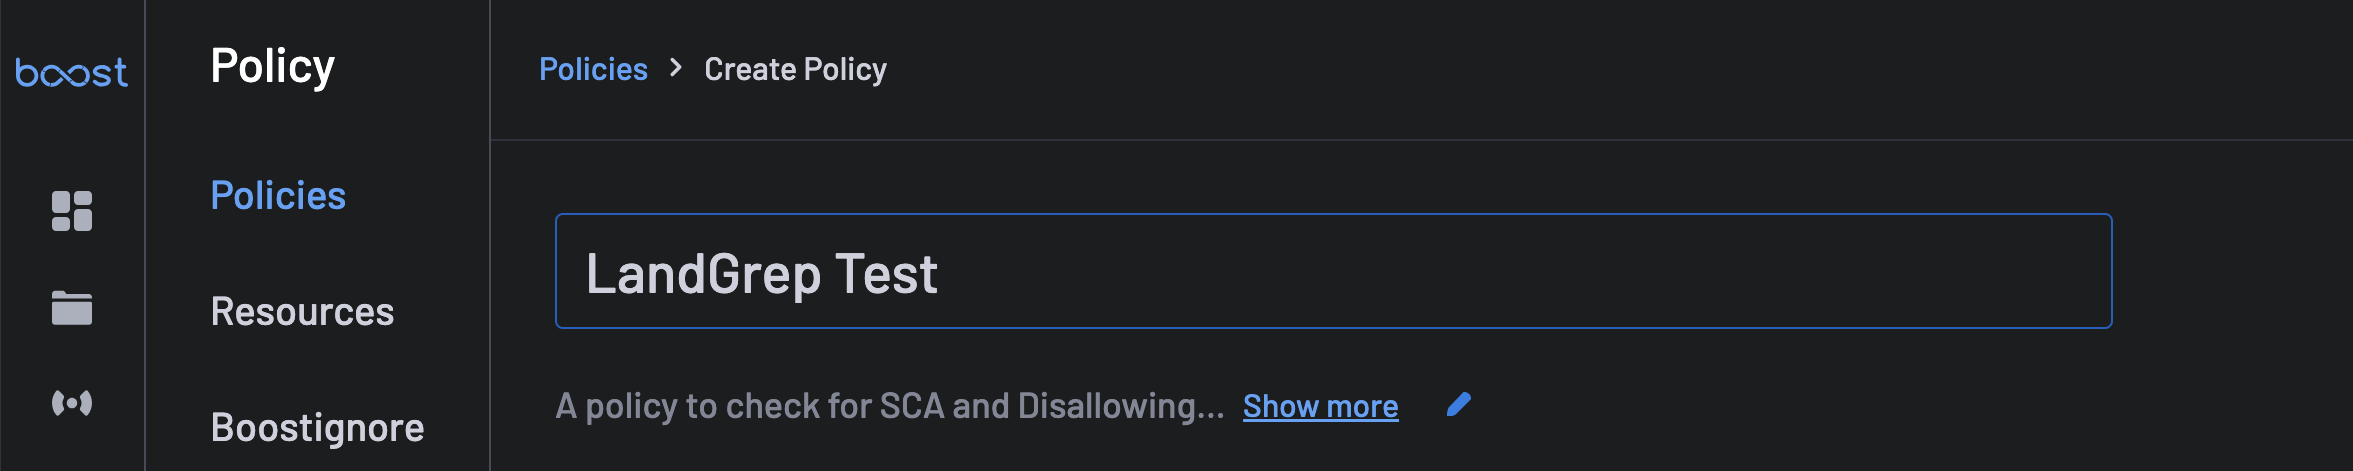
Provide a Name and Description for your policy, e.g., Disallowed Licenses, Severity Indicator, etc.
-
(Optional) In the Base policy dropdown, select a parent policy to inherit rules, scanners, and components from.
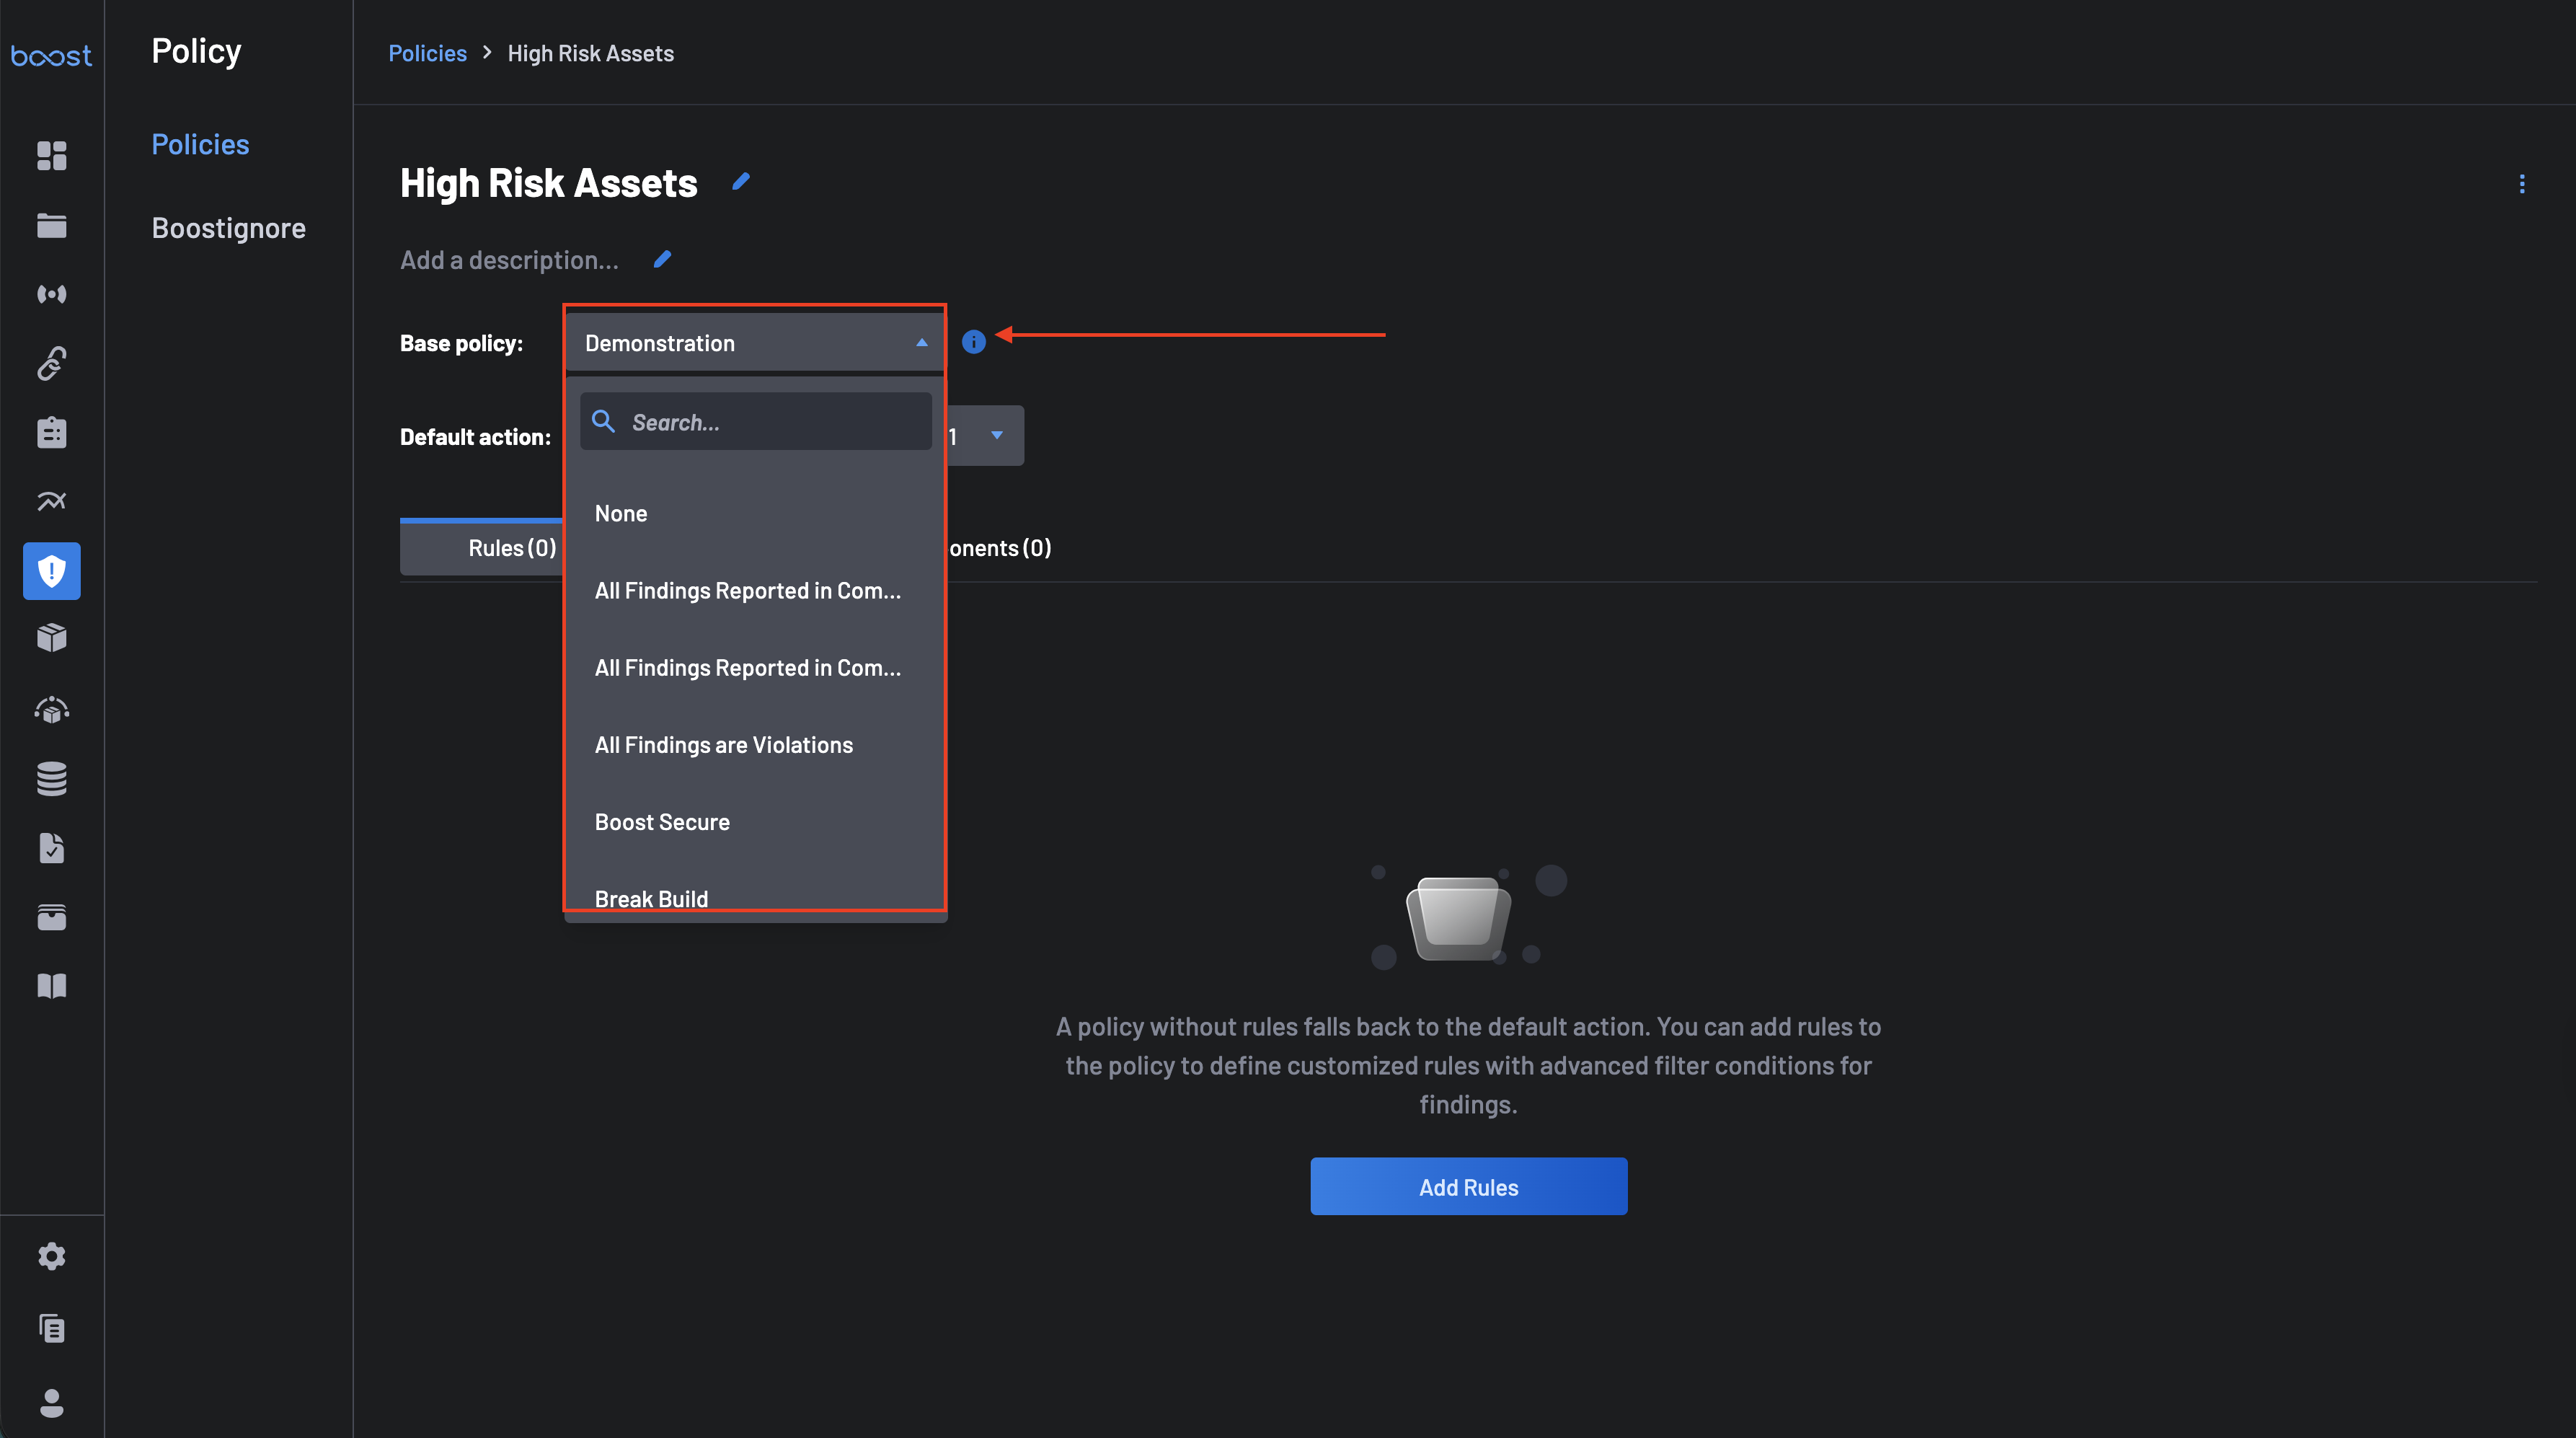
Info
You can still customize the policy after choosing a base policy. Rules are additive, but Scanners and Components are override-based (unless left empty for scanners).
-
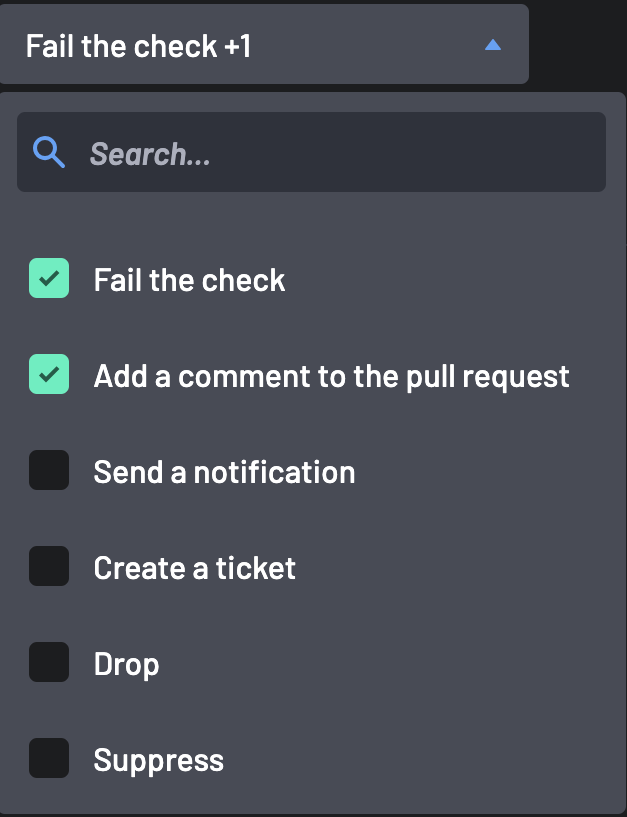
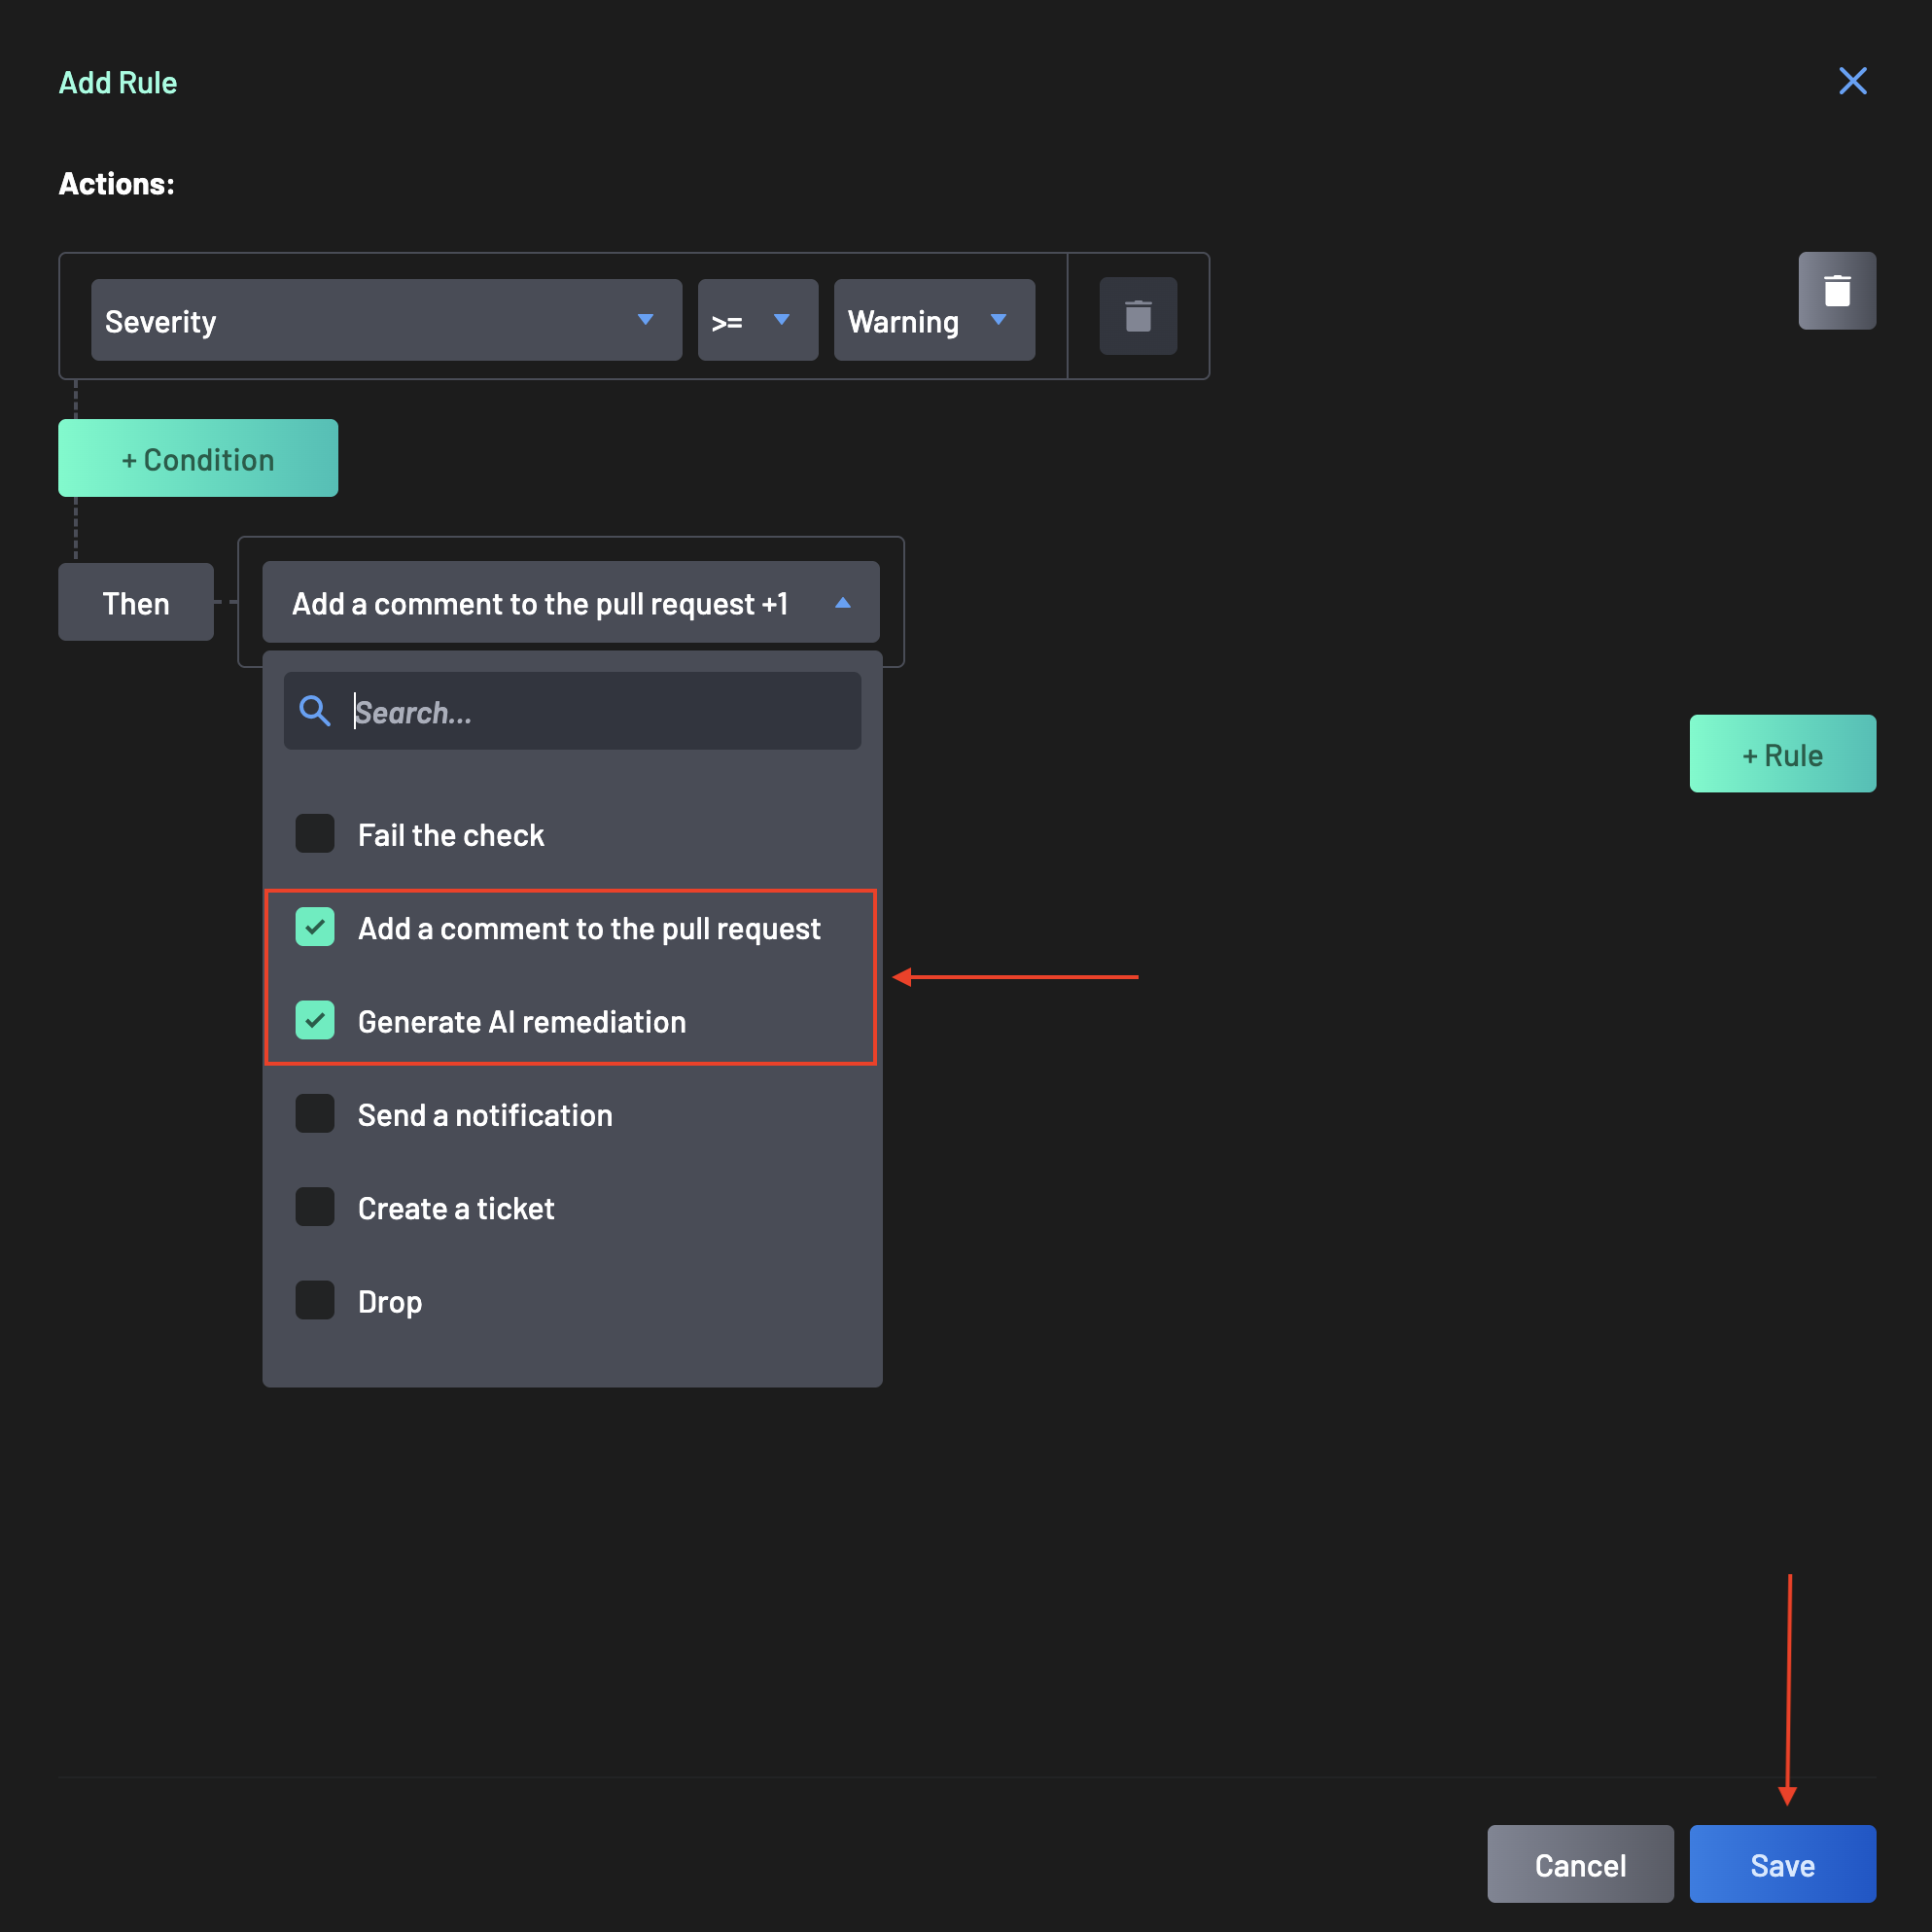
Select an action for the rule if you're not using the default action (Do not notify developers), which includes:
- Fail the check - Sends a "Fail" message to your CI job. Whether the build fails immediately depends on your pipeline configuration.
- Add a comment to the PR - Adds a comment to the PR.
- Generate AI Remediation - Enables AI-powered remediation suggestions for specific resources. Requires Add a comment to the PR to be selected simultaneously for results to be returned.
- Send a notification - Notifies your configured integrations (Slack, Teams, or Webhook). You must select integrations and add the channel name or webhook.
- Create a ticket - Generates a ticket in your issue tracker. Note: A project name is required.
- Drop - Drops all findings generated by the policy.
- Suppress - Suppresses the findings.
Warning
If you have a drop all action anywhere in your policy, compliance is always 0 for affected assets.
Info
You can select multiple actions to occur simultaneously (e.g., 'Fail the check' AND 'Send a notification')
-
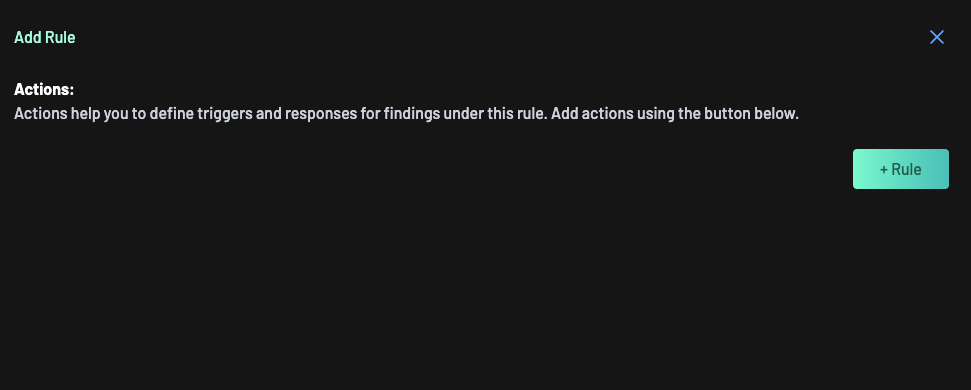
Click the Add Rule button.

-
Define a policy action, specifying parameters such as Label, EPSS Score, CVSS Score, Vulnerability ID, Confidence, Severity, Repository Flag, or many more.
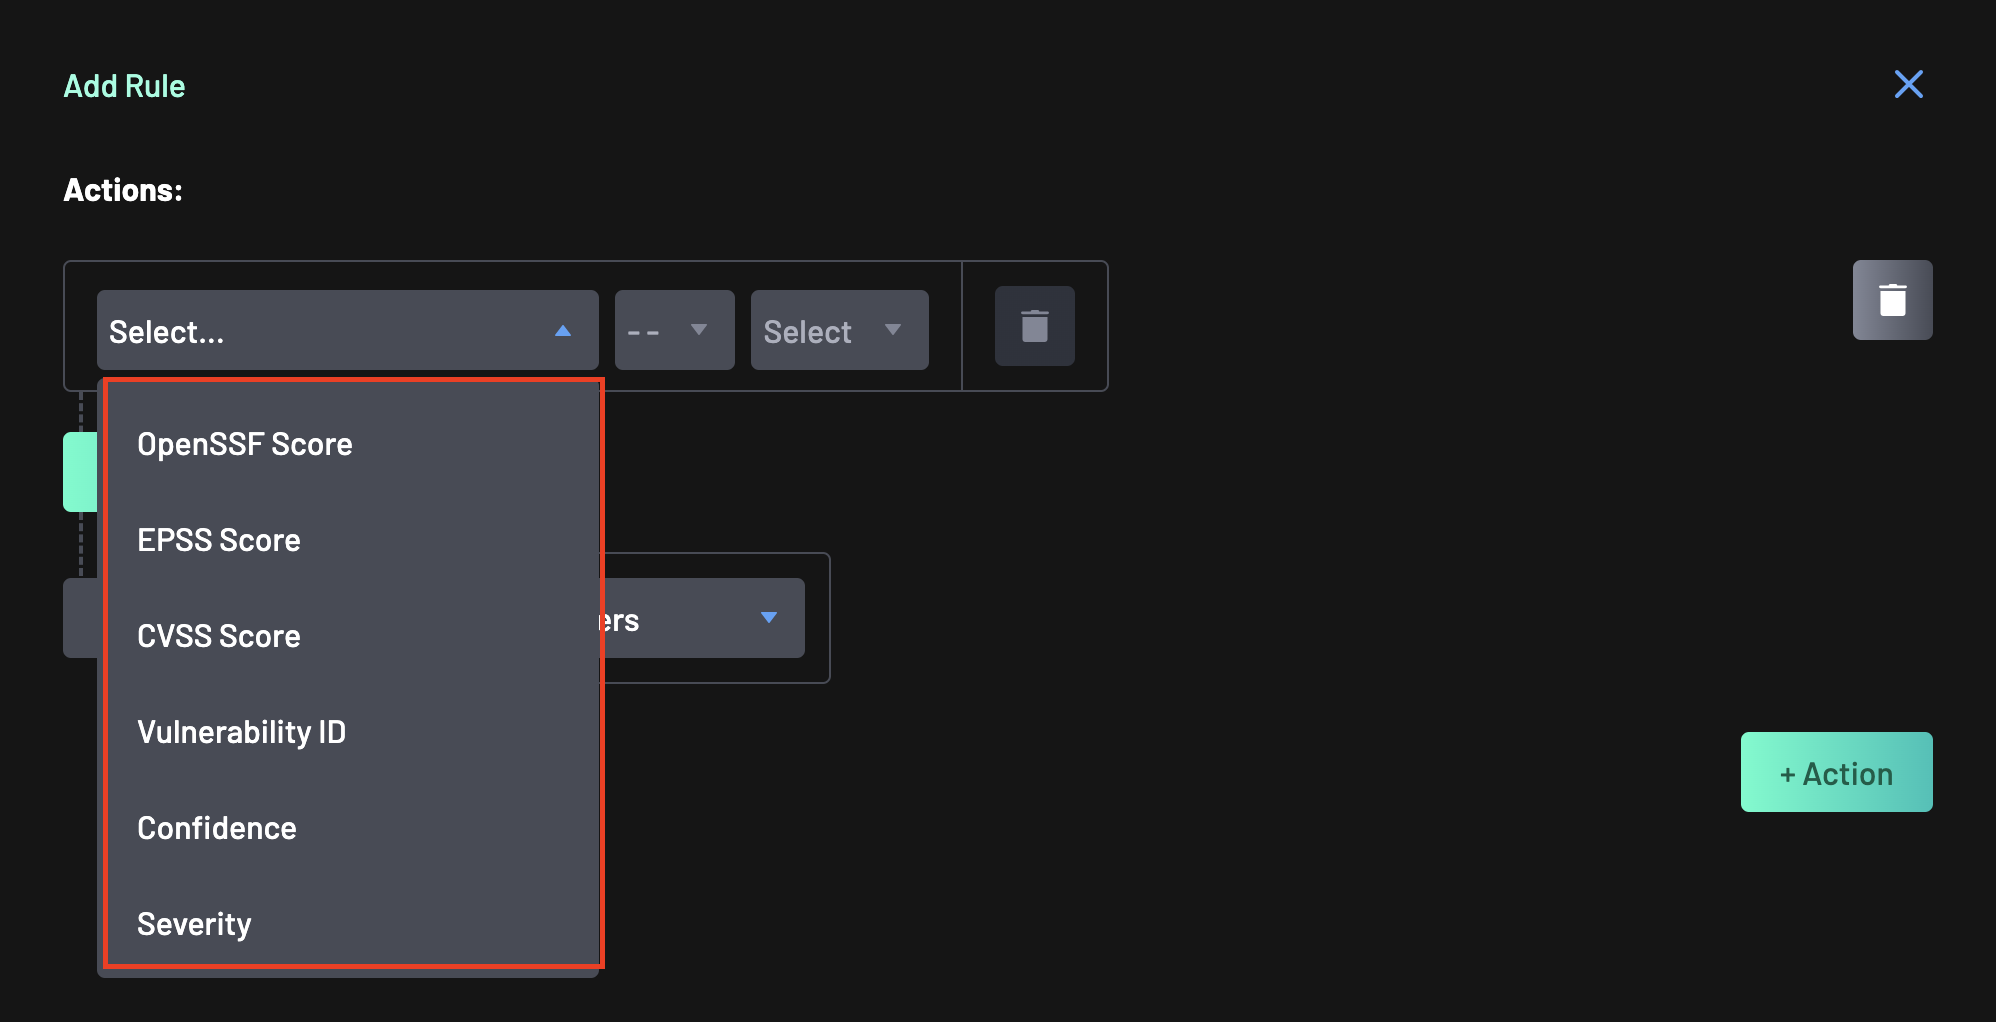
-
Select a policy action from the available categories (e.g., Software Composition Analysis). For this guide, select
Severity.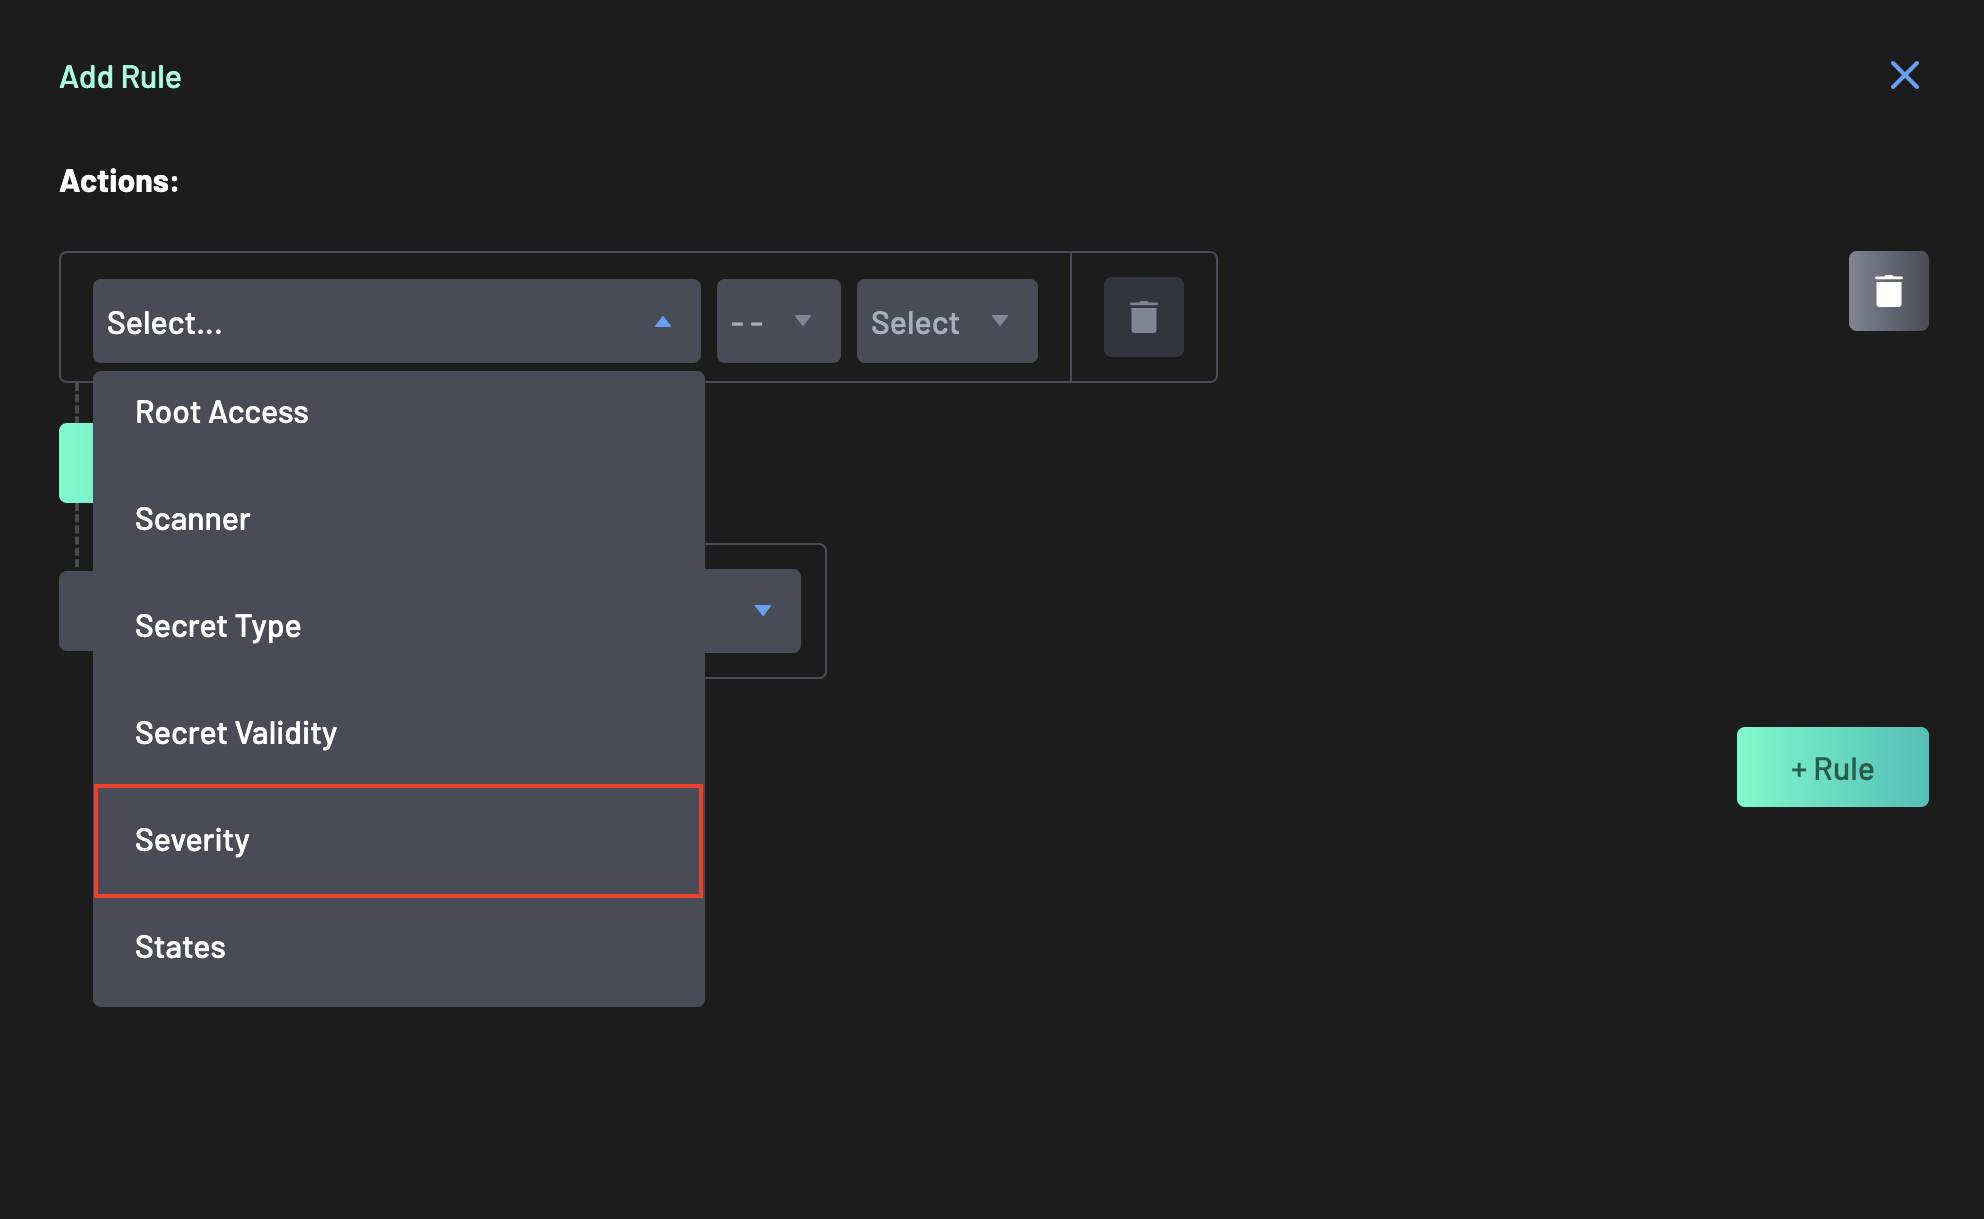
-
Define the logic for the rule.
- Select the
>=symbol. - Select Warning as the value.
- Interpretation: "If Severity is greater than or equal to Warning, trigger the default action (e.g., Add a comment to the PR, and Generate AI Remediation)."

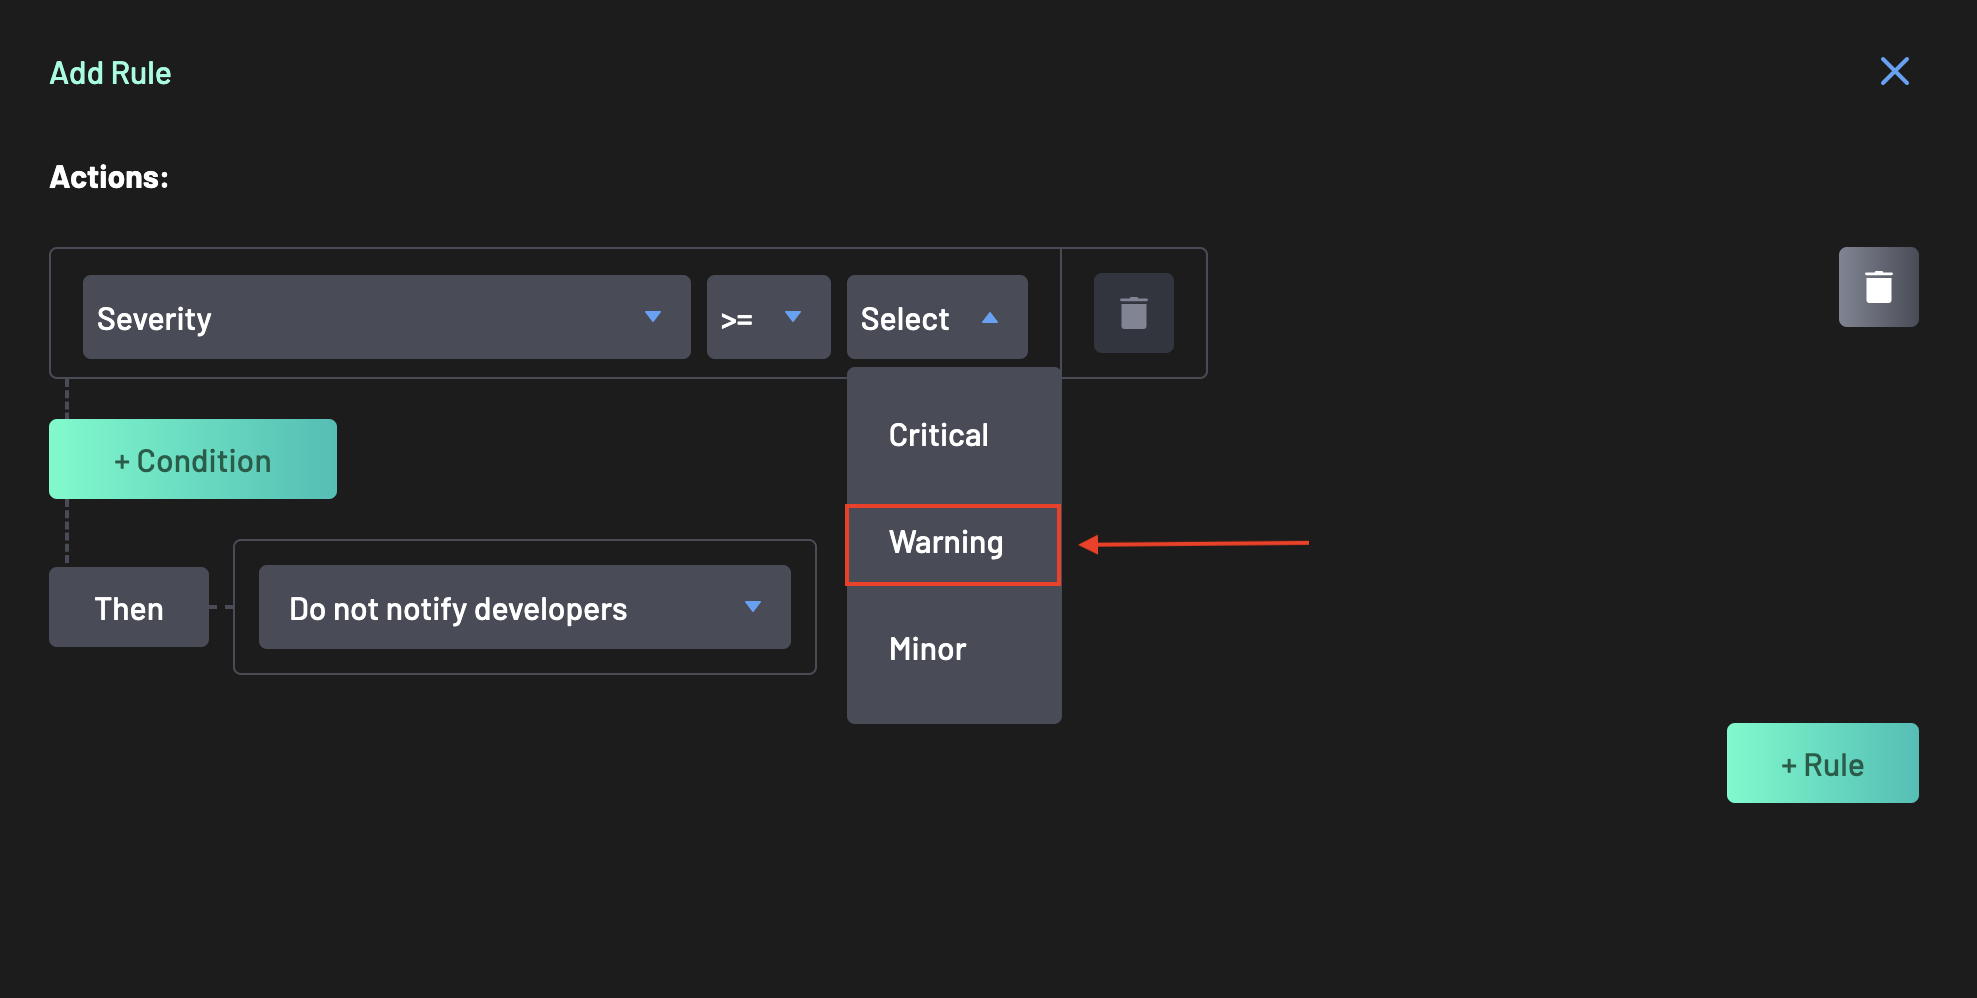
Save your progress.
Info
You can add multiple "Rules" and "Conditions" for policy actions by clicking the + Rule button.
- Select the
-
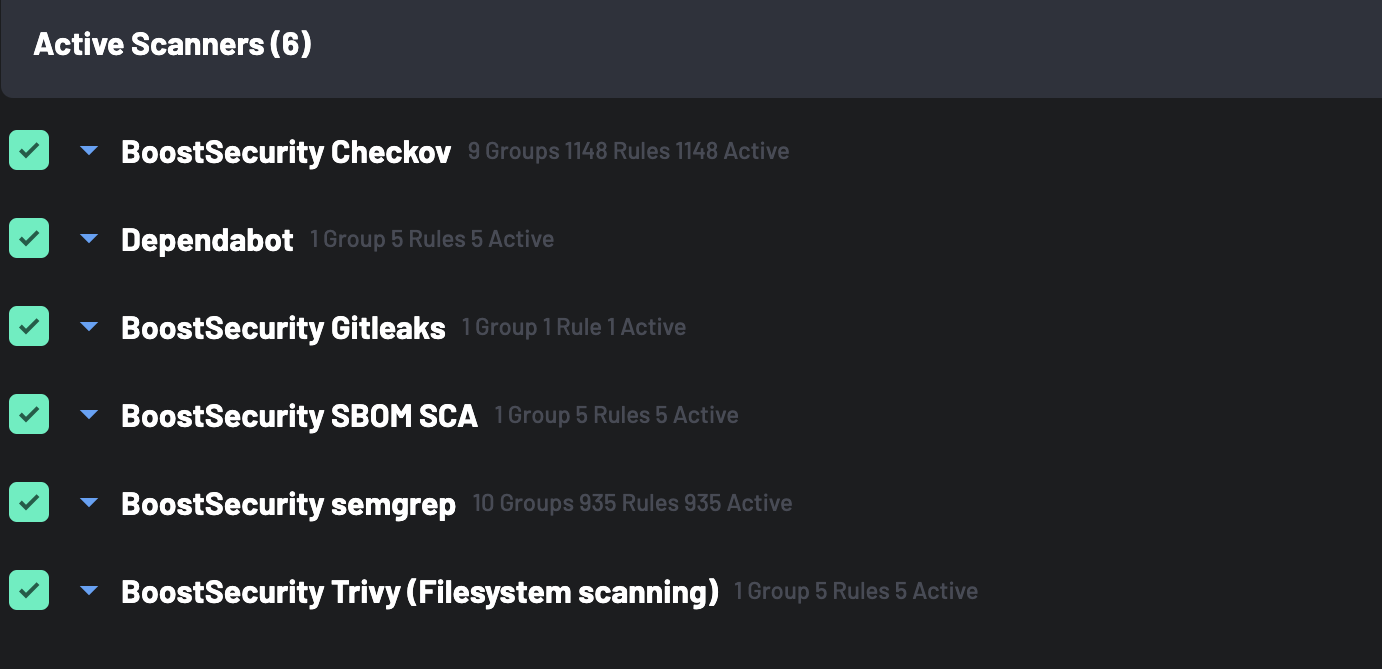
Click on the Scanners tab next to select specific scanners for your custom policy. By default, all scanners are active for a new policy. To narrow the scope, uncheck Select All Scanners and choose only specific scanners relevant to this policy.
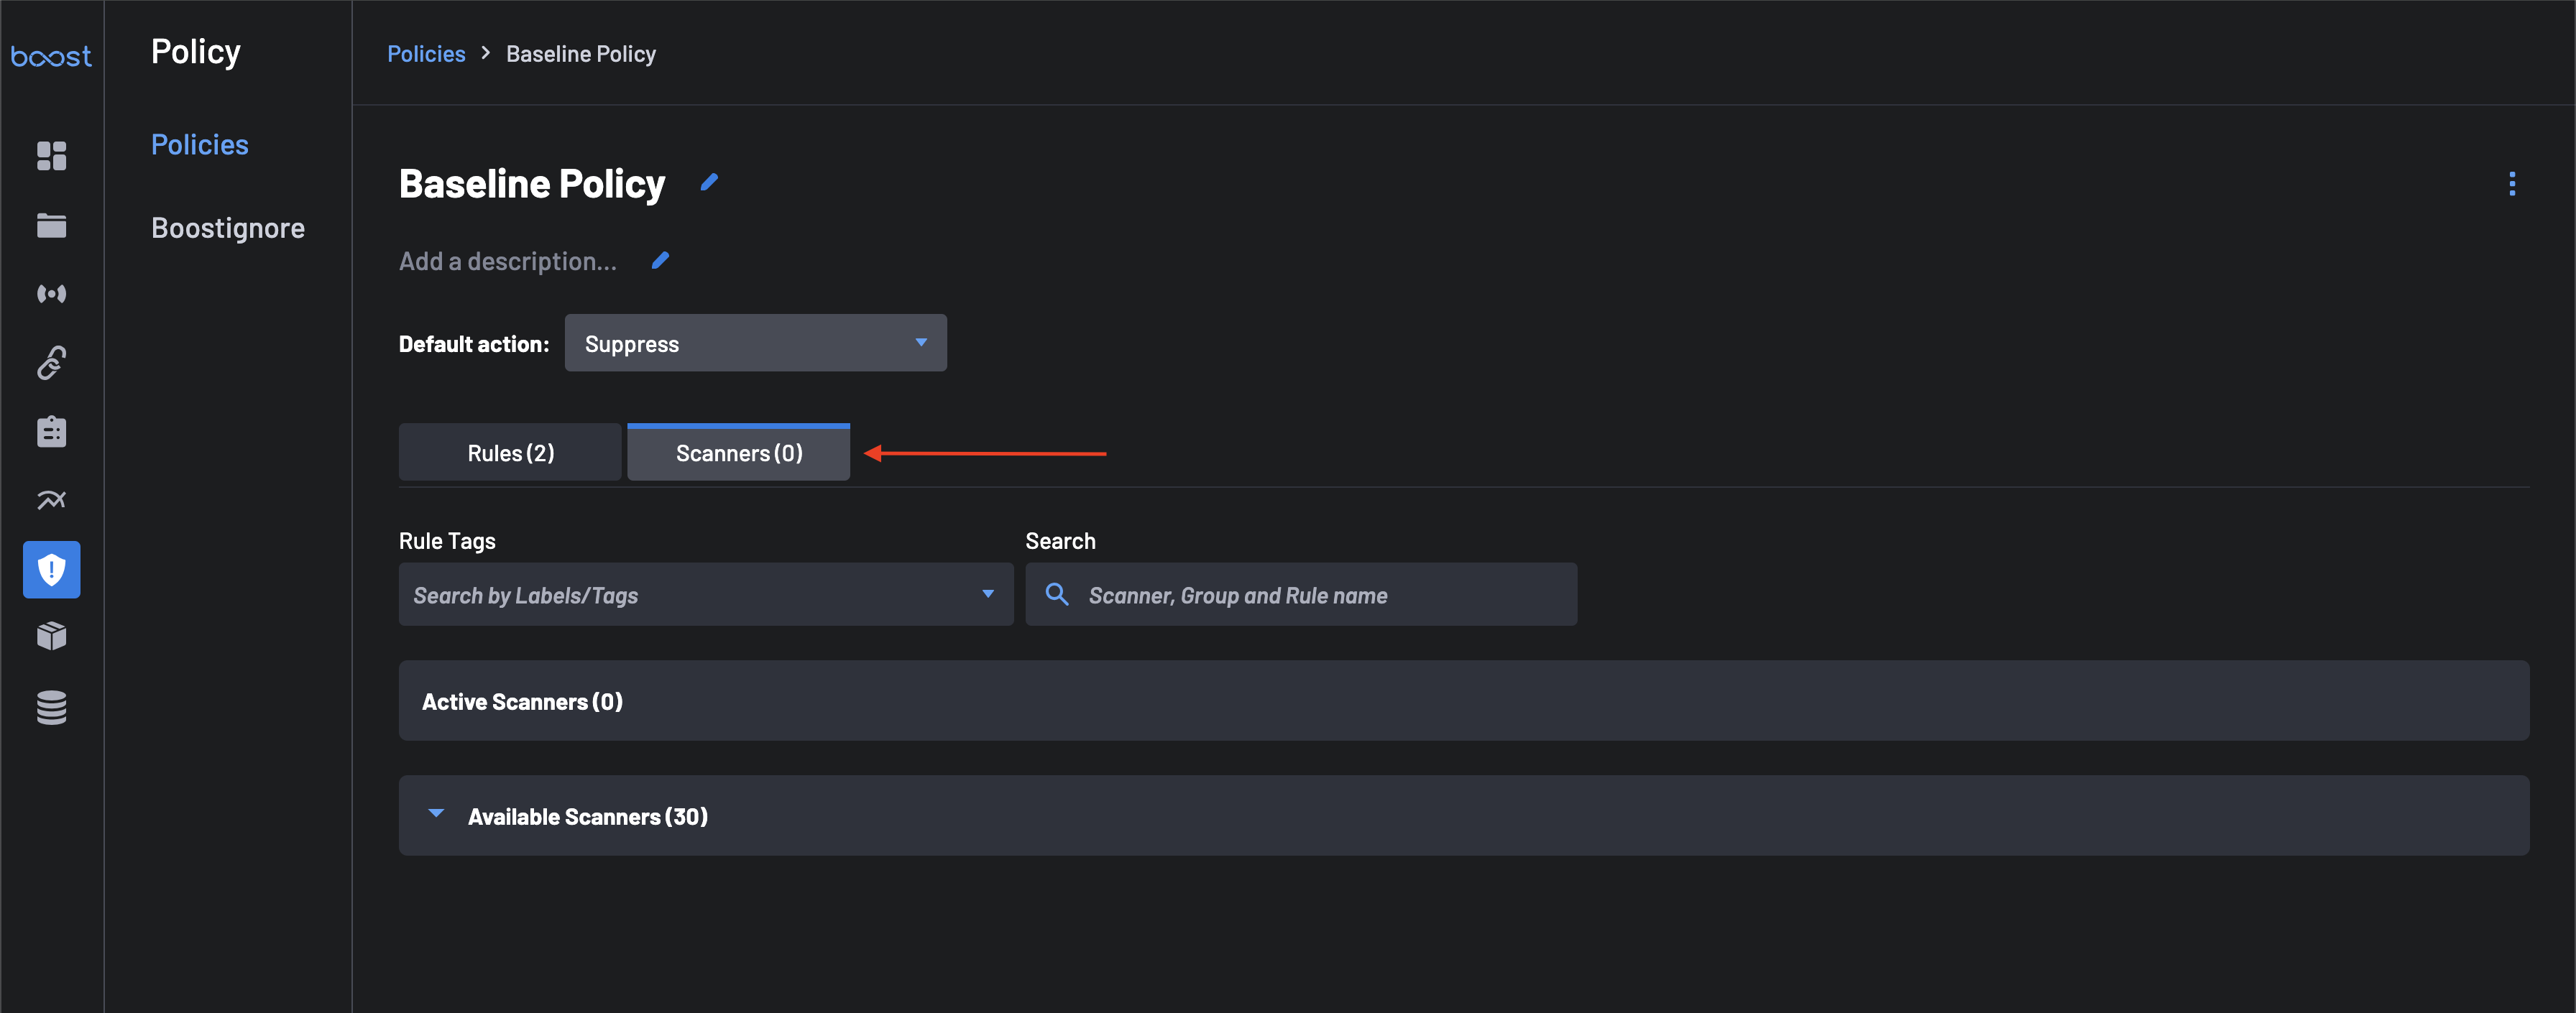
-
Select the required scanners from the
Available Scannerslist to move them to theActive Scannerstab.
-
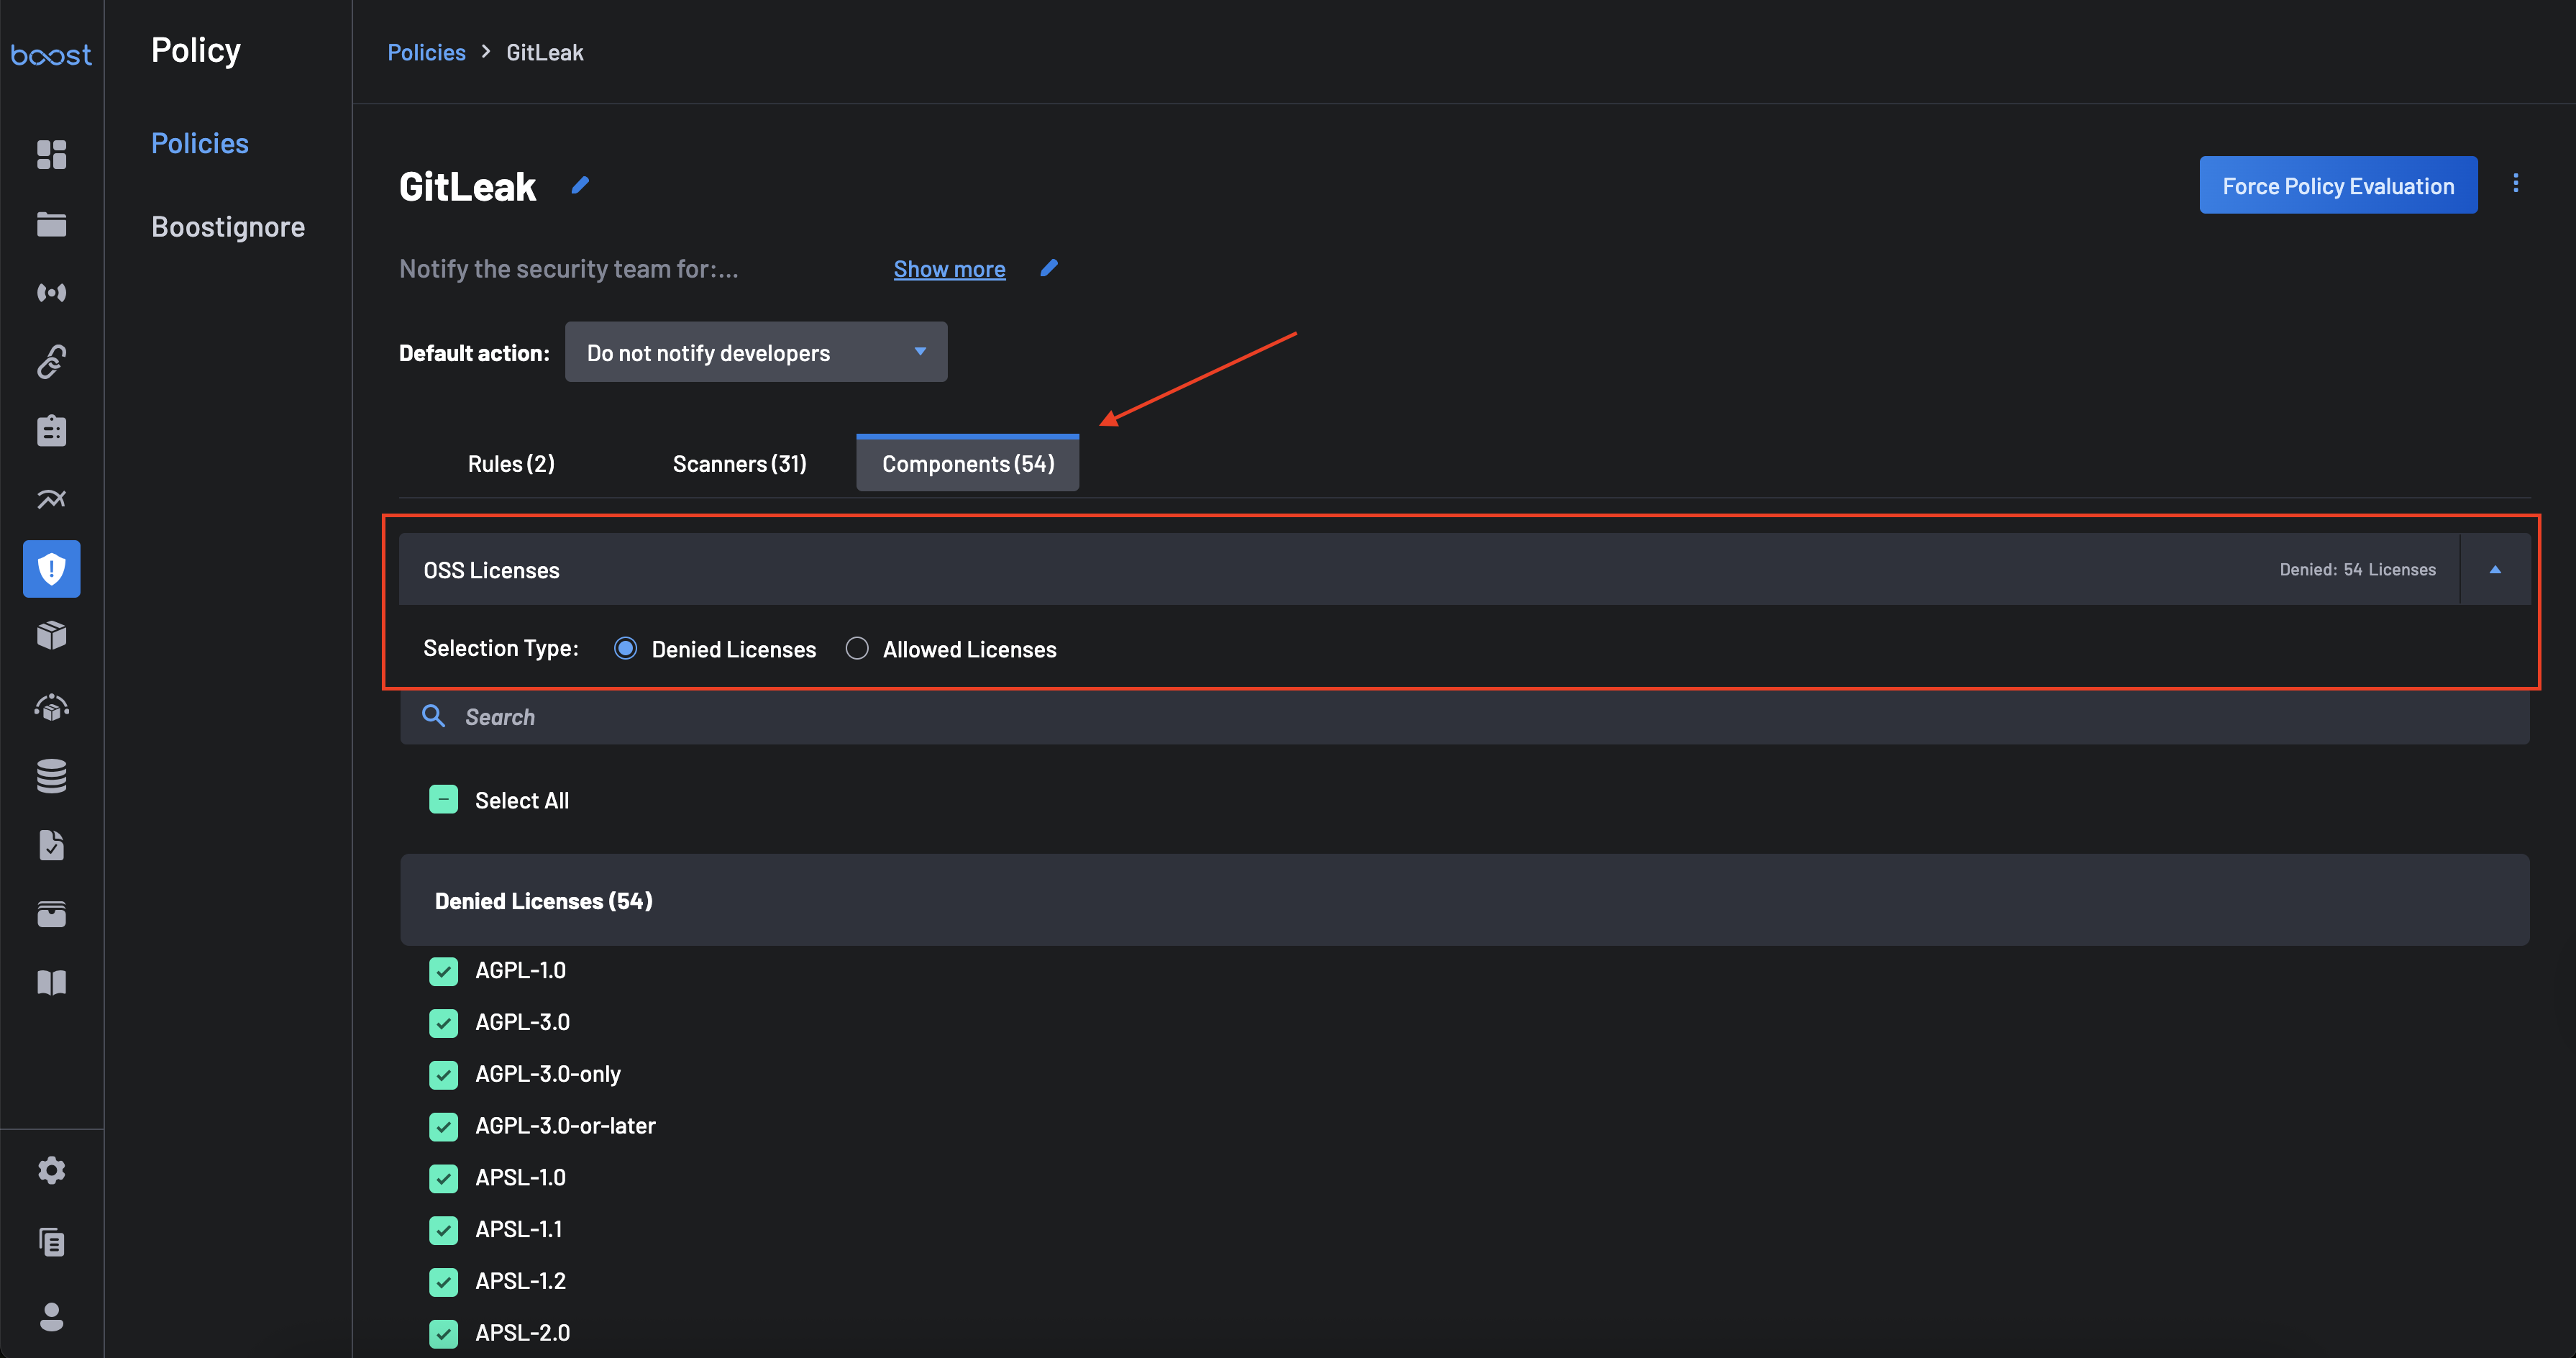
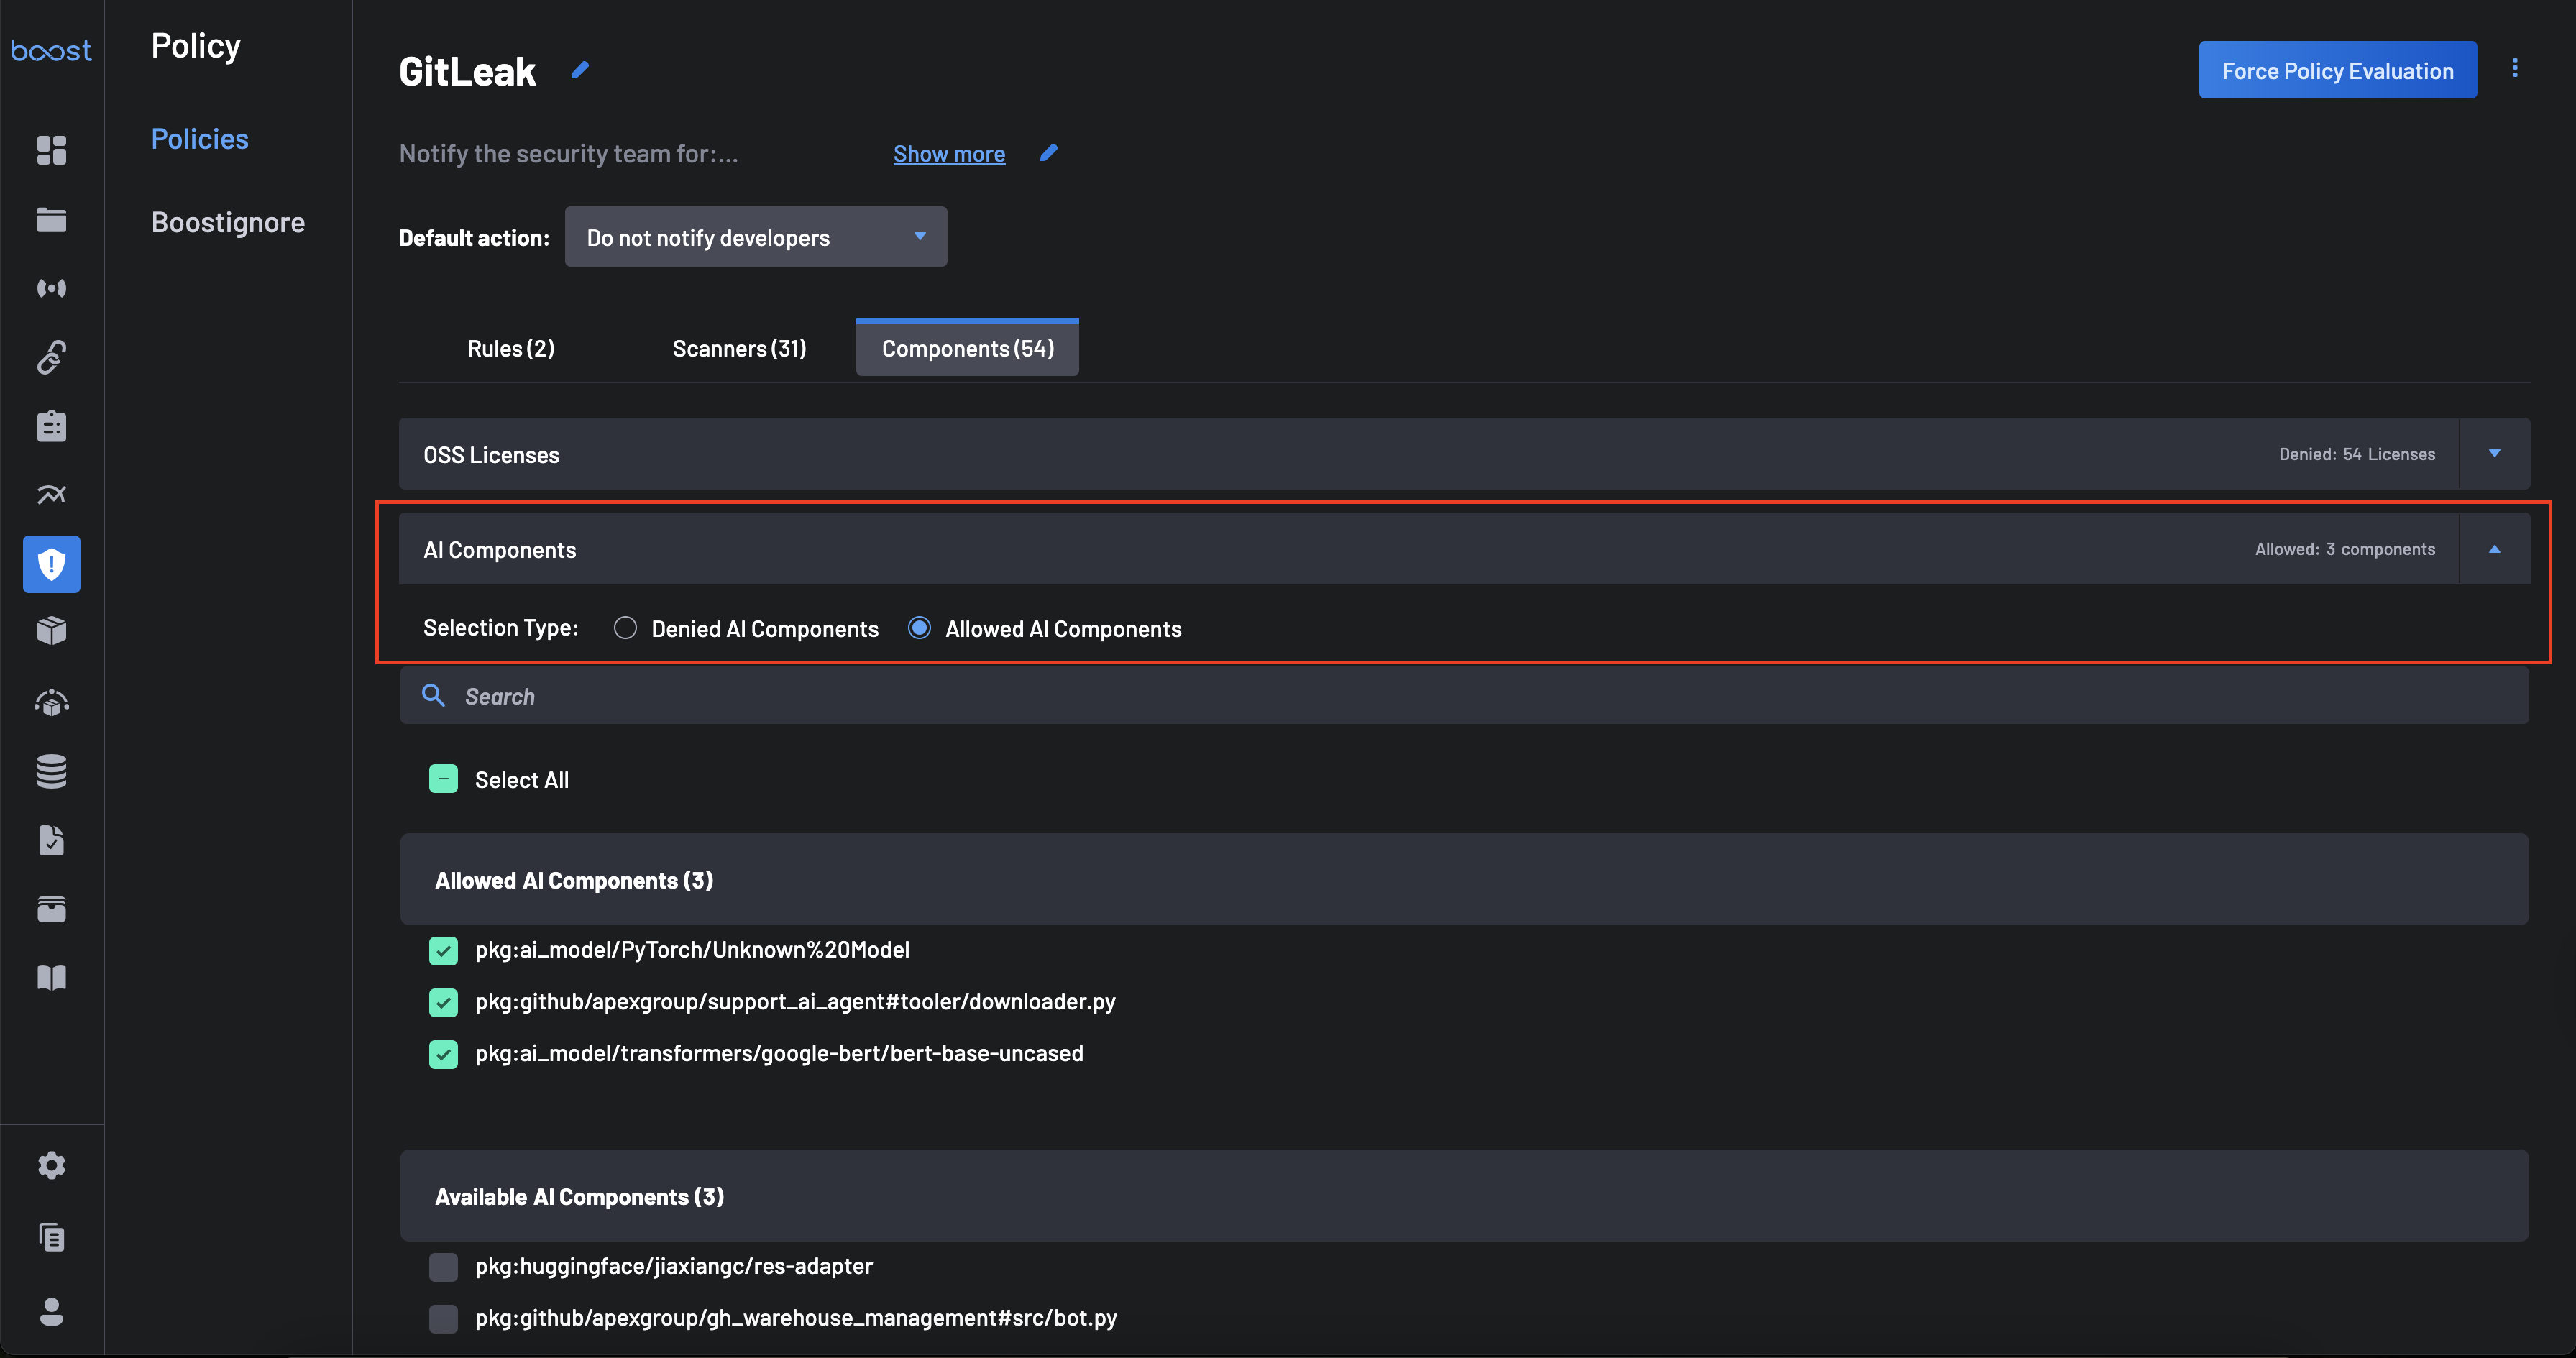
Click the Components tab to configure restrictions for OSS Licenses and AI Components.
- Selection Type: Choose between Allowed (allowlist) or Denied (blocklist) for both OSS Licenses and AI Components.
- Configuration: Use the dropdowns to select the specific licenses or AI models you wish to allow or deny.
Note
Enabling an allow/deny list for license checks is not enough on its own as this will not generate any license findings on its own. You must ensure the corresponding 'Use of Forbidden License' rule is also actively selected within the Scanner tab settings. If that scanner rule is not active, no findings will be generated even if you deny a license here.
-
Click the Save button to apply your changes.