Integrating Boost Security to Jira
Boost Security supports creating tickets in Jira directly from the dashboard.
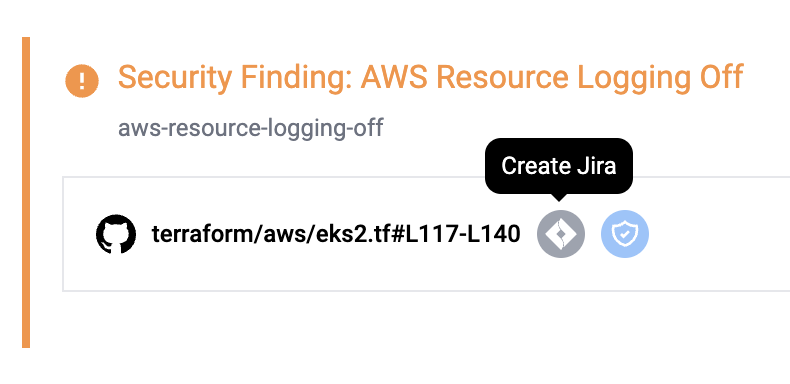
When this integration is enabled, a link will appear alongside Boost Security findings to create an issue in Jira with the details pre-populated. In addition, Boost Security will display information on the integration, such as its current status.
Prerequisite Integration Steps
- Log in to the dashboard.
- Once logged in, locate the left sidebar and click on the Integrations tab.
- Navigate to the Available tab.
-
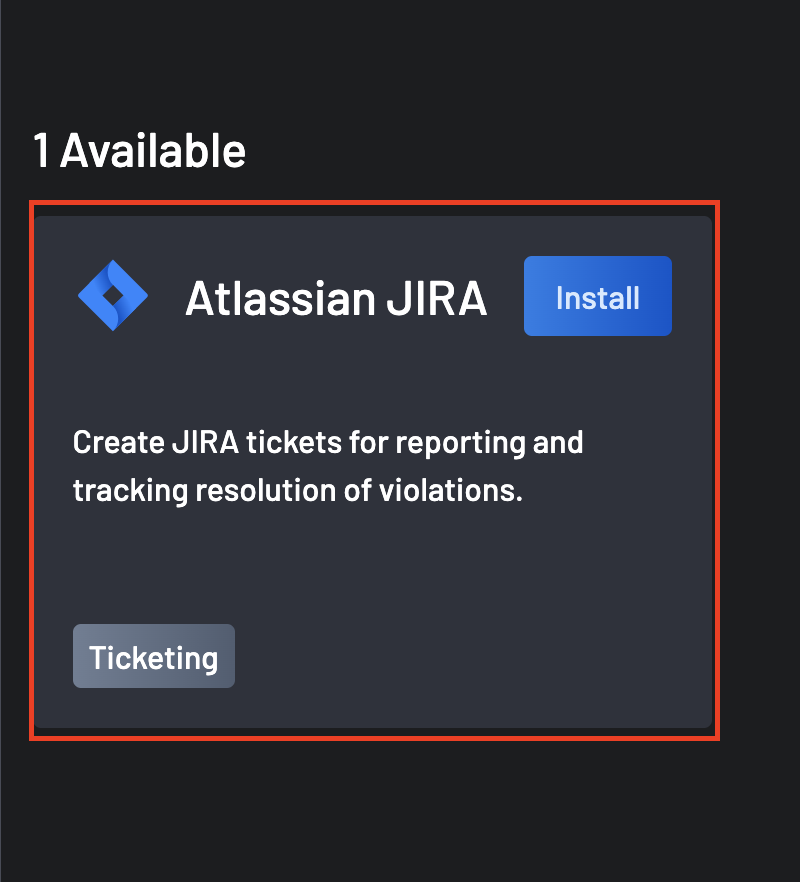
Look for Atlassian JIRA and click the "Install" button.
There are two ways to enable the JIRA integration to Boost Security:
1. Install Boost Security from the JIRA Marketplace
- Follow the prerequisite integration steps.
-
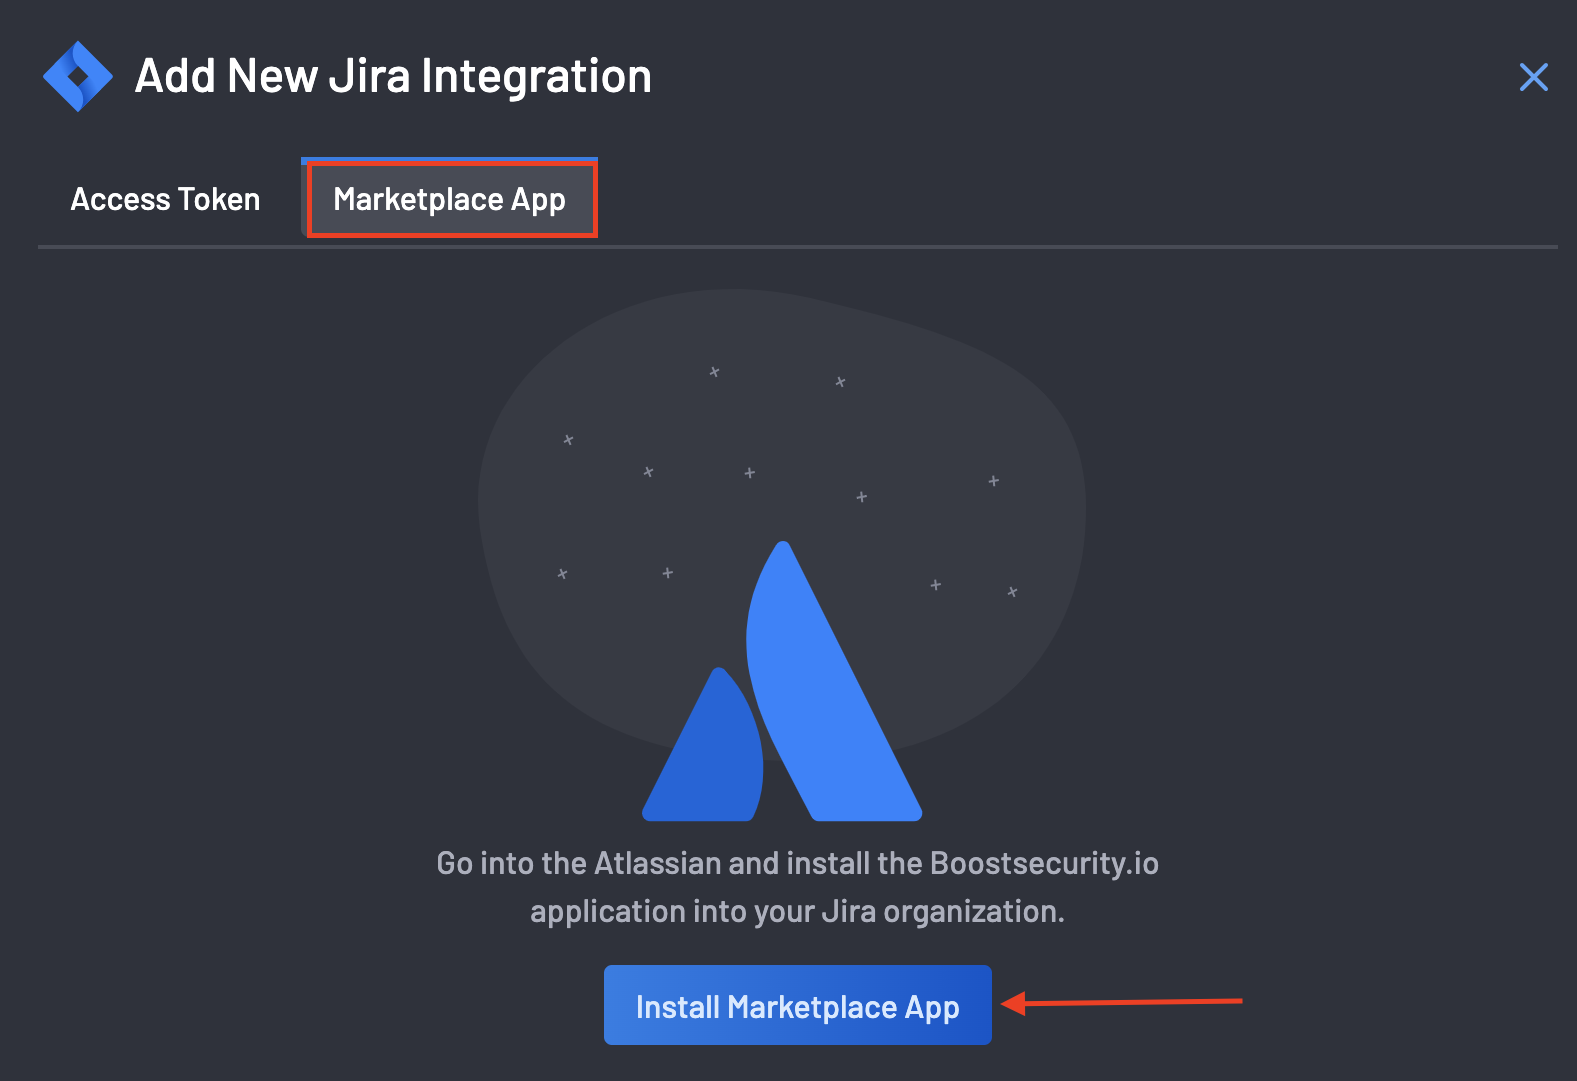
Click "MarketPlace App" on the next page and click the Install MarketPlace App button.
-
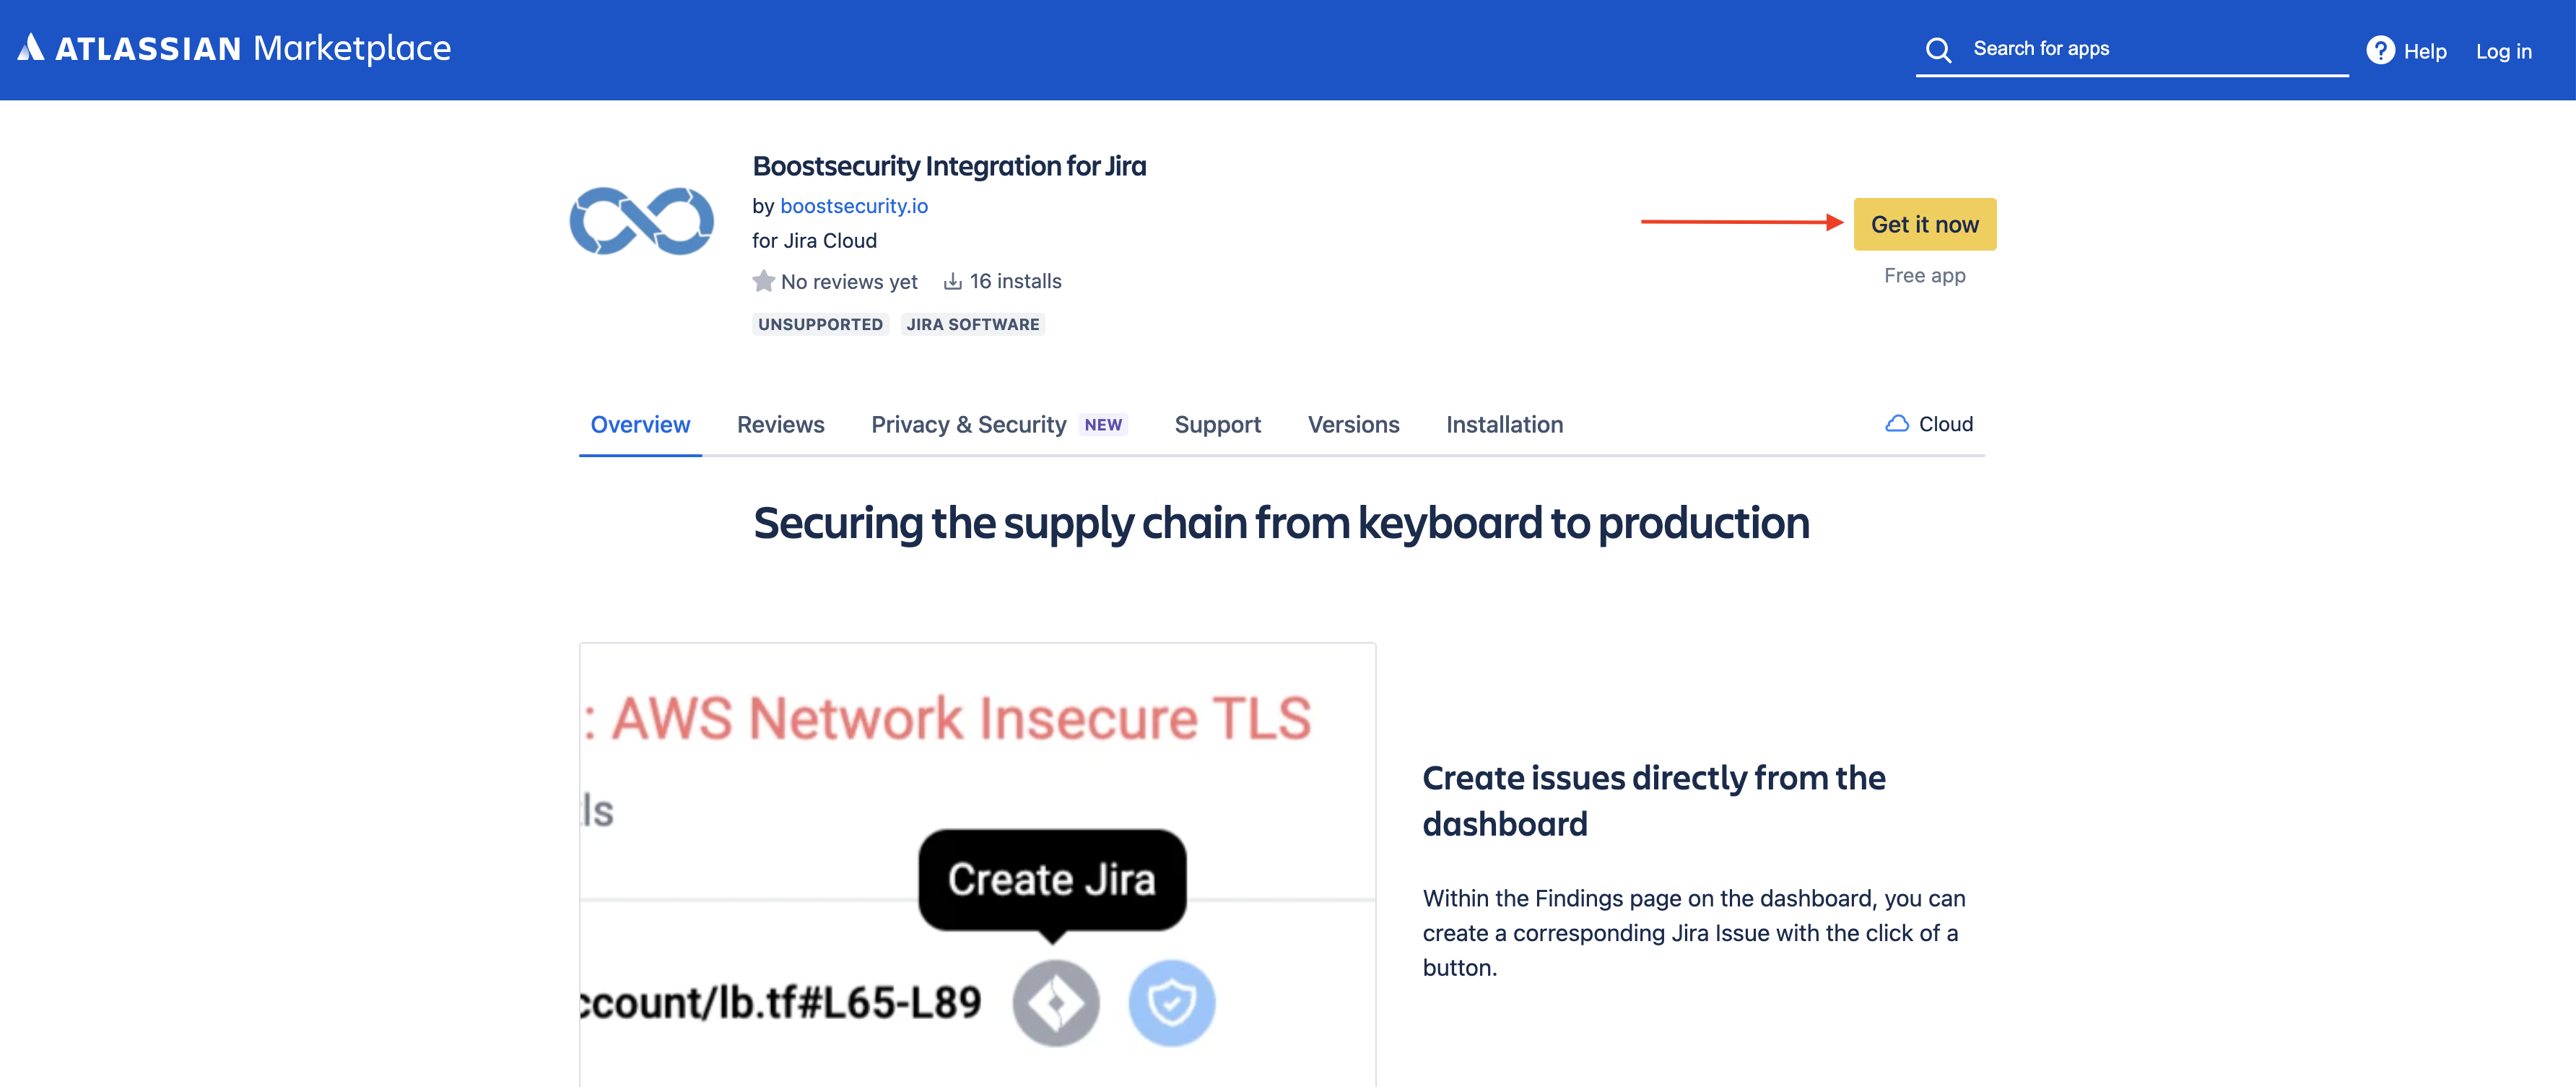
You will be directed to our Atlassian Marketplace app.
-
On the Atlassian Marketplace app page, click Get it now in the top-right corner.
-
Choose the specific Jira installation to integrate with.
Note
You will require Administrative privileges in Jira to continue with the installation.
-
Click Install now.
- Click Get started to continue the activation once installed.
- Finally, select the Jira project you wish to use with the integration.
2. Install the JIRA Integration with an Access Token
- Follow the prerequisite integration steps.
-
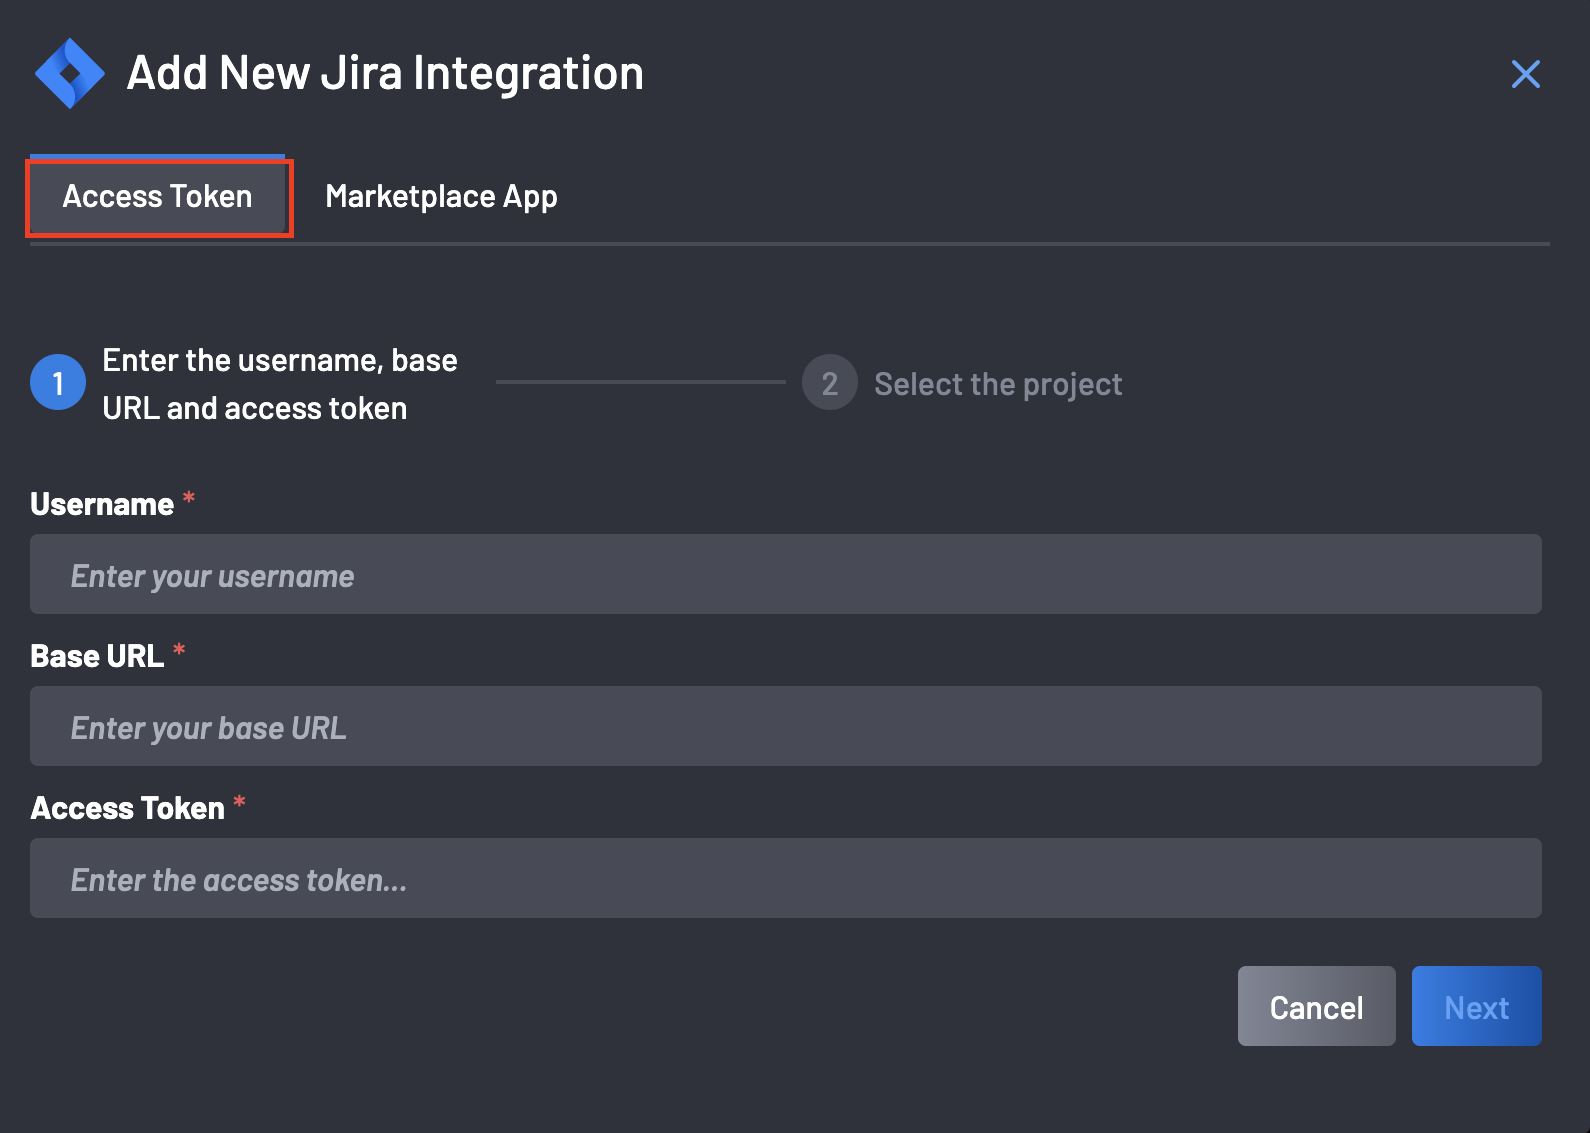
On the Access Token tab, provide the following details
- Username
- Base URL
- Access Token
Note
The Jira token needs to be created by a Jira Admin, i.e., the token needs admin privileges.
-
Click on the Next button.
- A list of projects is provided, which you would be required to select from.
- Select a default project.
Once complete, you will then see the Jira icon on your findings page:
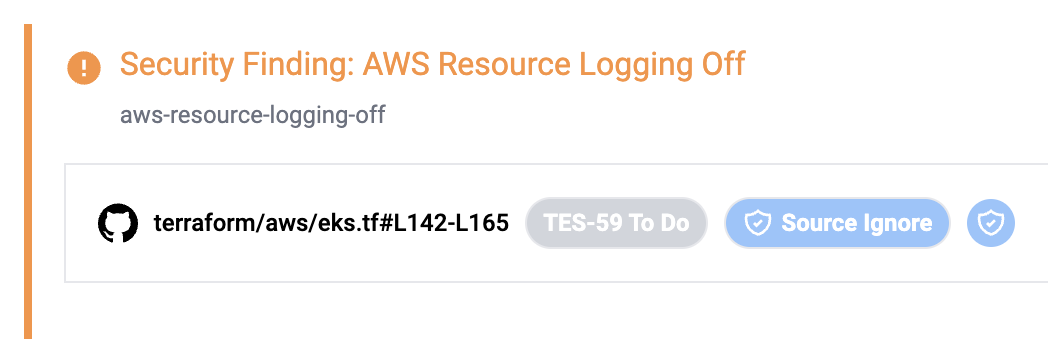
When you add a new Issue, it will be tracked:
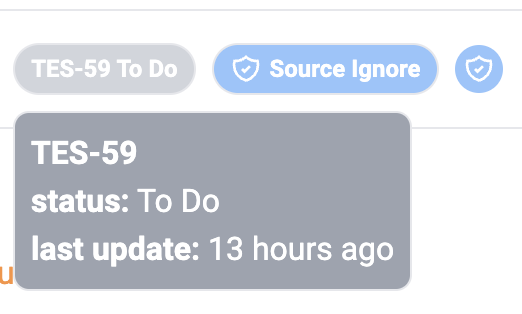
And it will provide details:
Uninstalling Boost Security Integration for JIRA
To uninstall the Boost Security JIRA Integration from your JIRA projects, follow these steps:
- Log in to your JIRA account with Administrative privileges.
- Navigate to the Administration settings in Jira.
- From the left sidebar, find and select Add-ons or Manage Apps.
- Look for the Boost Security integration in the list of installed apps.
- Click on the Uninstall button next to the integration.
- Confirm the uninstallation when prompted.
- The integration will be removed from your JIRA projects.
Configure an Issue Type for each JIRA project
When configuring your JIRA integration, you can select an Issue type for each connected JIRA project directly from the Issue type column on the integration page.
The Issue type column displays the available issue types for each selected JIRA project, allowing you to define how Boost Security findings are created and categorized in JIRA.
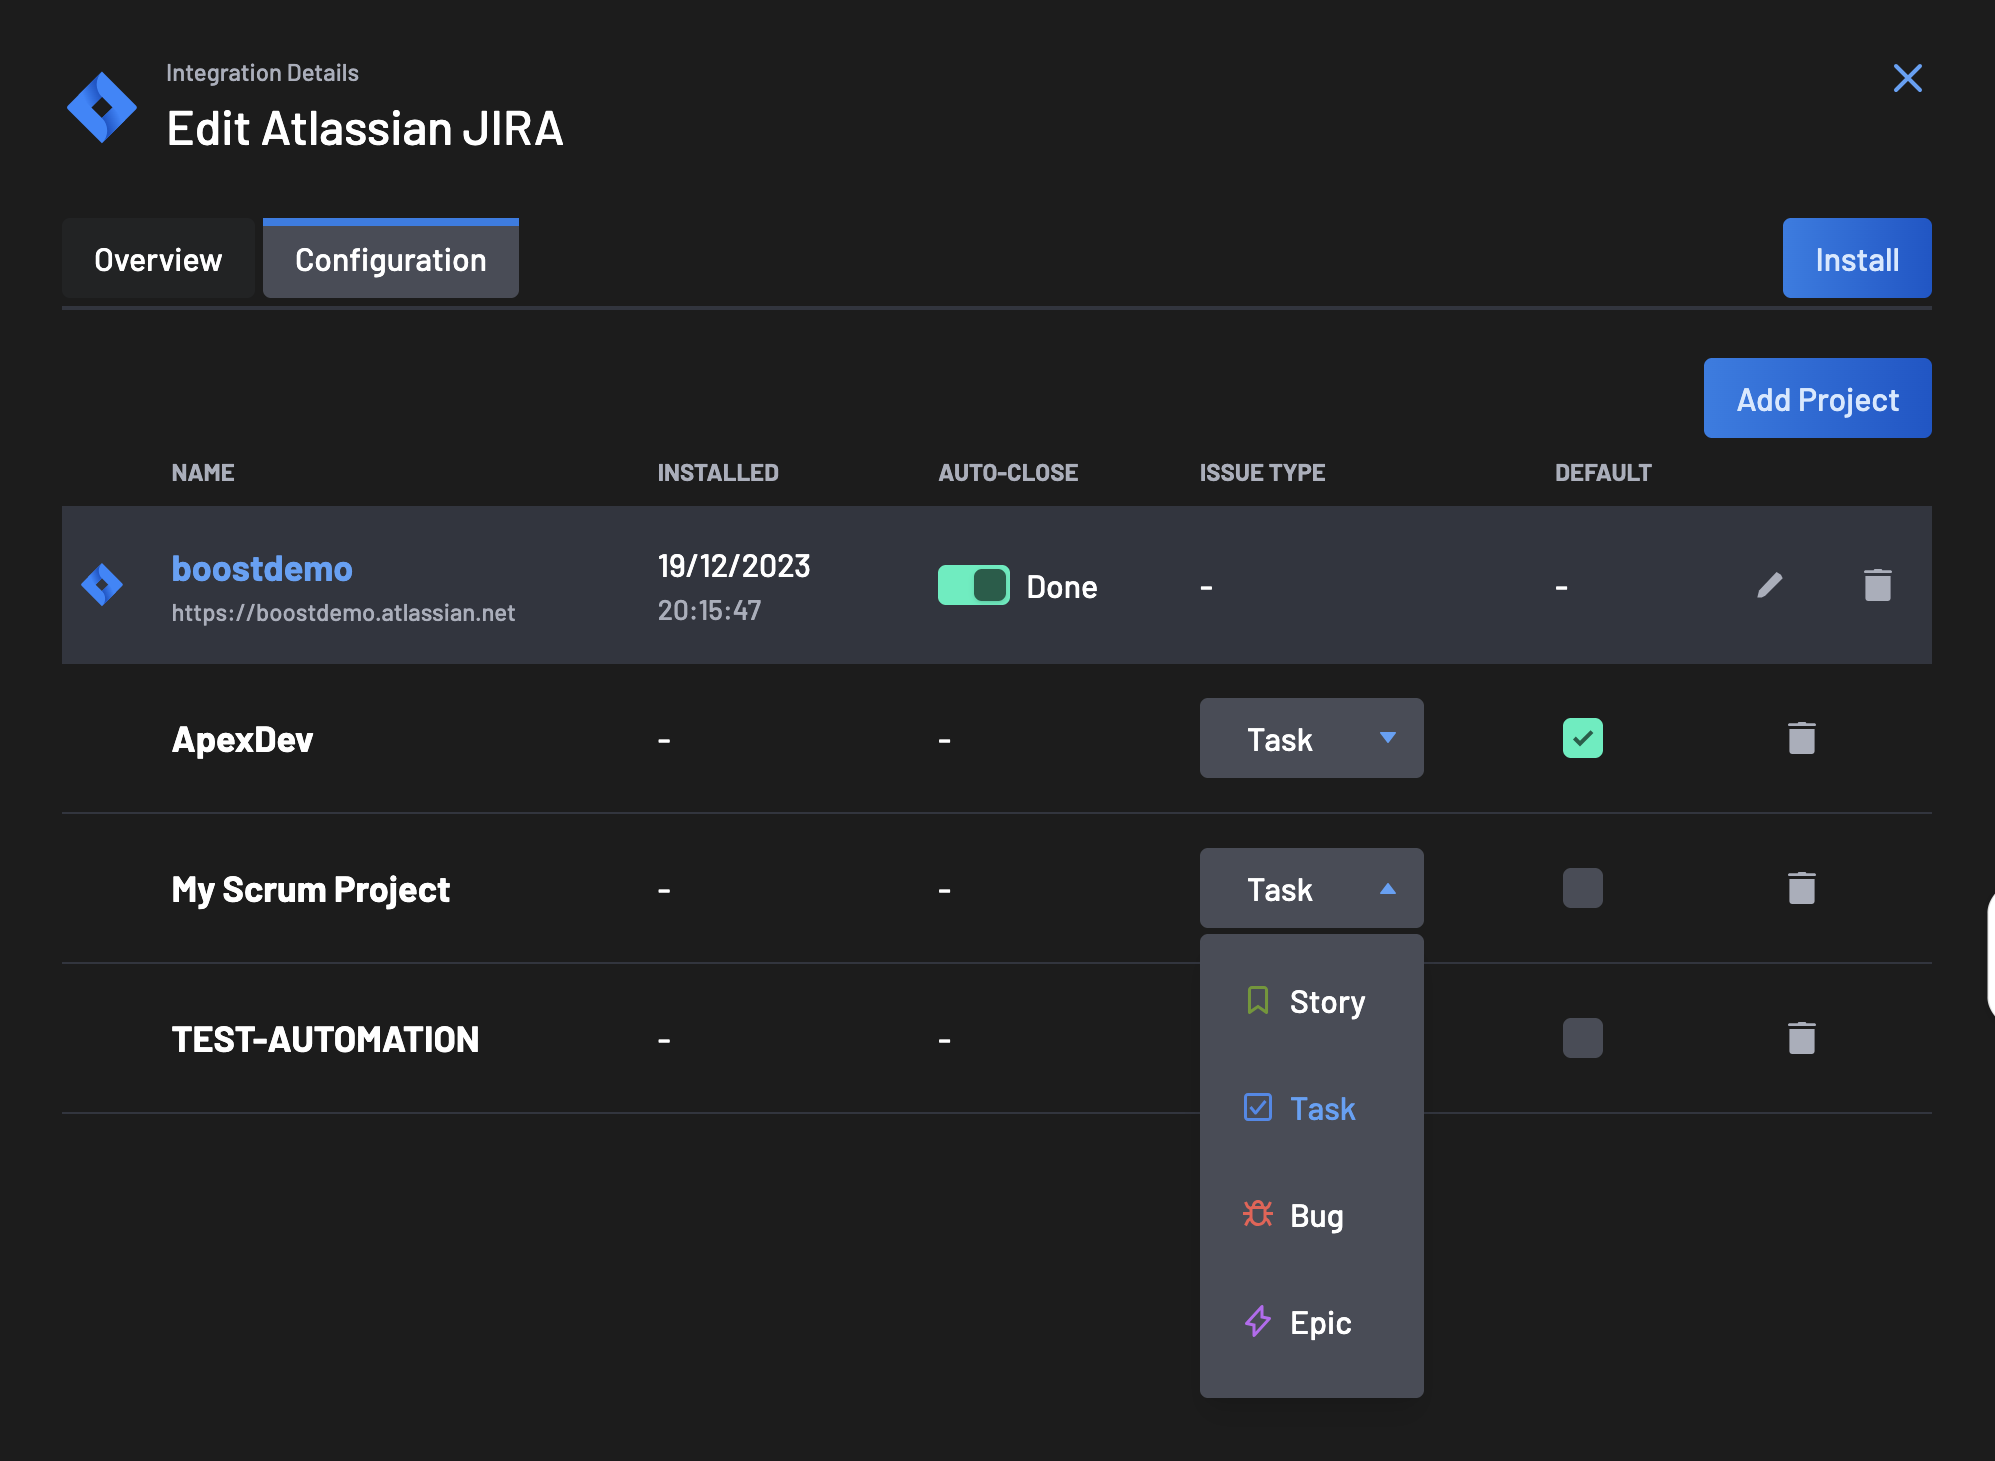
How to Configure Issue Types
- Navigate to the Integrations page in Boost Security.
- Locate your installed JIRA integration and open its Configuration tab.
- In the project list, find the Issue type column.
- For the project you want to change, select the preferred issue type from the dropdown list.
- Click the Save button that appears on that project's row.
Once configured, all findings pushed to JIRA for that project will be created using the selected issue type.
Note
Each project is saved on its own. Selecting an issue type stages the change on that row and replaces the row's delete button with Save — nothing is written until you click it, and saving one project leaves every other row, including rows with their own unsaved changes, untouched.
Available Issue Types
The available issue types include:
-
Story: Represents a feature or requirement described from the user’s perspective. Use this when a finding requires structured work that contributes to a broader feature or initiative.
-
Task: A general-purpose work item. This is the most flexible option and is commonly used for operational or remediation activities that don’t require detailed user stories.
-
Bug: Used to track defects or issues. This is typically the most appropriate option for security findings, as it represents a problem that needs to be fixed.
-
Epic: A large body of work that can be broken down into smaller tasks or stories. This is less commonly used for individual findings but may be applicable for grouping related issues.
Note
The list of available issue types is retrieved directly from your JIRA project configuration. Sub-task issue types are currently not included in the Issue type list and cannot be selected when configuring the integration.
Automatically Close Jira Tickets
Boost Security can transition a Jira ticket to a closed status when the finding it tracks is resolved or suppressed. You configure auto-close per Jira project, from the Configuration tab of your installed JIRA integration.
Each Jira connection lists its projects with the columns Project, Issue type, Auto-close, Closed status and Default. Auto-close is a toggle on the project's row, reading On or Off, and Closed status holds the status the ticket is moved to.
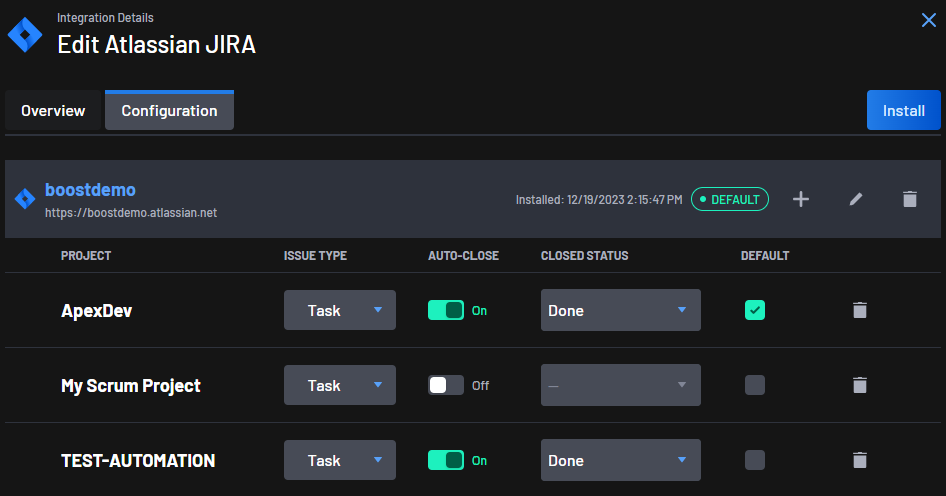
The statuses you can choose from are read from Jira, and are only the statuses that project defines for its configured issue type. You cannot pick a status belonging to a different project.
Note
Only one project across all of your Jira connections can be the account's default, which is what the Default column sets.
Enable Auto-Close for a Project
-
Navigate to the Integrations page in Boost Security, locate your installed JIRA integration and open its Configuration tab.
-
Find the project's row and switch its Auto-close toggle to On.
The Closed status dropdown becomes editable and a Save button appears on the row. If the project has no status stored yet the dropdown reads "Select a status" and Save stays disabled until you pick one. If it already has a status, that status is shown and you can save straight away.
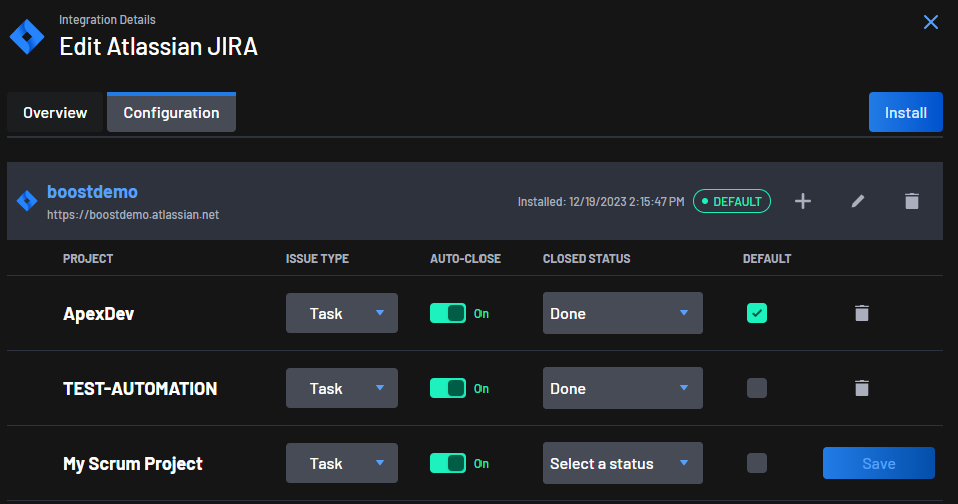
-
Select the status the ticket should be moved to when its finding is resolved or suppressed.
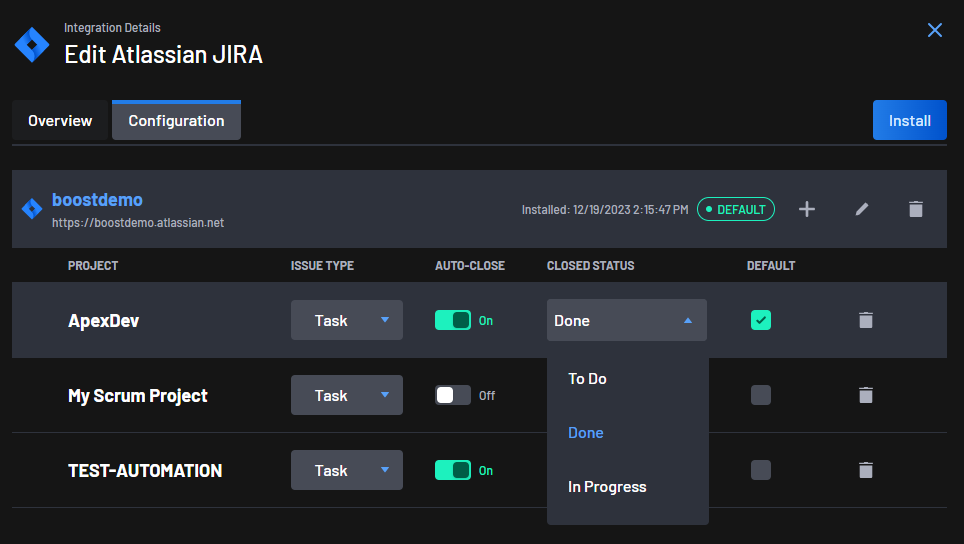
-
Click the Save button on that row.
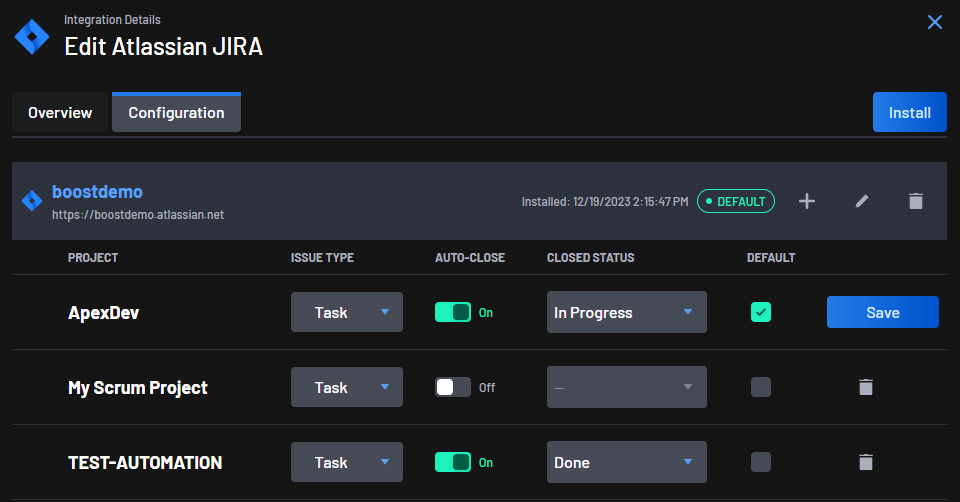
To turn auto-close off, switch the toggle to Off and click Save. The Closed status dropdown shows a dash and is disabled, and the status you had selected is kept — turning auto-close back on offers it again.
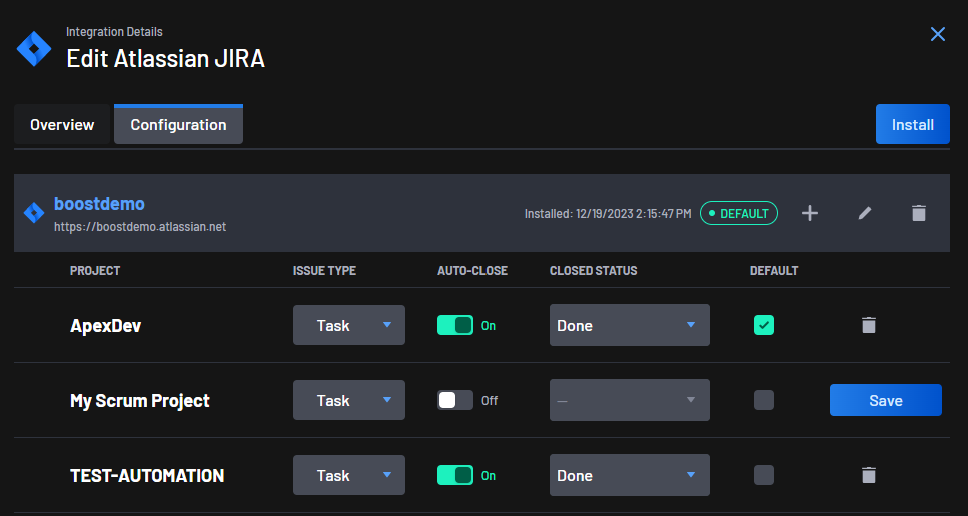
There is no Cancel button. To abandon a change you have not saved, set the controls back the way you found them and the Save button disappears.
Note
A row's Save commits everything staged on that row, so if you changed the issue type as well, one Save applies both.
Note
A newly added project starts with auto-close Off and no closed status. It does not inherit either setting from another project, so turn auto-close on deliberately for each project you want it on.
When Boost Security Rejects a Status
Boost Security checks the status against the project's own Jira statuses before saving it. If the check fails, the project is left unchanged and you get a red notification carrying the reason. When the status simply is not one the project offers, that message lists the ones it does, naming the project by its Jira key:
Status 'Done' is not available for project KEY. Available statuses: Done, In Progress, To Do
You will also see a rejection if Boost Security cannot reach Jira, or if the access token has lost permission to browse the project. Because turning auto-close on re-checks the stored status even when you have changed nothing else, a Jira outage blocks a plain "turn on" until Jira is reachable again.
Warning
A status that passes this check is a status that exists in the project's workflow. It does not guarantee the ticket can move to it: if a ticket's current status has no transition to the configured status when Boost Security tries to close it, that ticket is left as it is.
When the Status List Will Not Load
If Boost Security cannot load a project's statuses at all — Jira is unreachable, the access token cannot browse the project, or the project's saved issue type has no statuses — that project's Closed status dropdown opens empty and you get a warning. Your other projects are unaffected.
An empty dropdown on its own means the list could not be loaded. It does not mean the status you have stored is wrong, and Boost Security does not mark it as such.
Fix a Status That Jira No Longer Has
When a project has auto-close On, its status list loaded, and the status you stored is no longer among the statuses Jira reports, the Closed status dropdown is shown empty with a warning marker beside it. Its tooltip reads:
Warning
The saved auto-close status is no longer available in Jira. Pick a valid status and save.
The warning marker is what separates this from a list that would not load — that case is never marked. Nothing is corrected for you: select a valid status and save the row to clear the warning.
FAQ
How do I see Jira tickets created by Boost Security?
issue.property[boostsec].finding-id is not EMPTY
By default, Boost Security creates Jira tickets with a finding-id property, which you can easily filter for in jql queries.
issue.property[boostsec].finding-id is not EMPTY
How do I get Jira tickets out of Boost Security?
The Findings page's CSV export ends with three columns describing the Jira ticket tracking a finding, when it has one — its key, a link to it, and its last recorded status. See Jira Ticket Columns.
How to resolve JIRA installation error
Suppose JIRA indicates that the Boost Security app is already installed but does not appear on your Installed Apps page. In that case, you can fix the issue by uninstalling the app and reinstalling it.
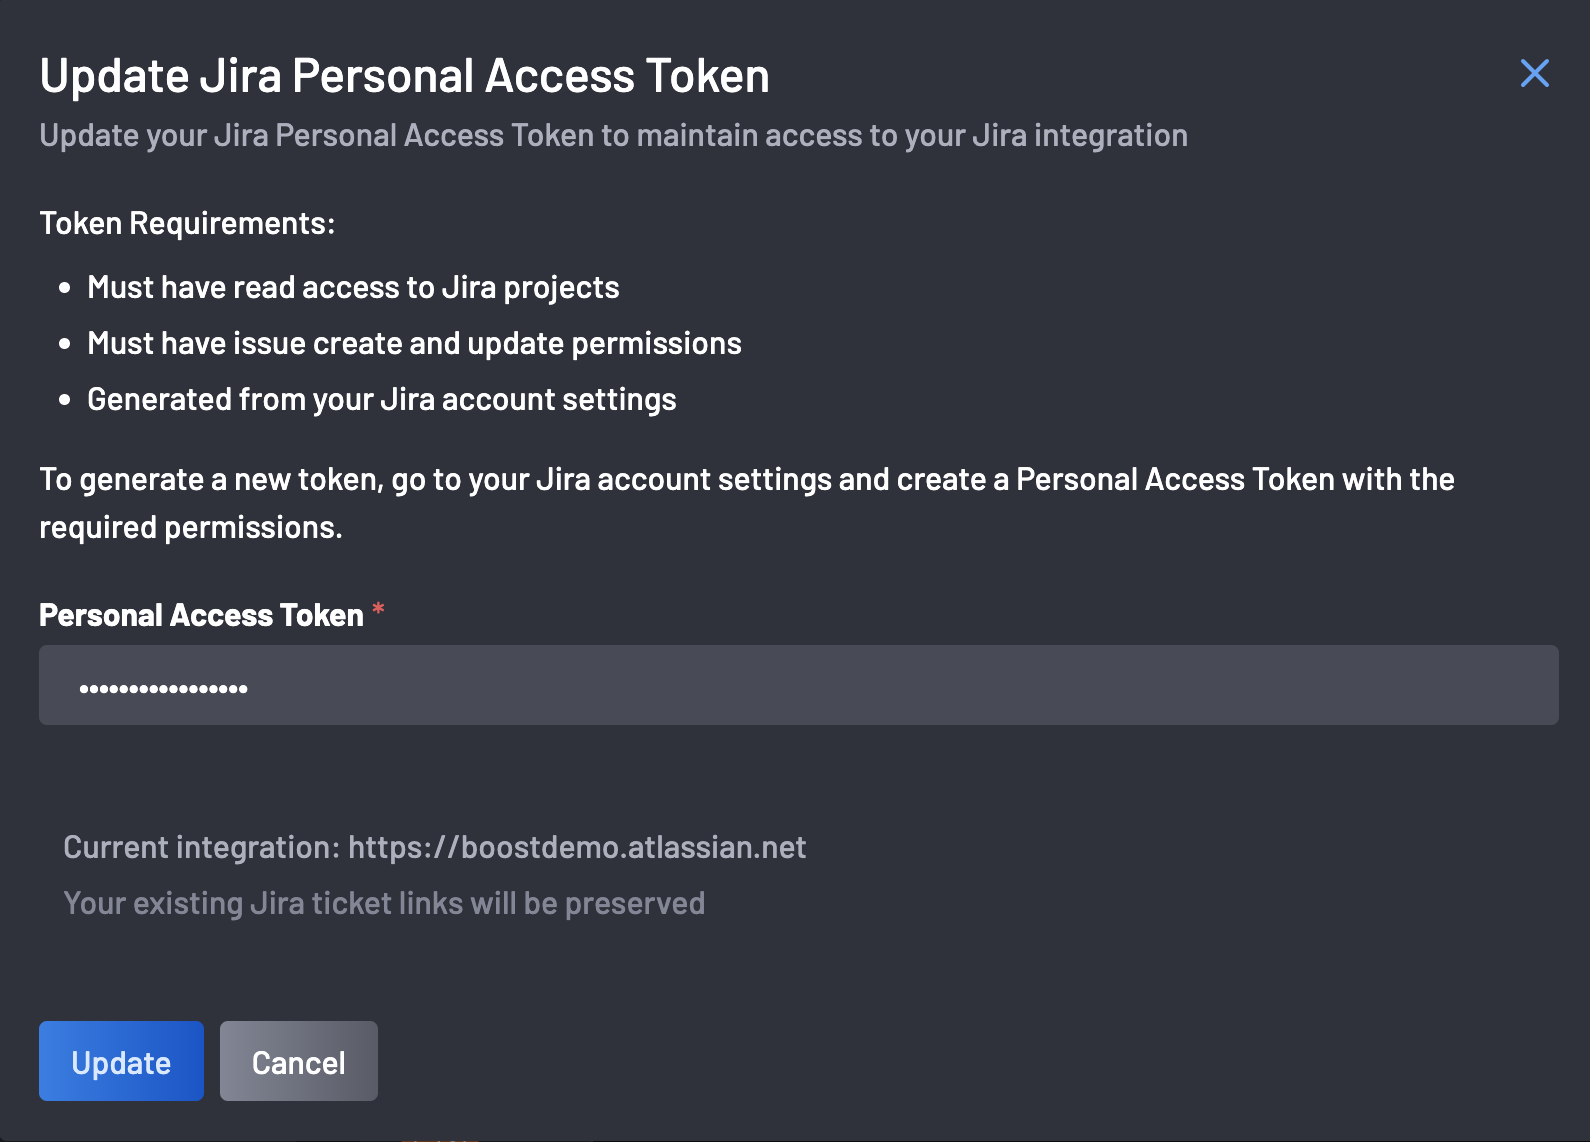
How to update the JIRA Personal Access Token
You can update the Jira access tokens without disrupting active connections by:
- Navigate to the Configuration tab of your installed JIRA integration.
-
Click the "Update Jira Personal Access Token" icon.
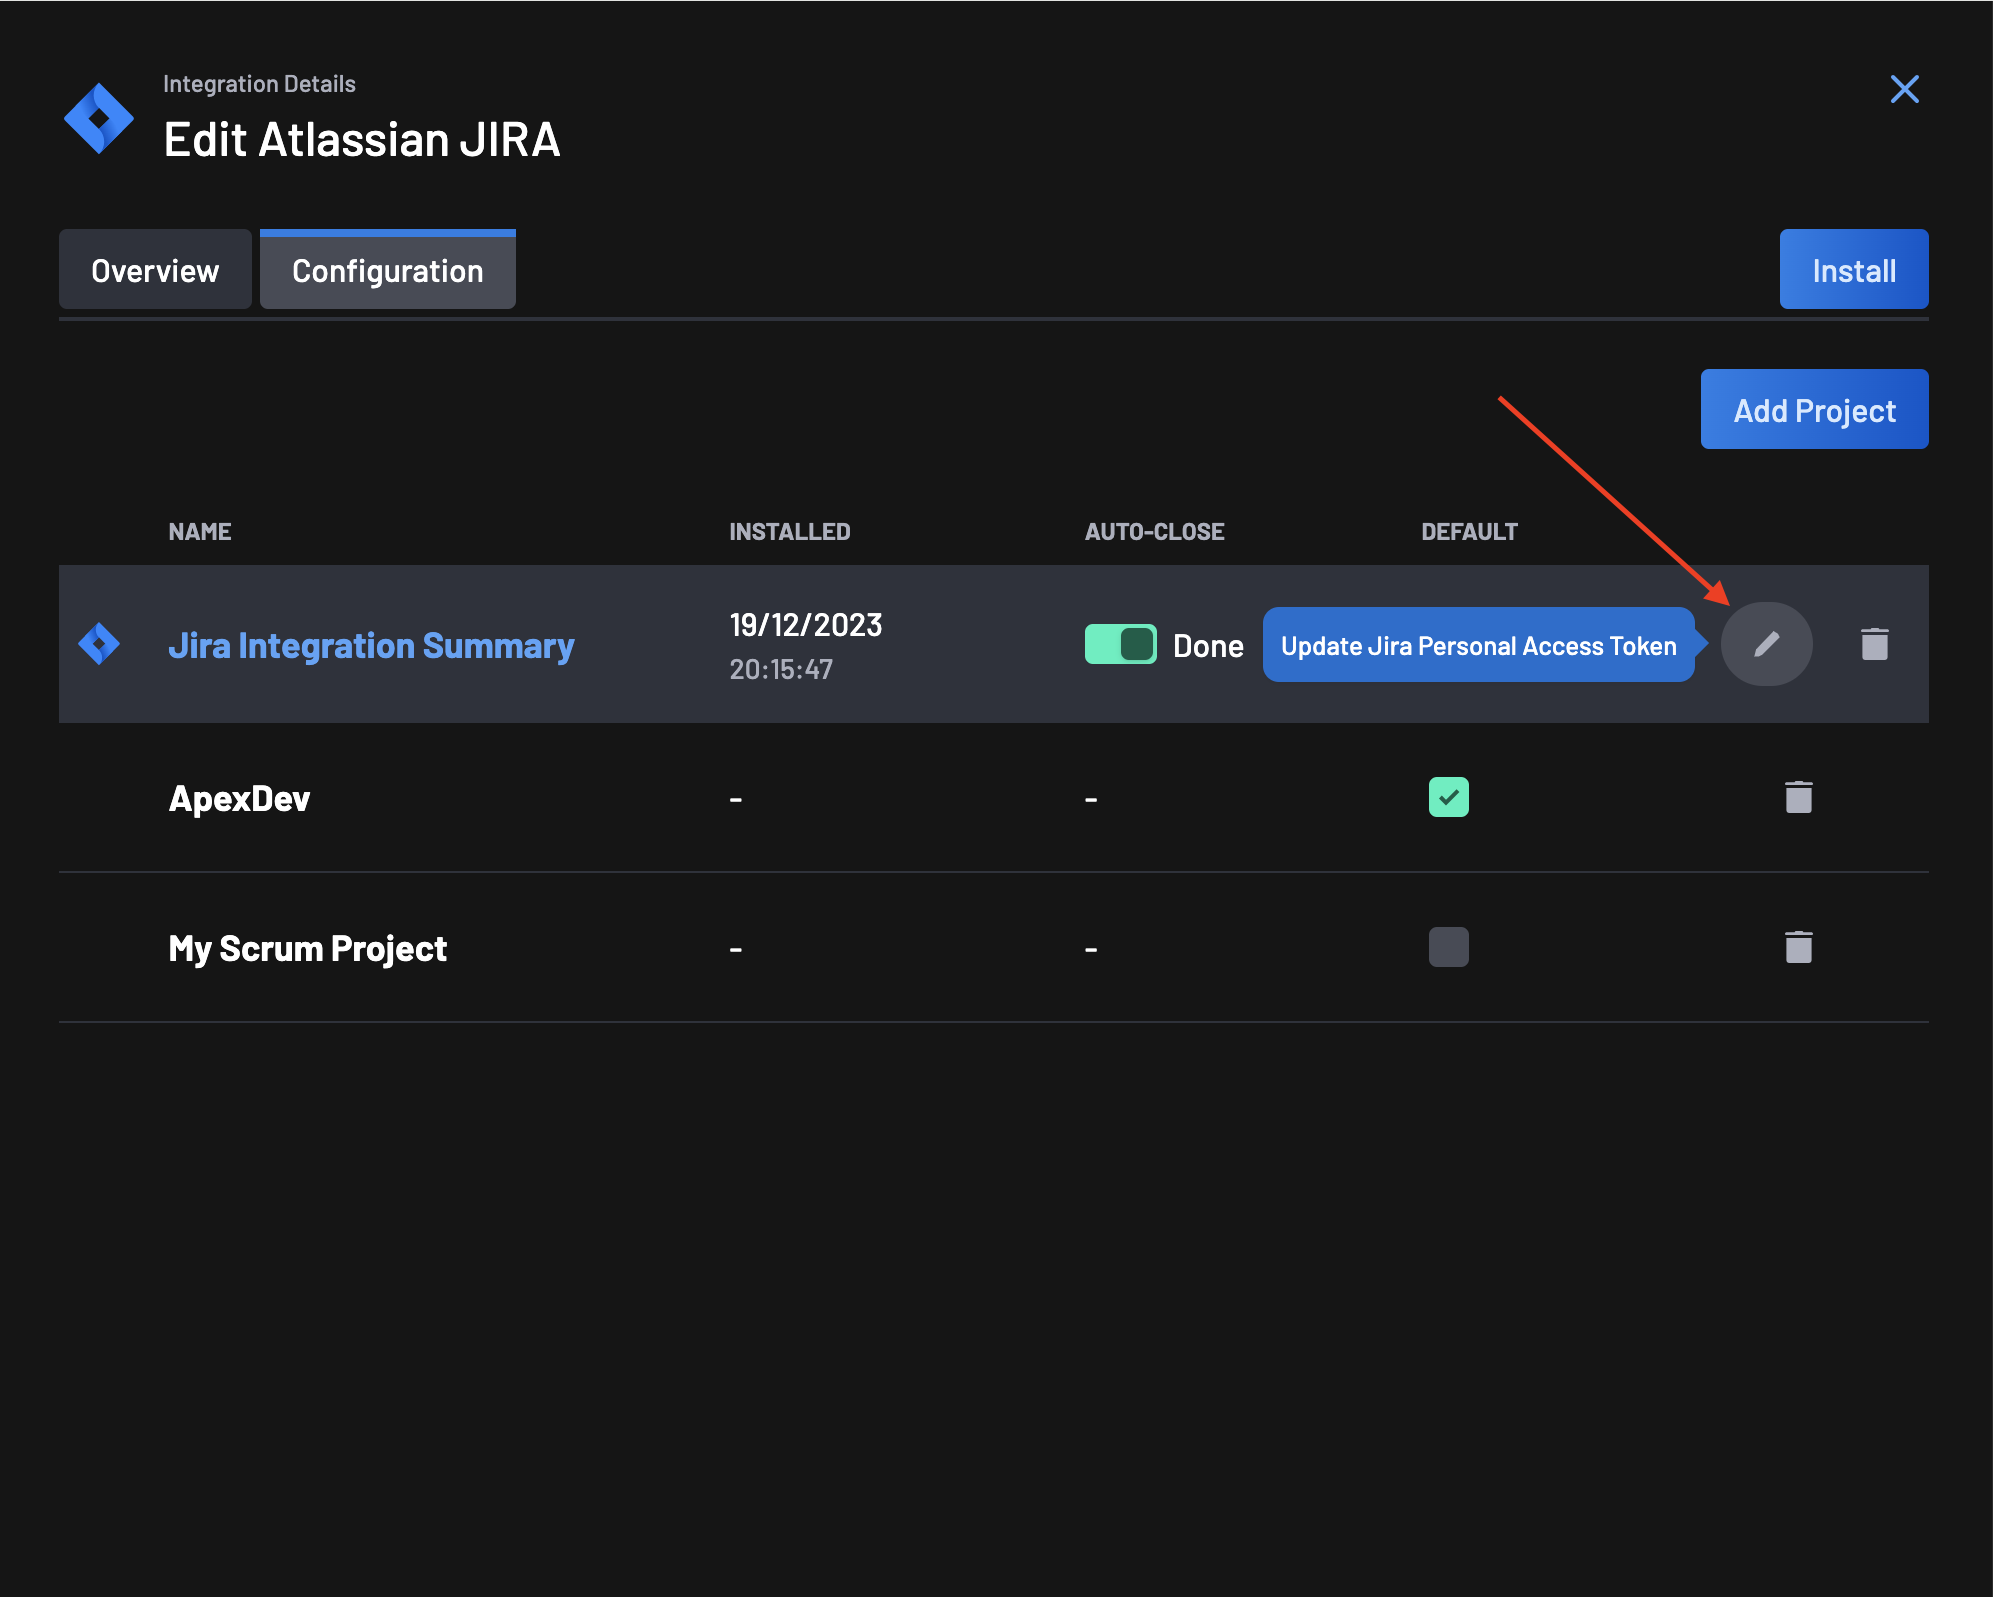
-
Input the new token and click the "Update" button to save the settings.