Establish Your First Connection
This comprehensive tutorial guides you through integrating source code management and other pivotal workflows, laying the foundation for a robust security infrastructure on Boost Security.
What You'll Accomplish
By the end of this tutorial, you will have:
- Successfully navigated the onboarding process.
- Connected your source code management system.
- Implemented Zero Touch Provisioning for your SCMs.
- Implemented dependabot and CI/CD pipeline configuration.
- Harnessed security findings aligned with your organization's CI/CD and Dependabot security checks.
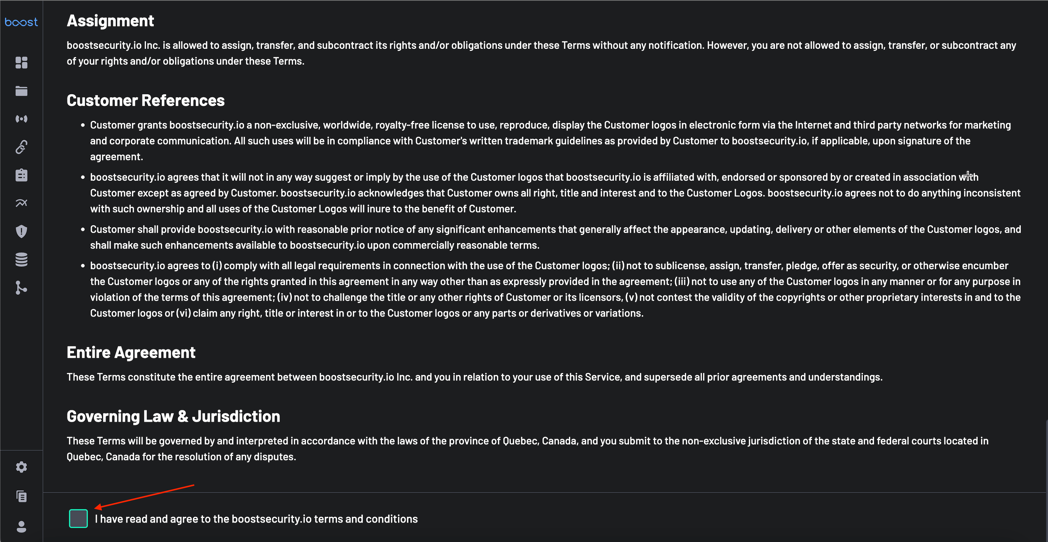
1. Accept Terms and Login
The first entry point to Boost Security is accepting the terms of service and logging into the dashboard.Your organization would be provisioned as a tenant on Boost Security, and your account details and other information would be sent to you. Accept the terms of service at the bottom of the page, and you will be redirected to the Boost Security login page.

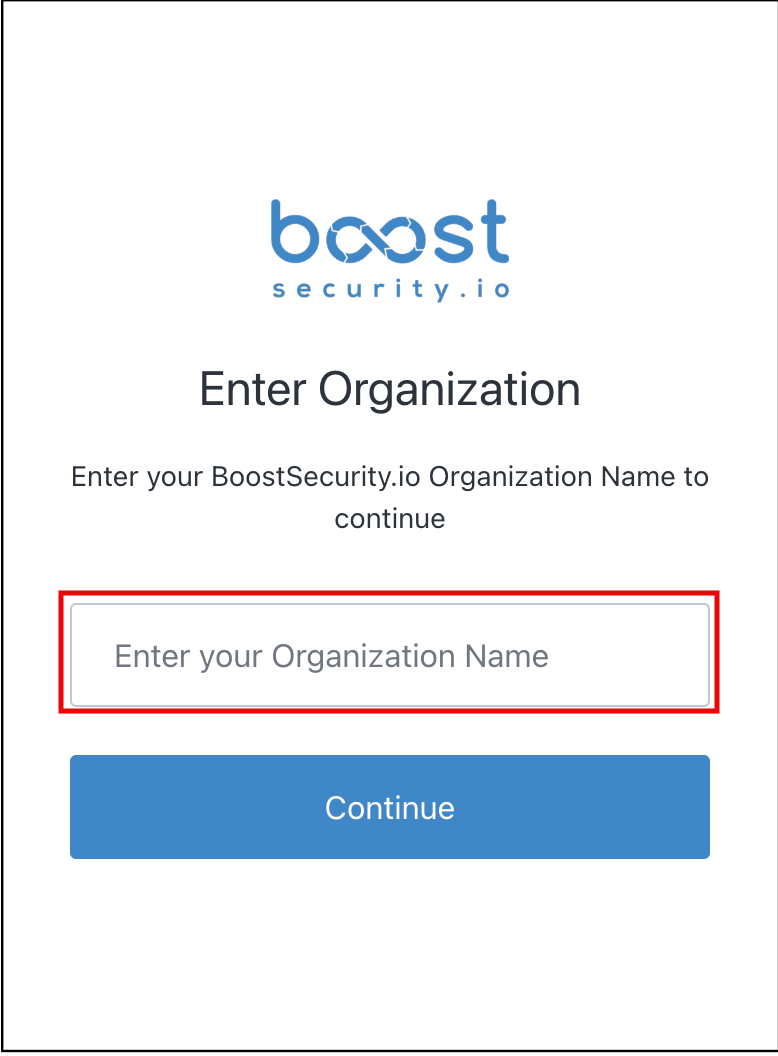
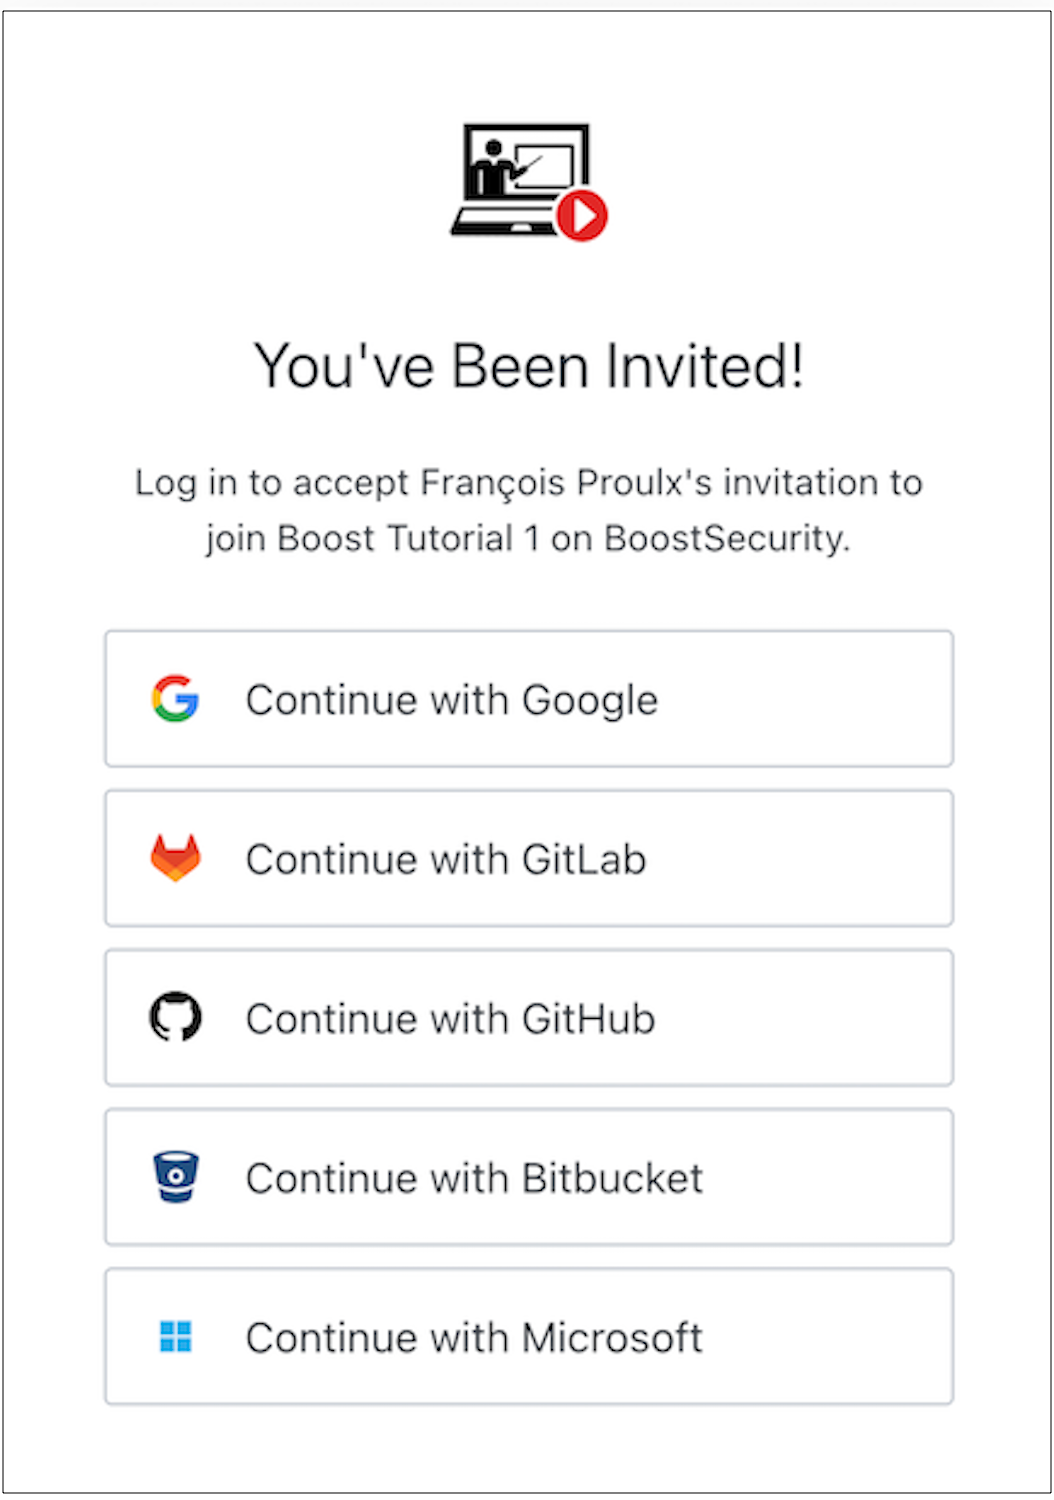
On the login page, enter your Boost Security Organization Name to continue and select an account to continue with. You can log in using the Oauth mechanisms of Google, GitLab, GitHub, BitBucket, and Microsoft.
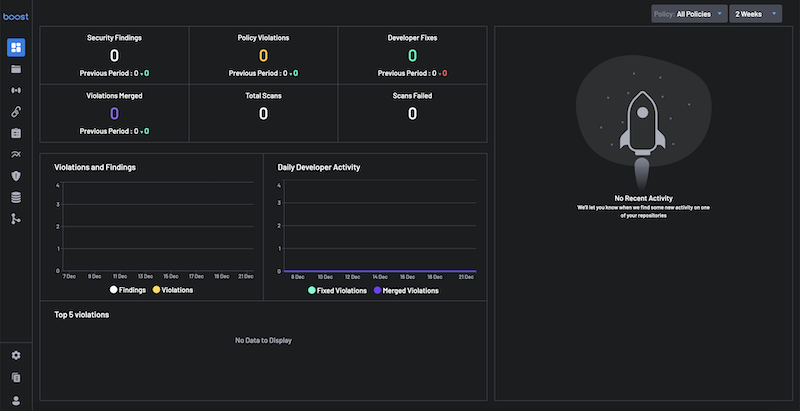
2. Welcome to your Dashboard
Upon a successful login, you will be redirected to your dashboard page, which will have no data.
3. Connect Your SCM and Retrieve Data
Boost Security supports integration with several Source Code Management (SCM) tools, including GitHub, GitLab, BitBucket, and Azure DevOps. Additionally, Boost provides Zero Touch Provisioning (ZTP) for repositories directly within SCMs.
Note
Before proceeding to Step 4, completing all necessary steps within the linked page corresponding to your Source Control Management (SCM) system is crucial. Ensure you've thoroughly followed the instructions tailored to your SCM to avoid any disruptions or errors in the process.
- Integrate with GitHub
- Integrate with Azure DevOps
- Integrate with Bitbucket
- Integrate with GitLab
- Integrate with AWS CodeCommit
4. Enable Default Scanner Protection
After successfully connecting to your Source Code Management tools, enabling the CI/CD scanner for all SCMs on the scanner coverage page is recommended.
To do this:
-
Navigate to the Scanner Coverage page, and for all your SCMs, you'll see a column called Default Scanner Protection.
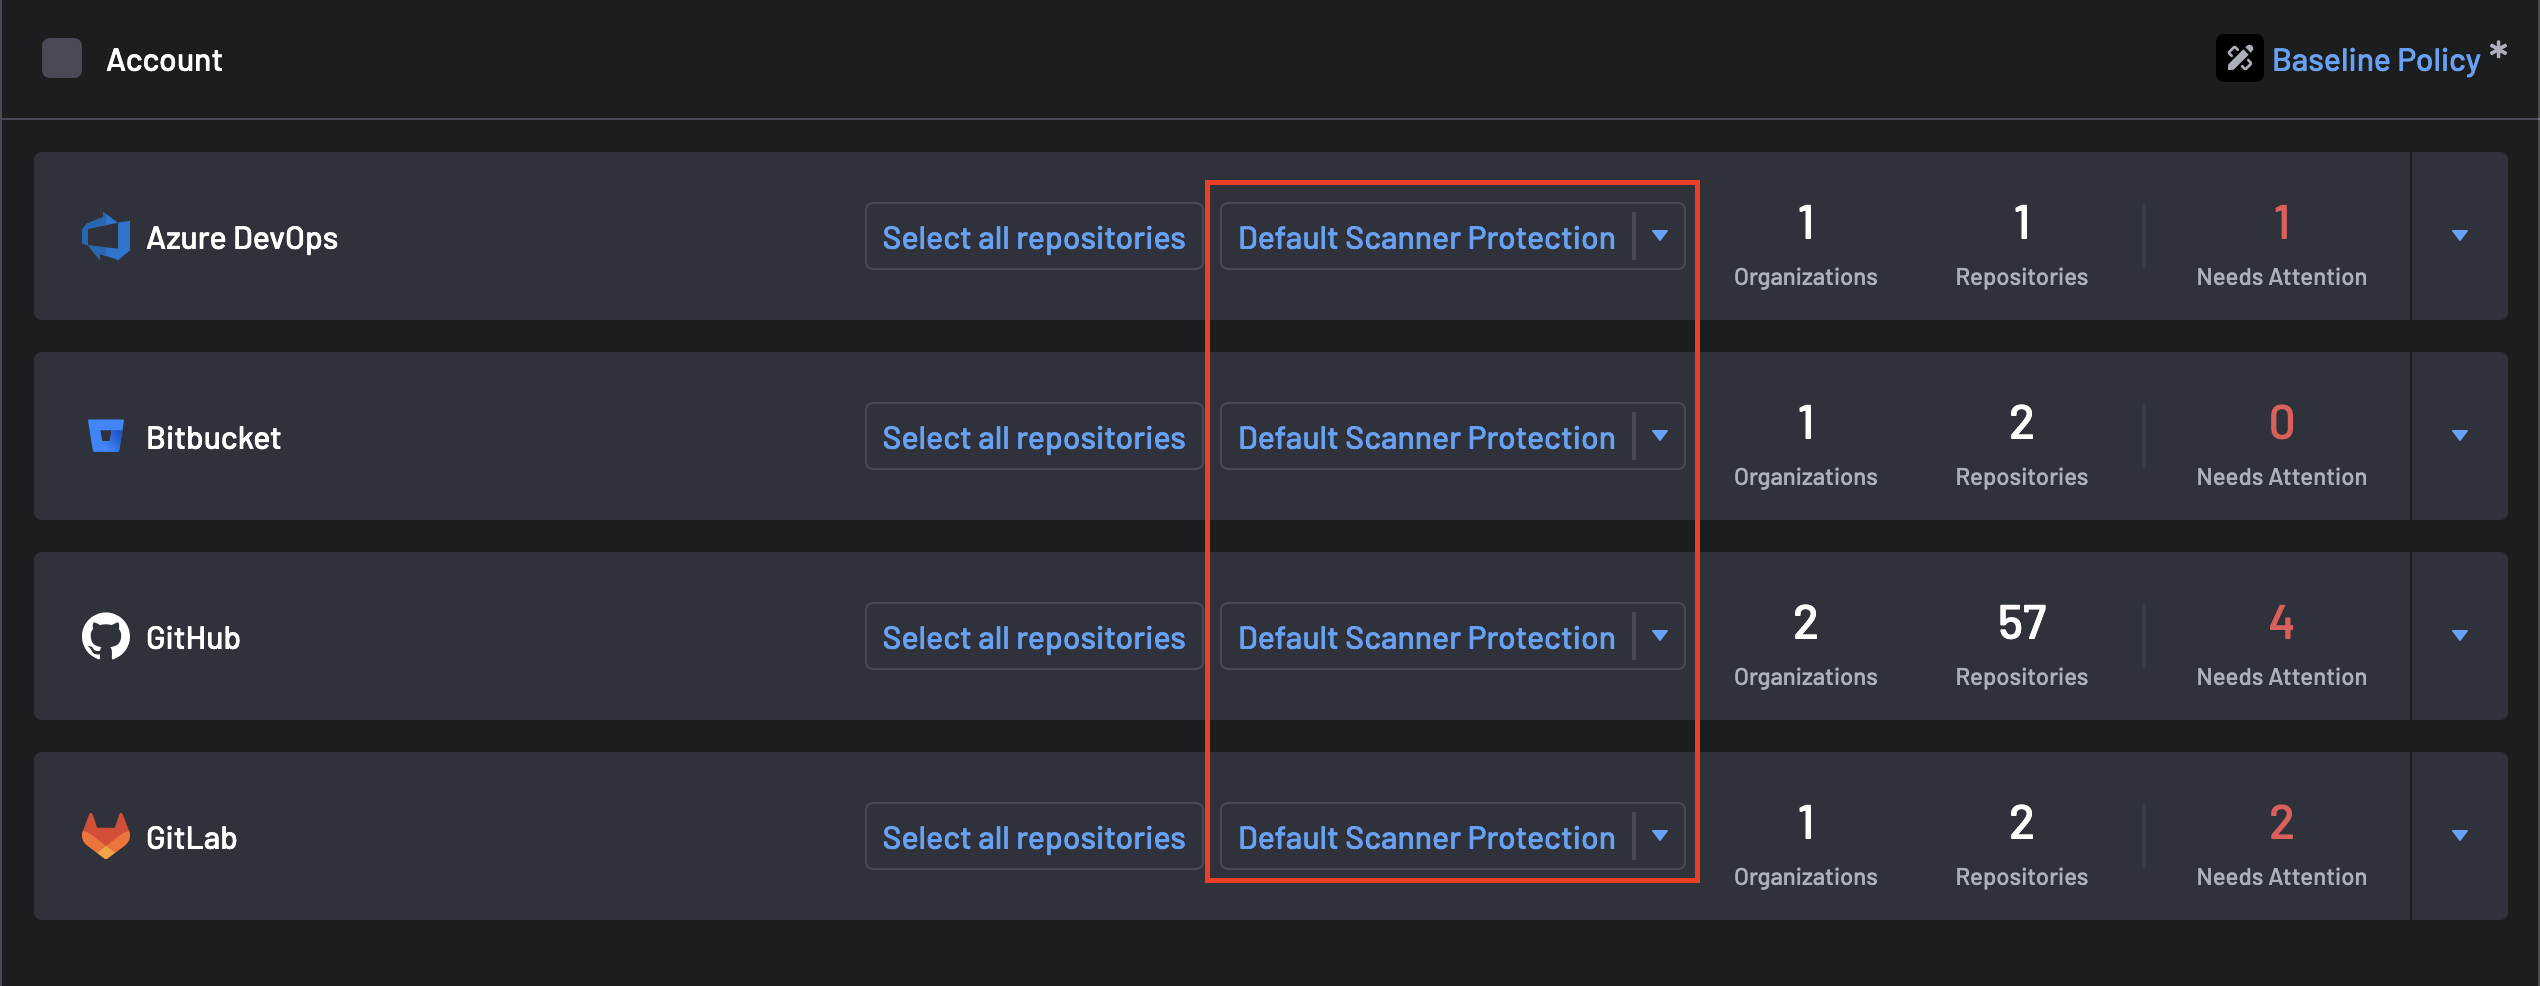
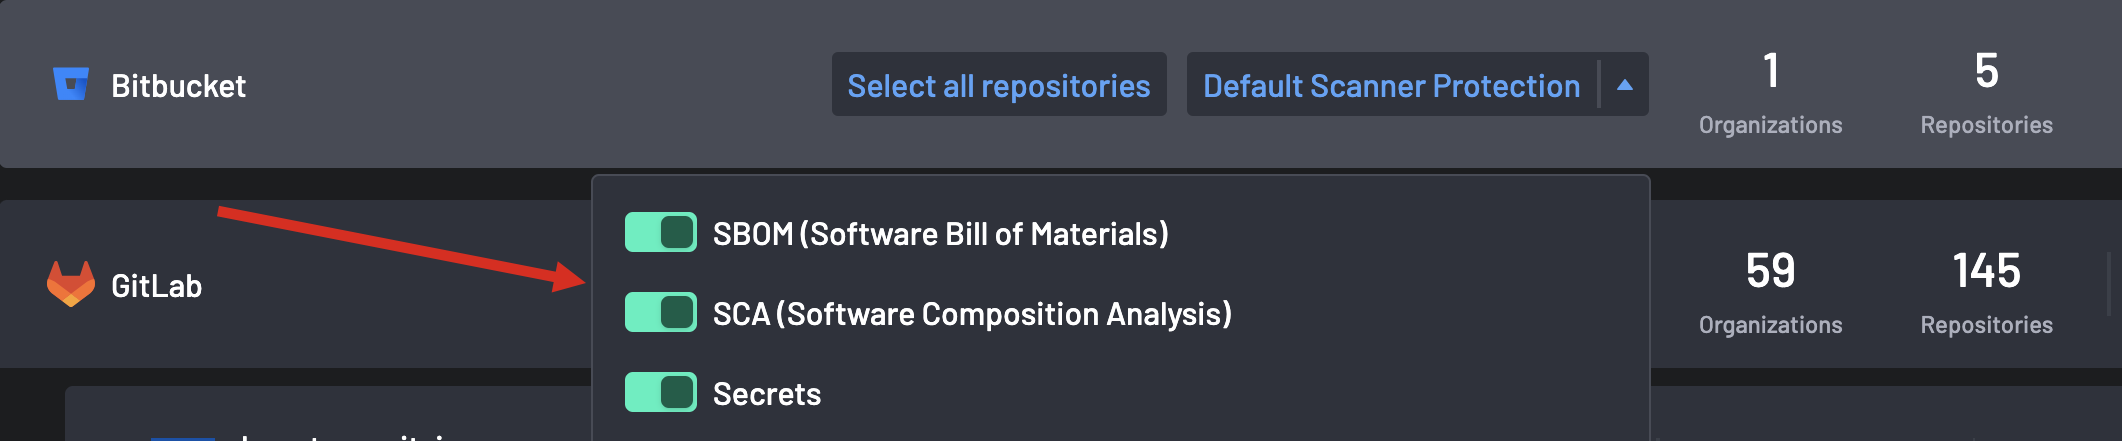
-
Click on the column and select the toggle to Enable the Boost Security Scanner to scan for SBOM, SCA, or Secrets.
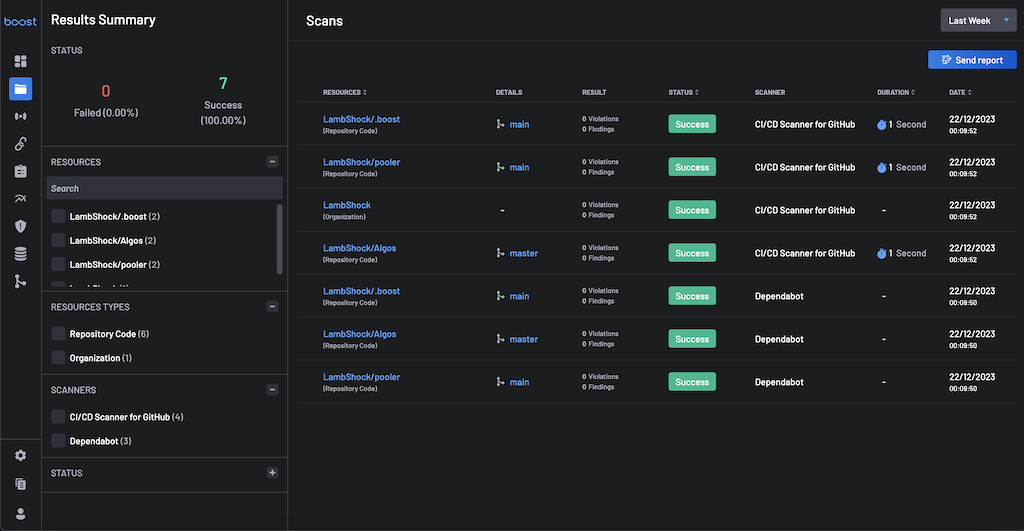
5. View Your Scans
The scanners configured on your GitHub organization via the security checks for CI/CD and Dependabot would already have some scan results. Go to the Scans page to check them out.
6. Check out the Findings
Once Boost Security starts to receive data feeds, you can explore the results in the Findings page.
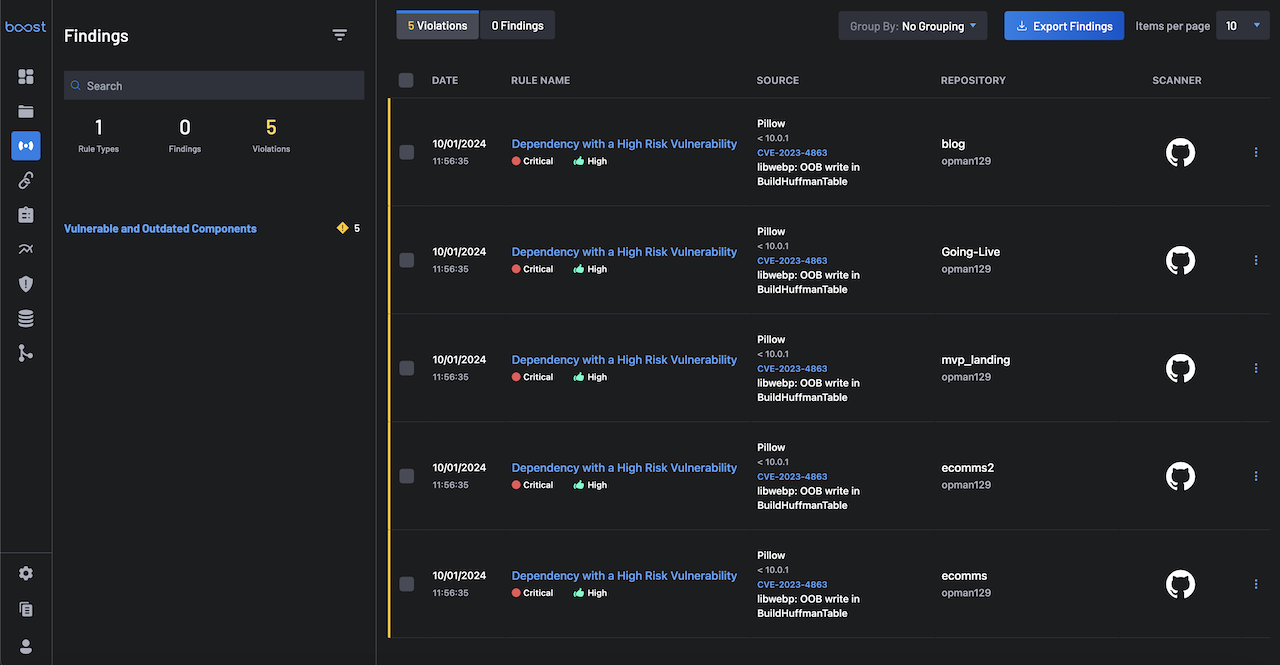
You can filter and drill down through the findings using the filters, allowing you to focus on findings from one or more project(s) (e.g., GitHub and GitLab repositories) or triggered by a specific scanner rule.
For each finding in this page, you can see:
- The rule that detected the Findings.
- The file path.
- Source code lines where it was found.
- A description and link to the documentation explaining why this is an issue, how to address it, and more.
Great job! Your organization has been successfully onboarded on Boost Security. You have connected your SCM and activated Dependabot and CI/CD pipelines, which enable scans. You can now see your security findings.
Info
If you see no findings, don’t worry. It simply means the default policy didn’t find any significant problems with your repo configuration.
Next Steps
Proceed to build your first custom policy, where you would define specific actions for security events identified by configured scanners.