Build First Custom Policy
Custom policies play a pivotal role in determining the response to security events identified by configured scanners. In this guide, you'll learn how to create and manage policies to define specific actions for security events identified by configured scanners.
What You'll Accomplish
By the end of this tutorial, you will have:
-
Created a very “low noise” and targeted policy. Once completed, this policy will automatically suppress any findings that are not SCA findings with a high likelihood of exploitation in the near future or a detected stored secret. Because of the default action set to “Suppress”, any resources with this policy will generate violations explicitly for the outlined criteria, and all other ingested findings will be hidden by default (but can be seen if you remove the suppression filter in the Findings view).
-
Applied the custom policy to your organization.
Now, let's dive into the step-by-step process of building your first custom policy.
Prerequisites
There are no specific requirements needed to create a policy.
1. Creating and Managing a Policy
-
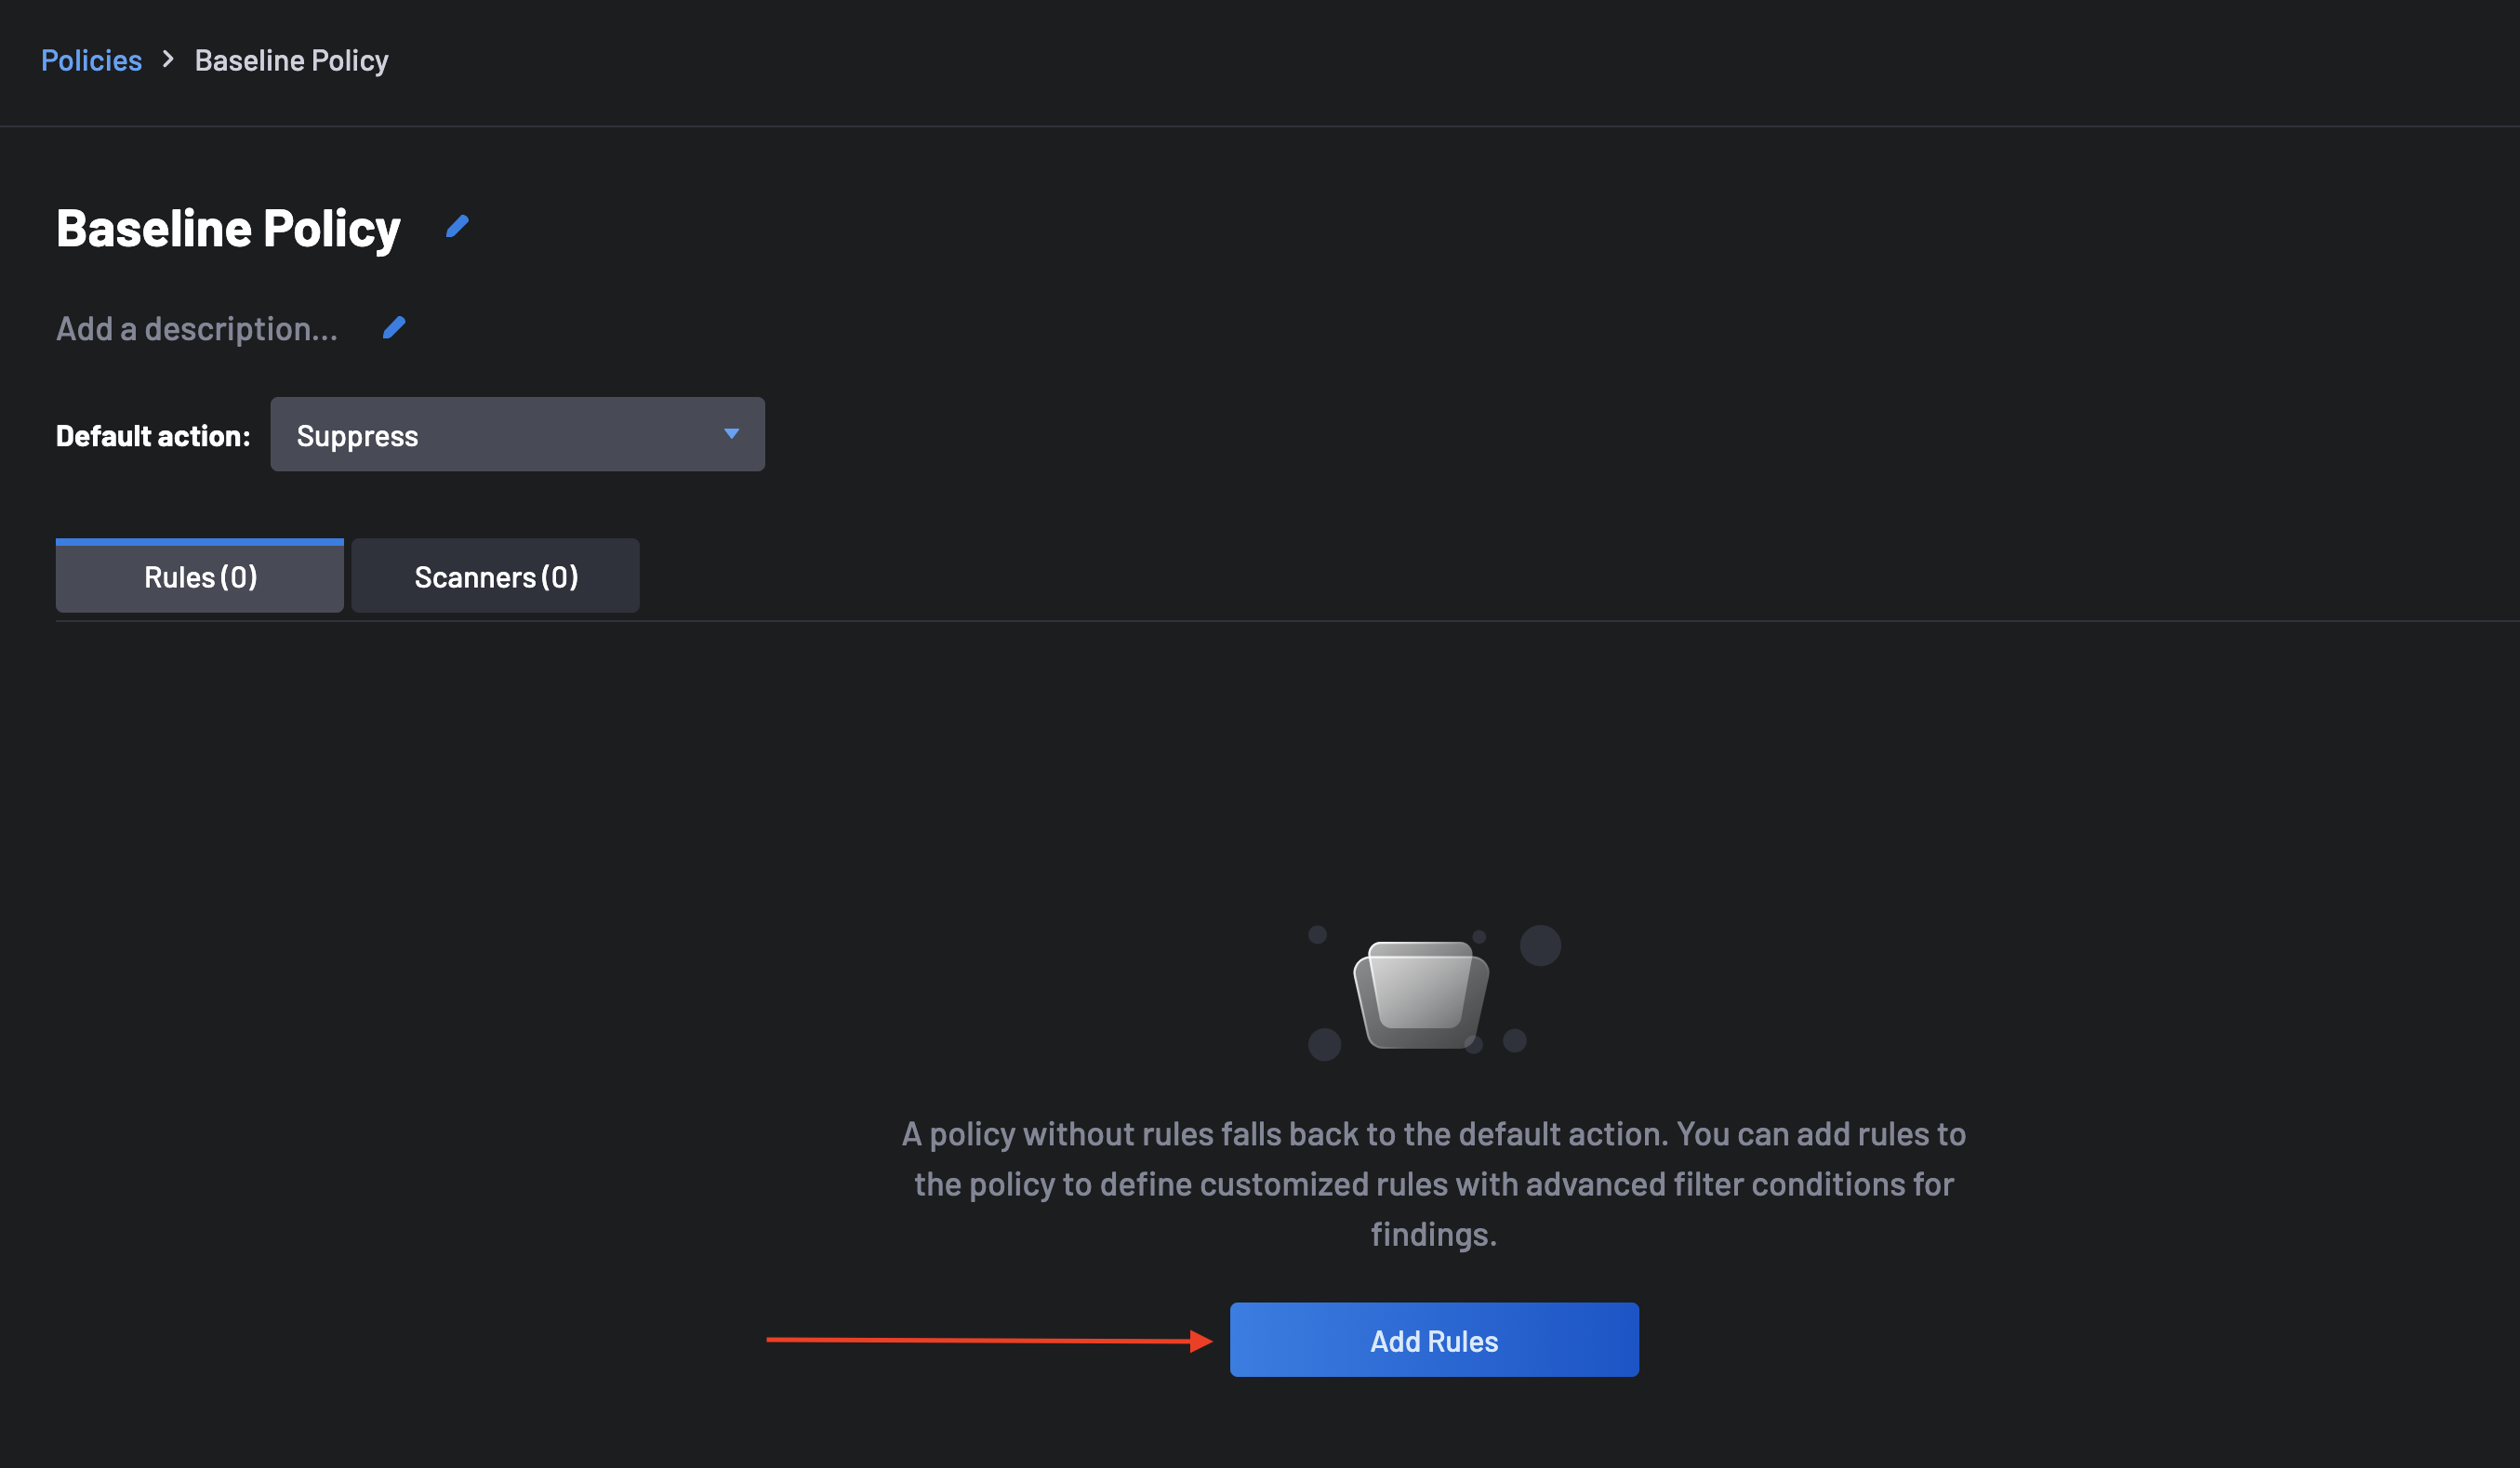
Go to the Policy page and click on the New Policy button at the top-right corner.

-
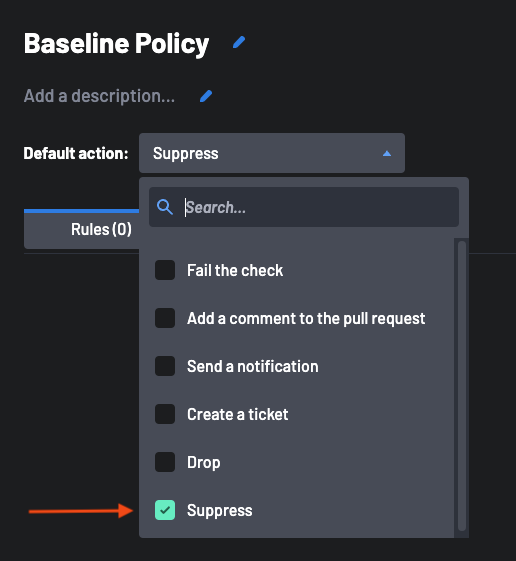
Provide a Name and Description for your policy, i.e., Baseline Policy.
-
Select the Suppress Action as the policy's default action. This tells the policy to hide any findings that do not meet at least one of the rules and criteria you will outline in this policy.
-
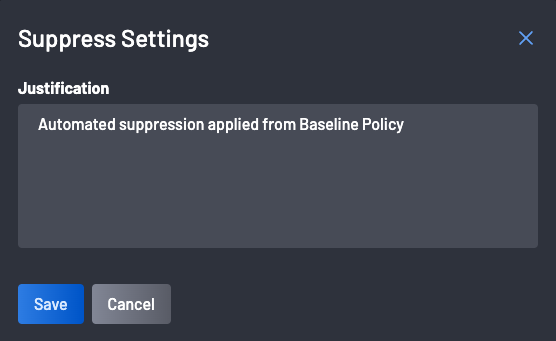
Selecting Suppress will bring up a dialog asking you to give a suppression reason to apply to those findings. For this tutorial, you can write “Automated suppression applied from Baseline Policy” or something similar.
-
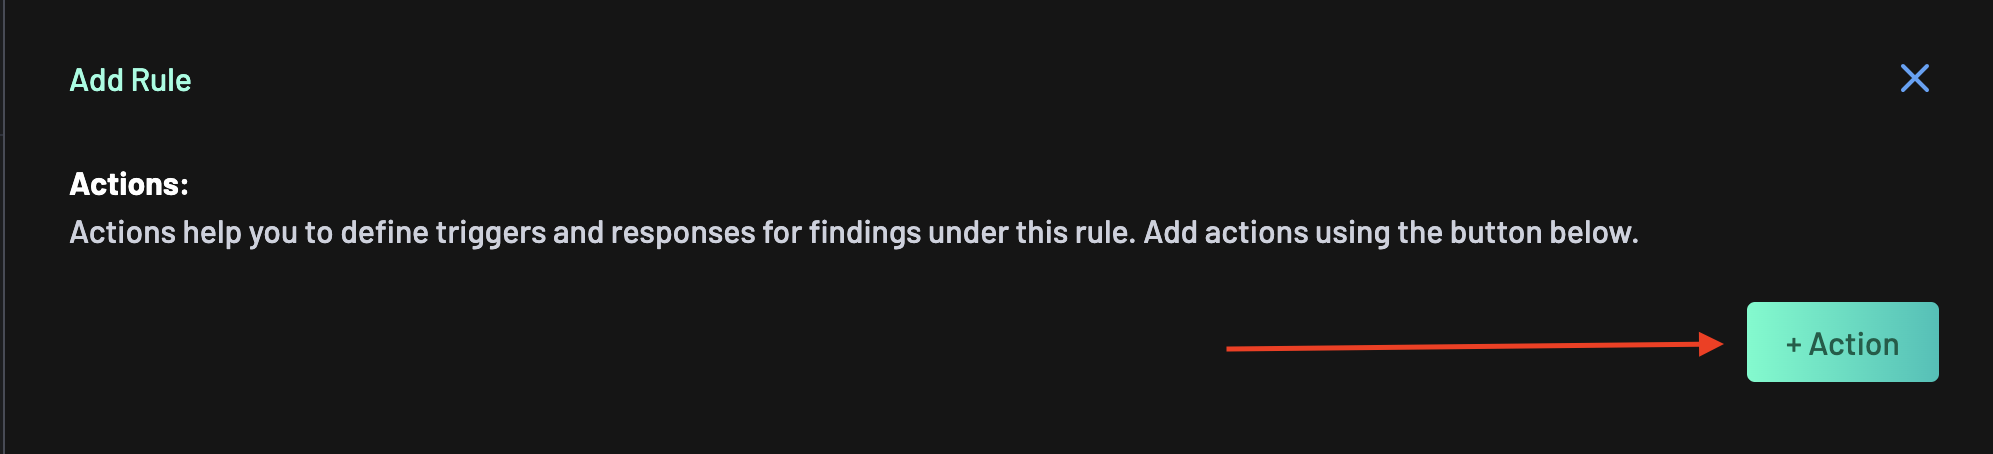
Click the Add Rule button.
-
Click the Add Action button to define an action path for the rule.
-
Select
EPPS Scoreas the conditional subject.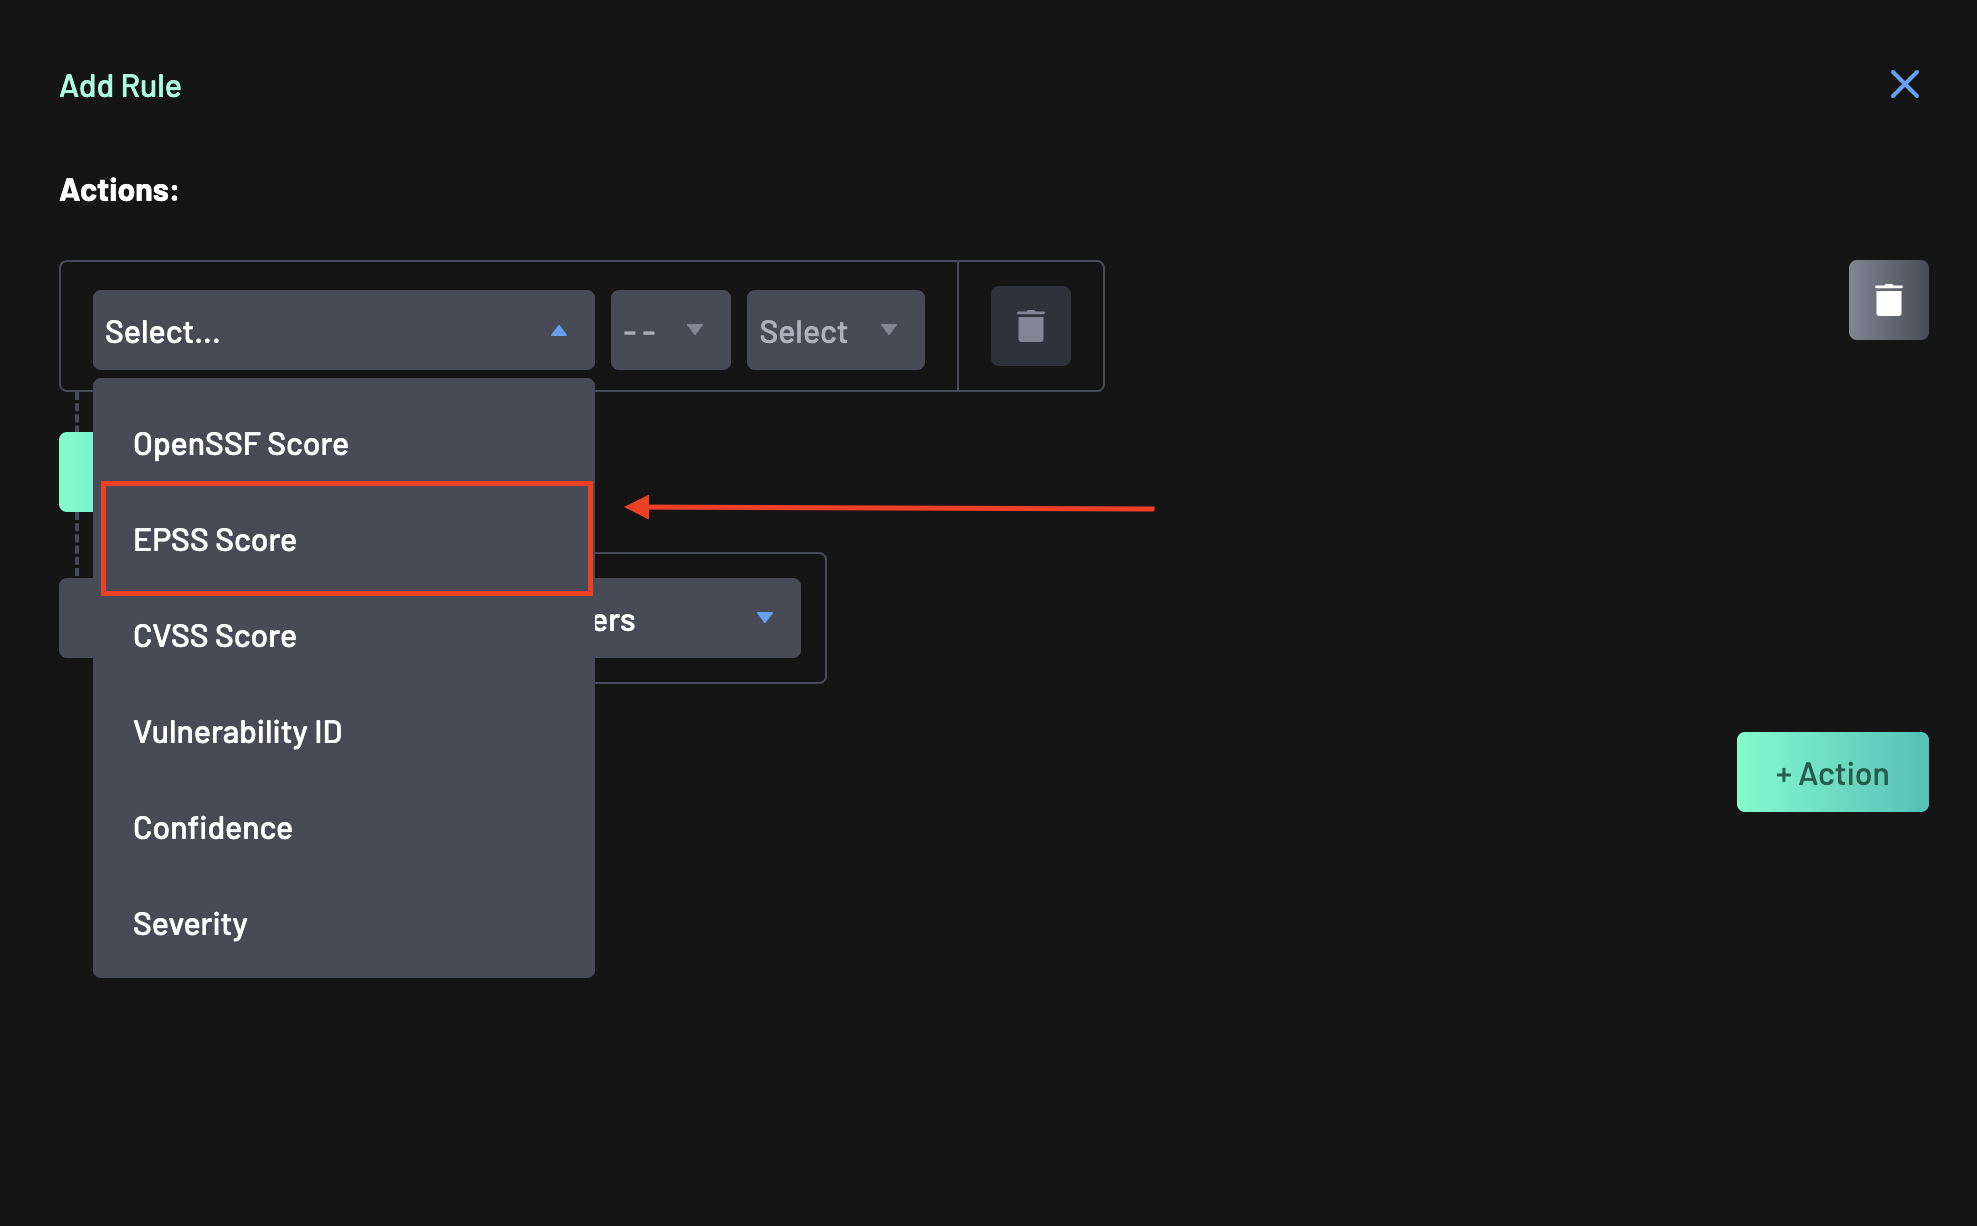
-
Then set
>=as the comparator and 5% as the value.
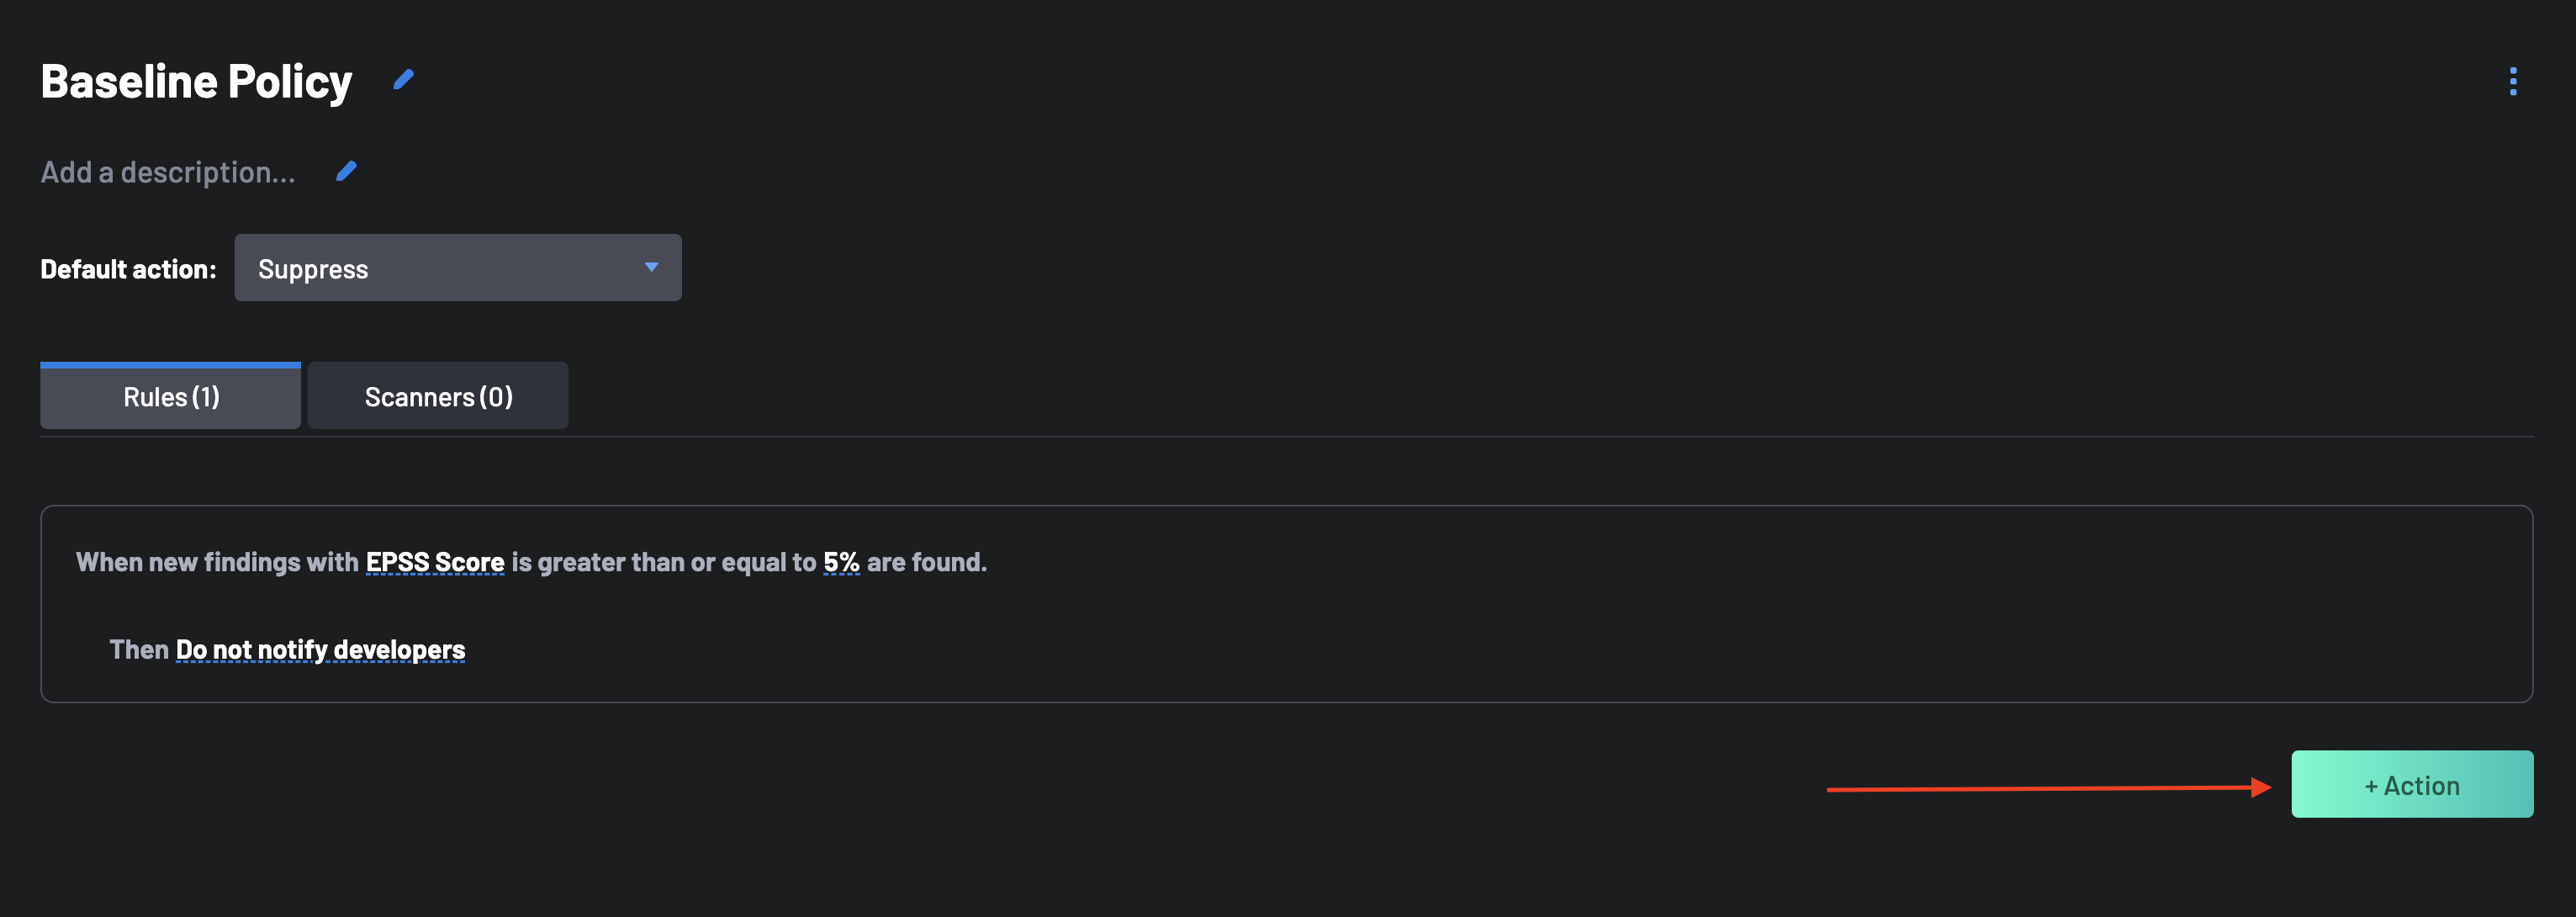
Save your progress.
-
We can leave the Action as the default "Do not notify developers" action. This ensures that while these findings will be elevated to Violations within Boost Security, no external interactions will take place for these.
-
Click the Save button at the bottom of the page to save your progress.
-
Now, let’s add one more Action to this policy by clicking the + Action button at the bottom of the page again.
-
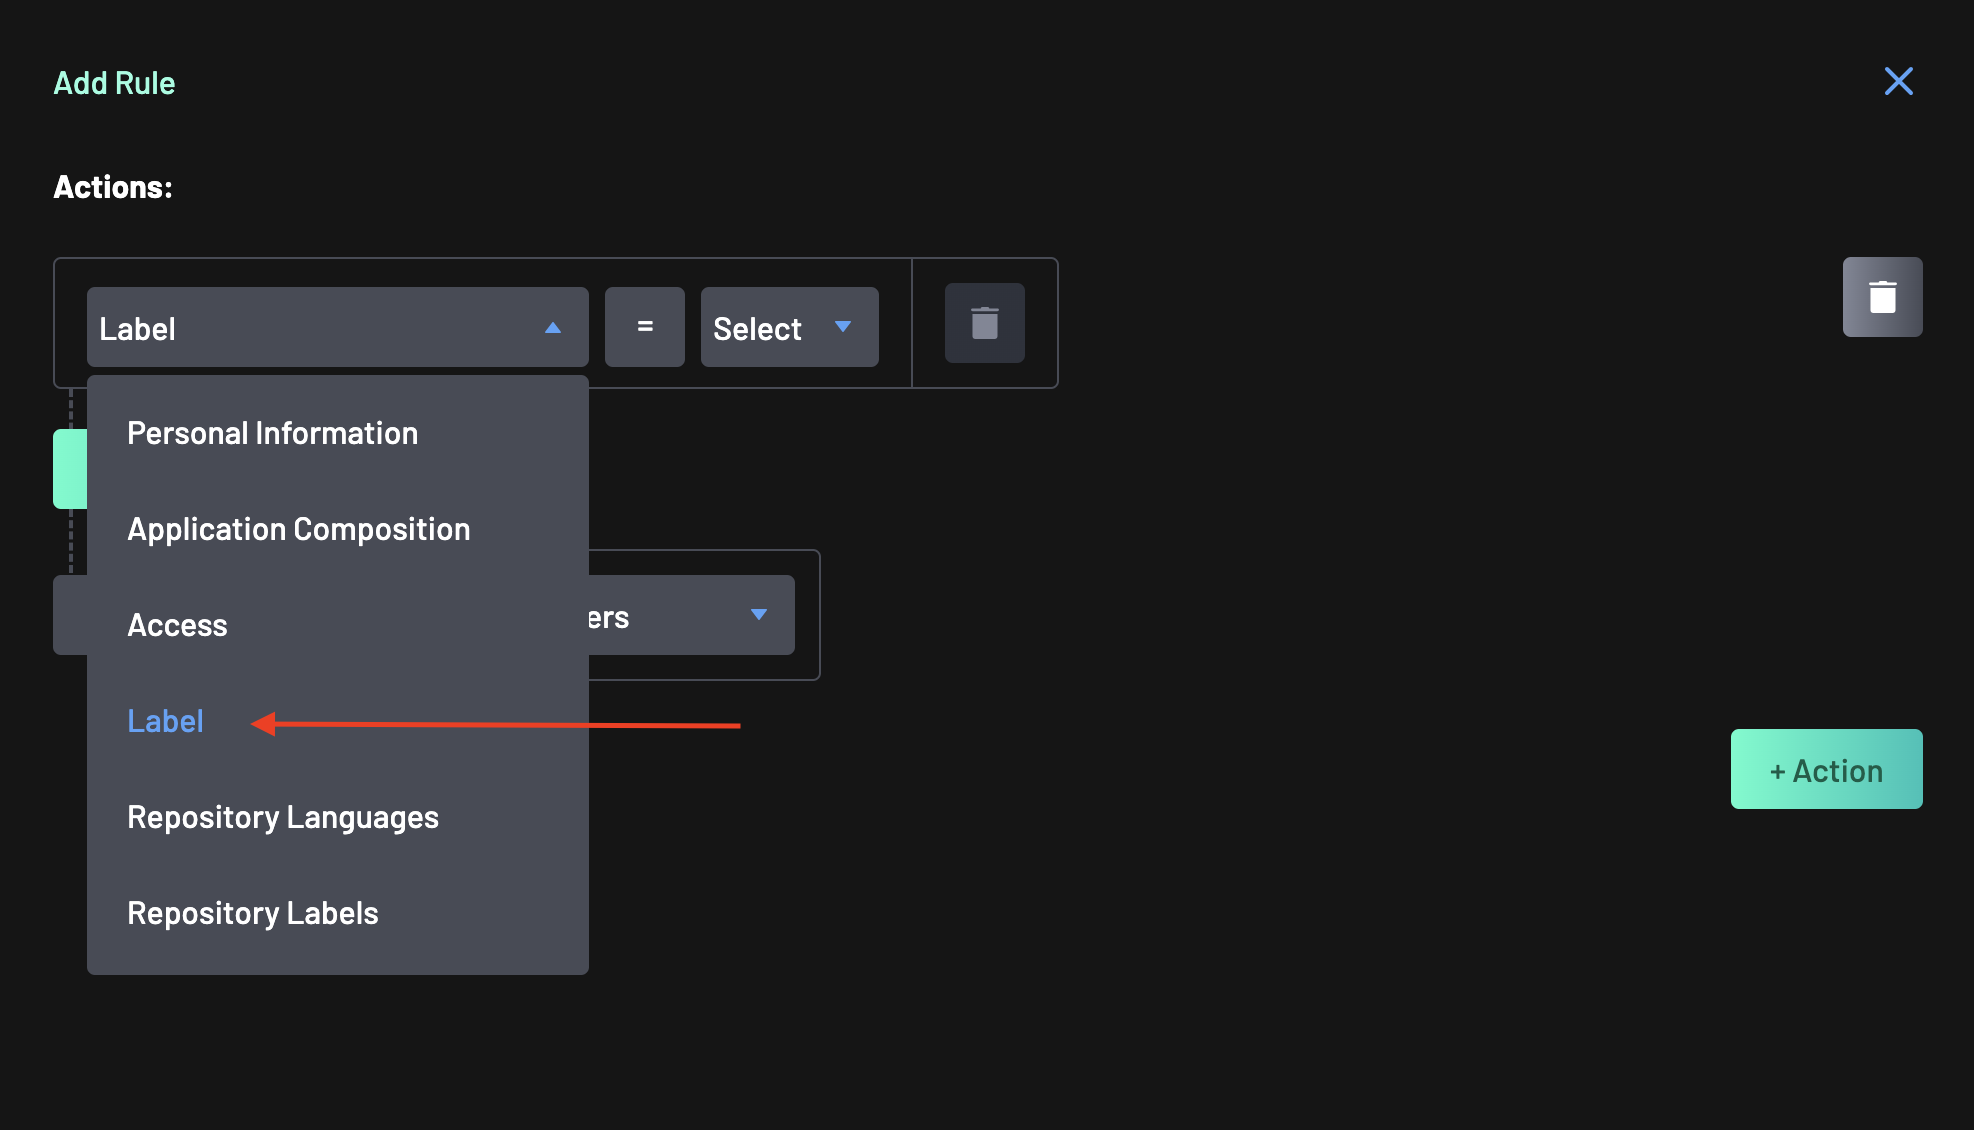
This time, scroll down the action path list and choose Label as the conditional subject.
-
Leave the comparator as
=and start typing “Stored Secrets” in the dropdown search.
-
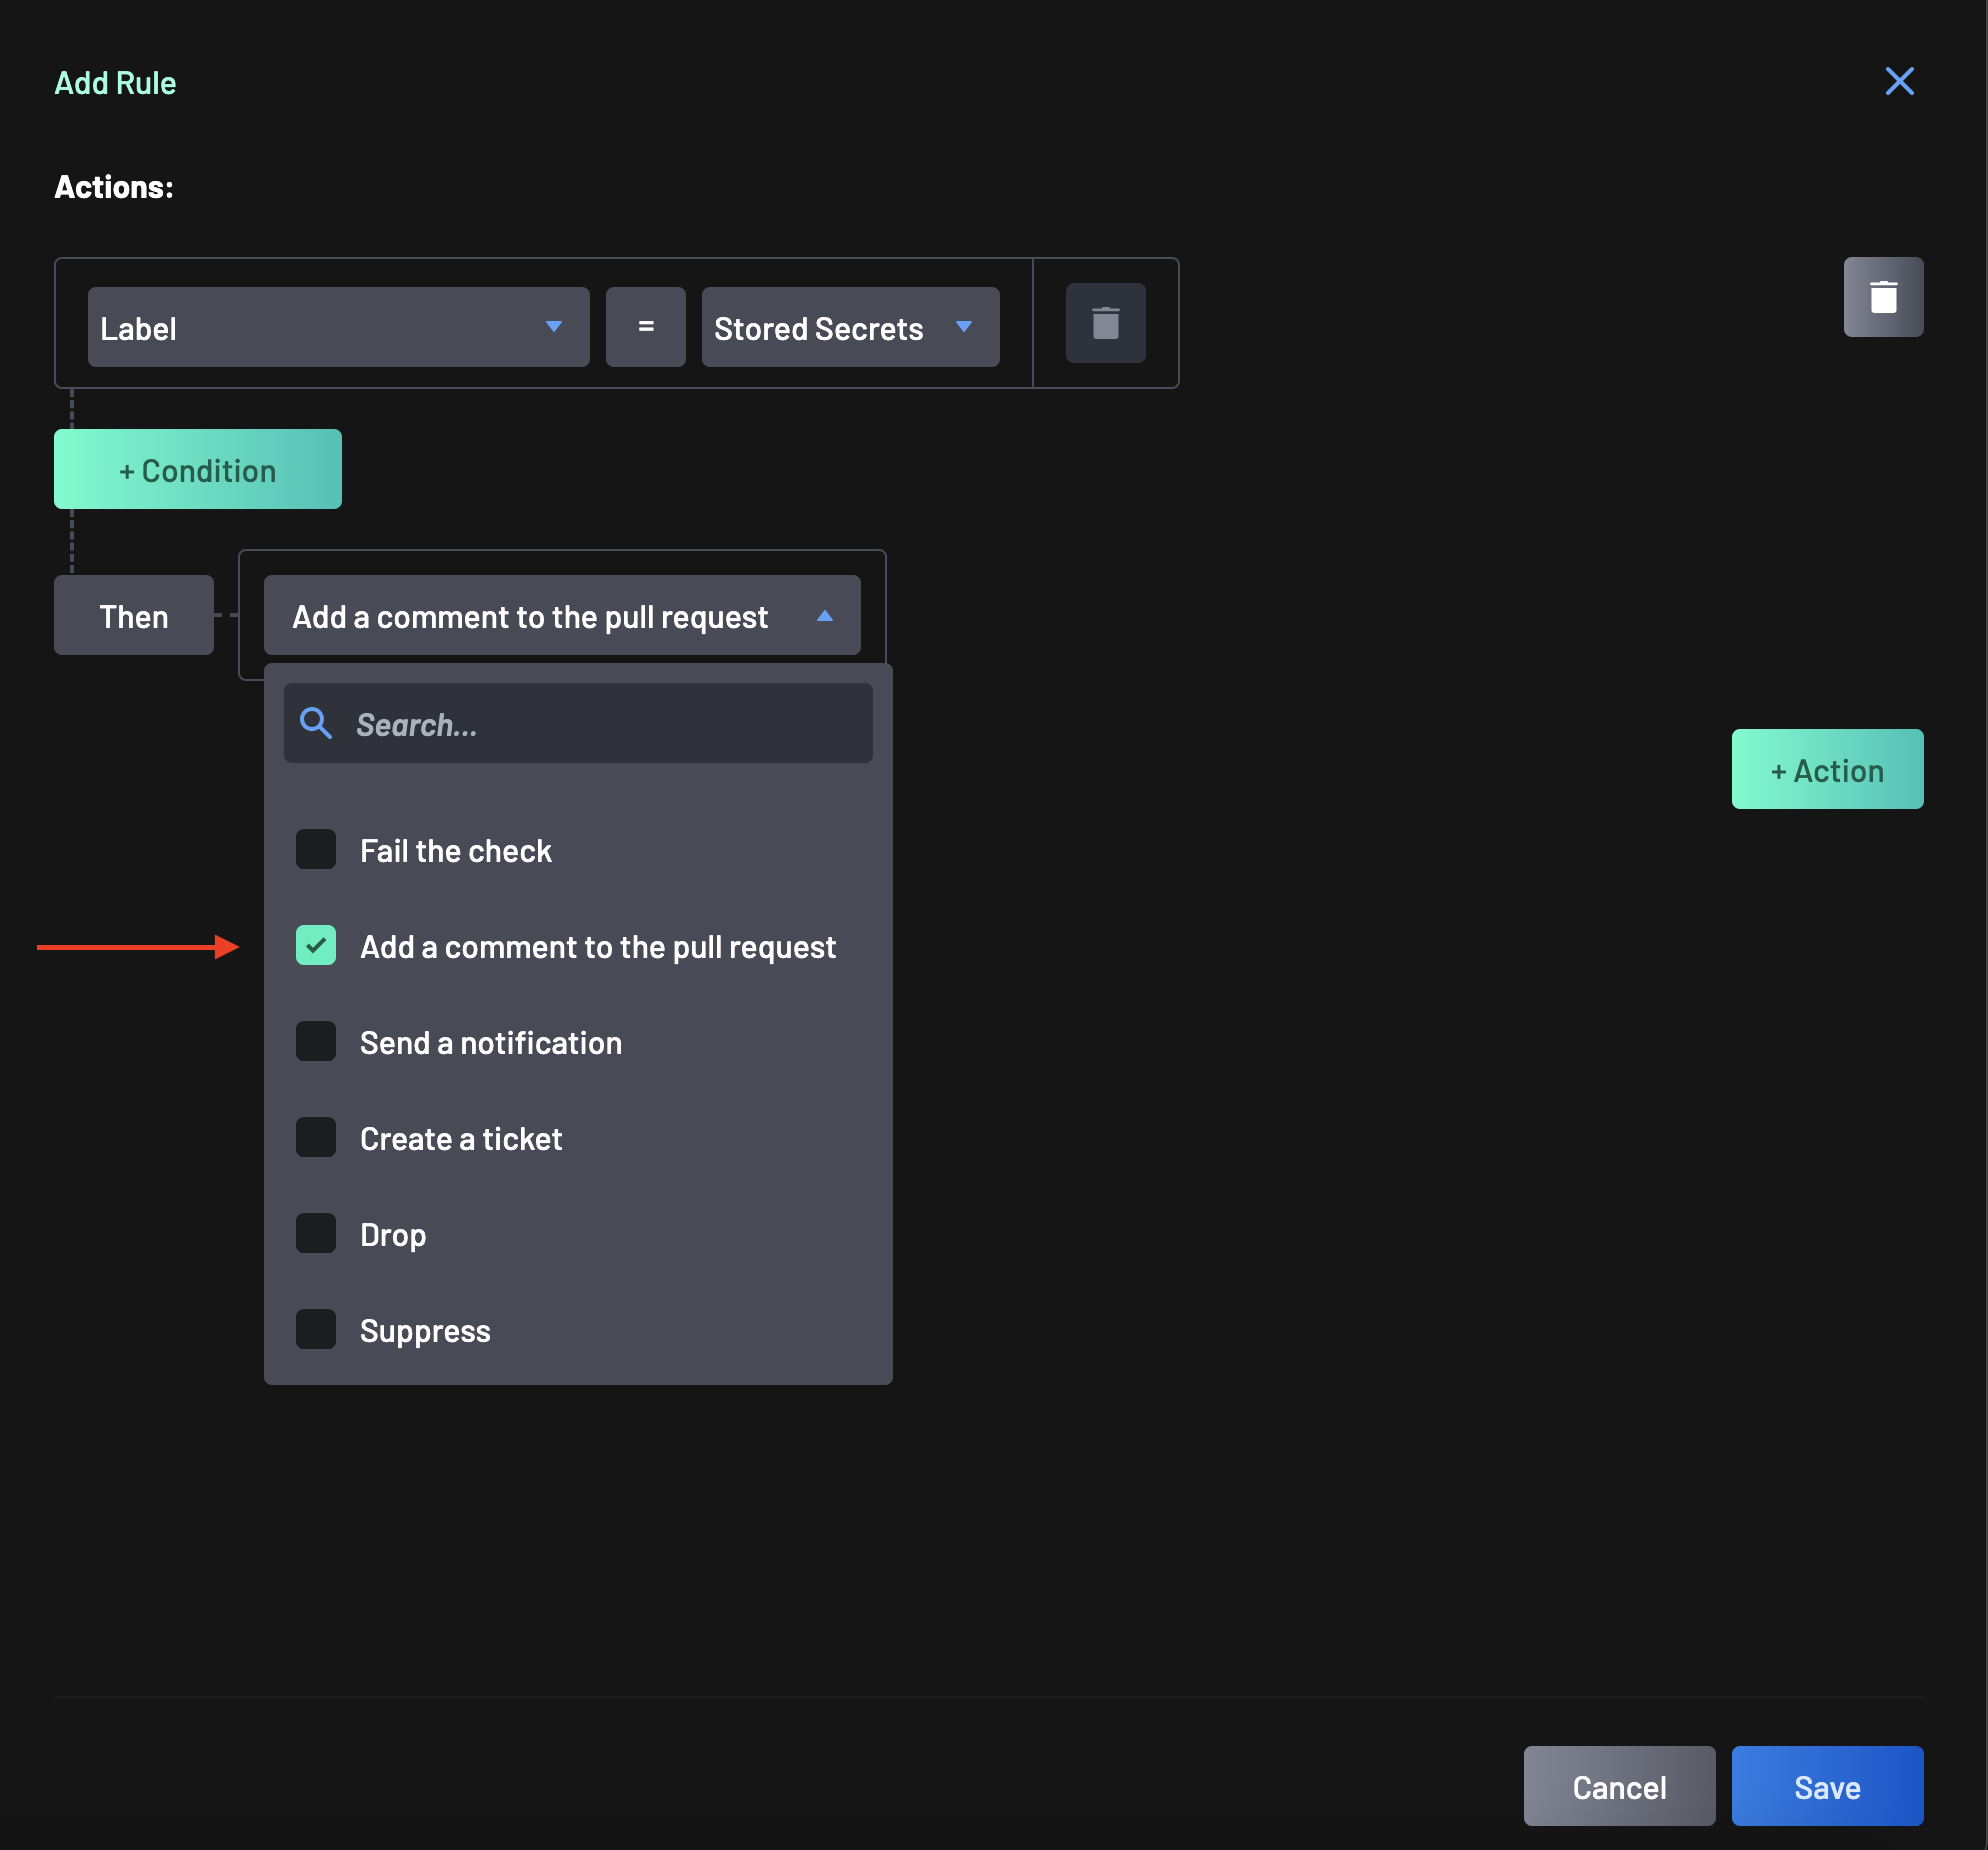
Select Stored Secrets.
-
For this Condition, we want the Action to be "Add a comment to the pull request" to ensure that if any developer submits a PR where a stored secret is detected, they are informed with an automatically generated comment from Boost Security informing them that they should resolve this issue before moving forward with the commit.
-
Click Save at the bottom of the drawer to finish defining this rule.
-
Finally, click on the Scanners tab next to select scanners for your custom policy.
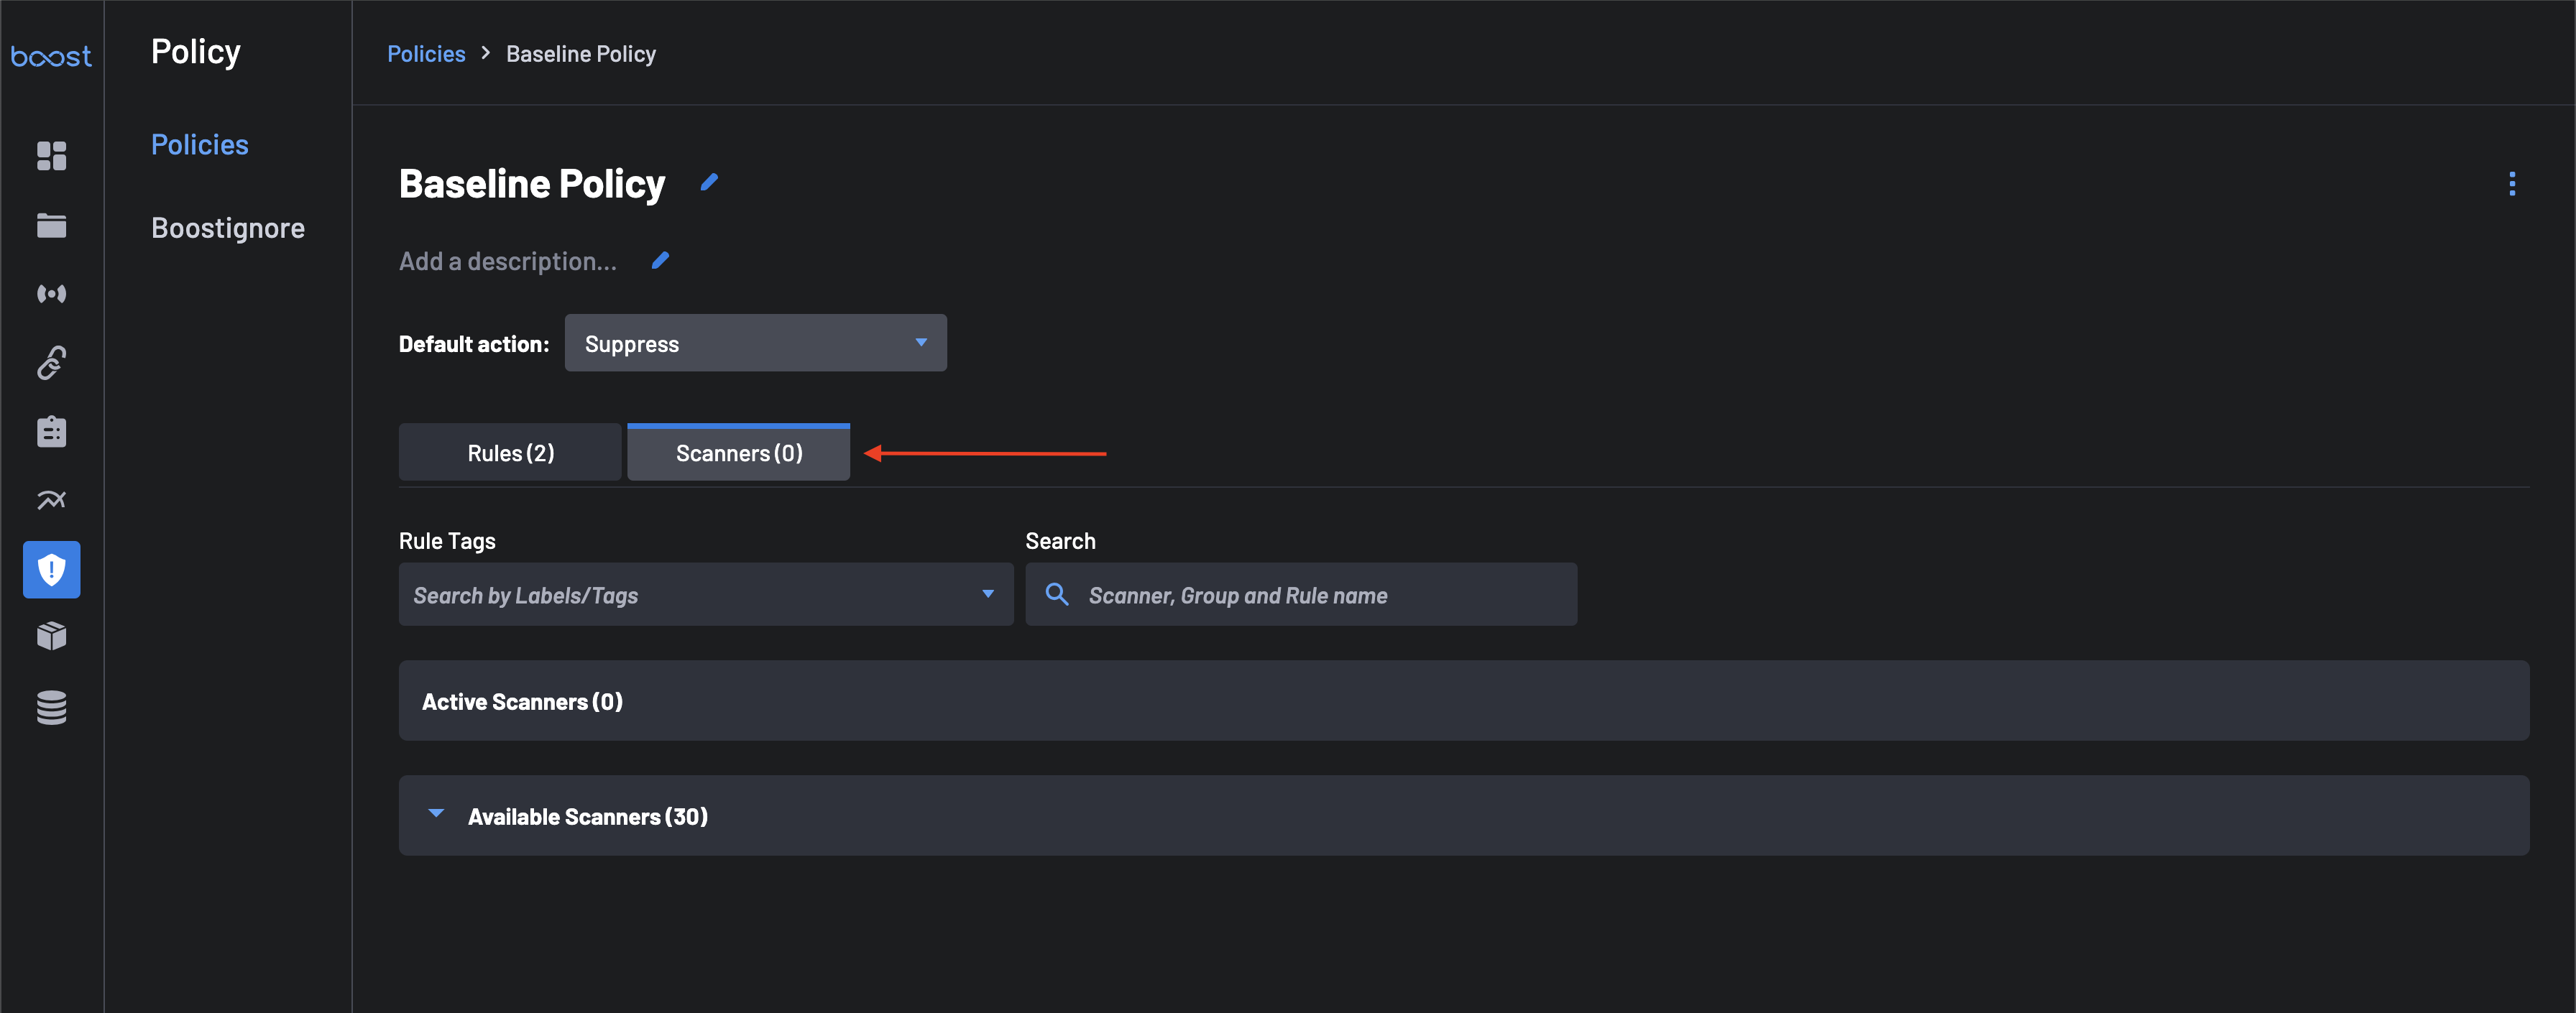
-
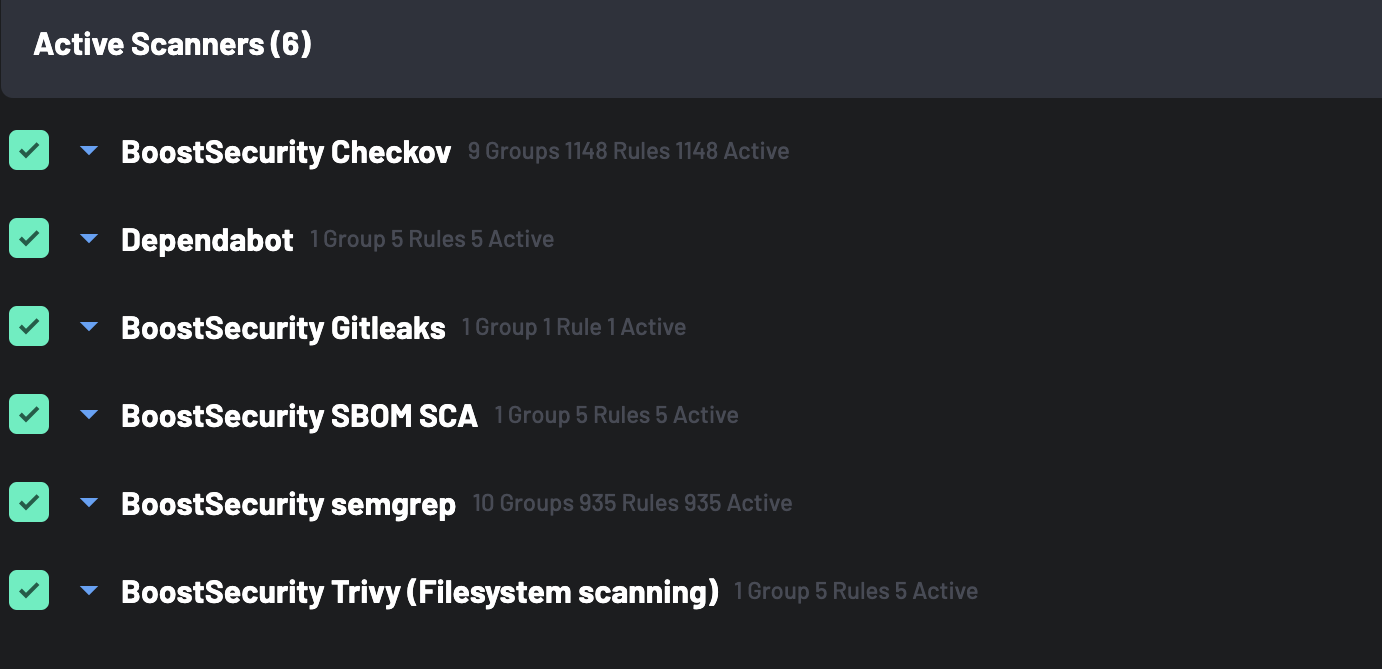
Select the following scanners from the
Available Scannerslist. They will then be listed under theActive Scannerstab.
-
Click the Save button to save the updates to your custom policy.
You've successfully created your custom policy!!!
2. Apply Policy to a Resource
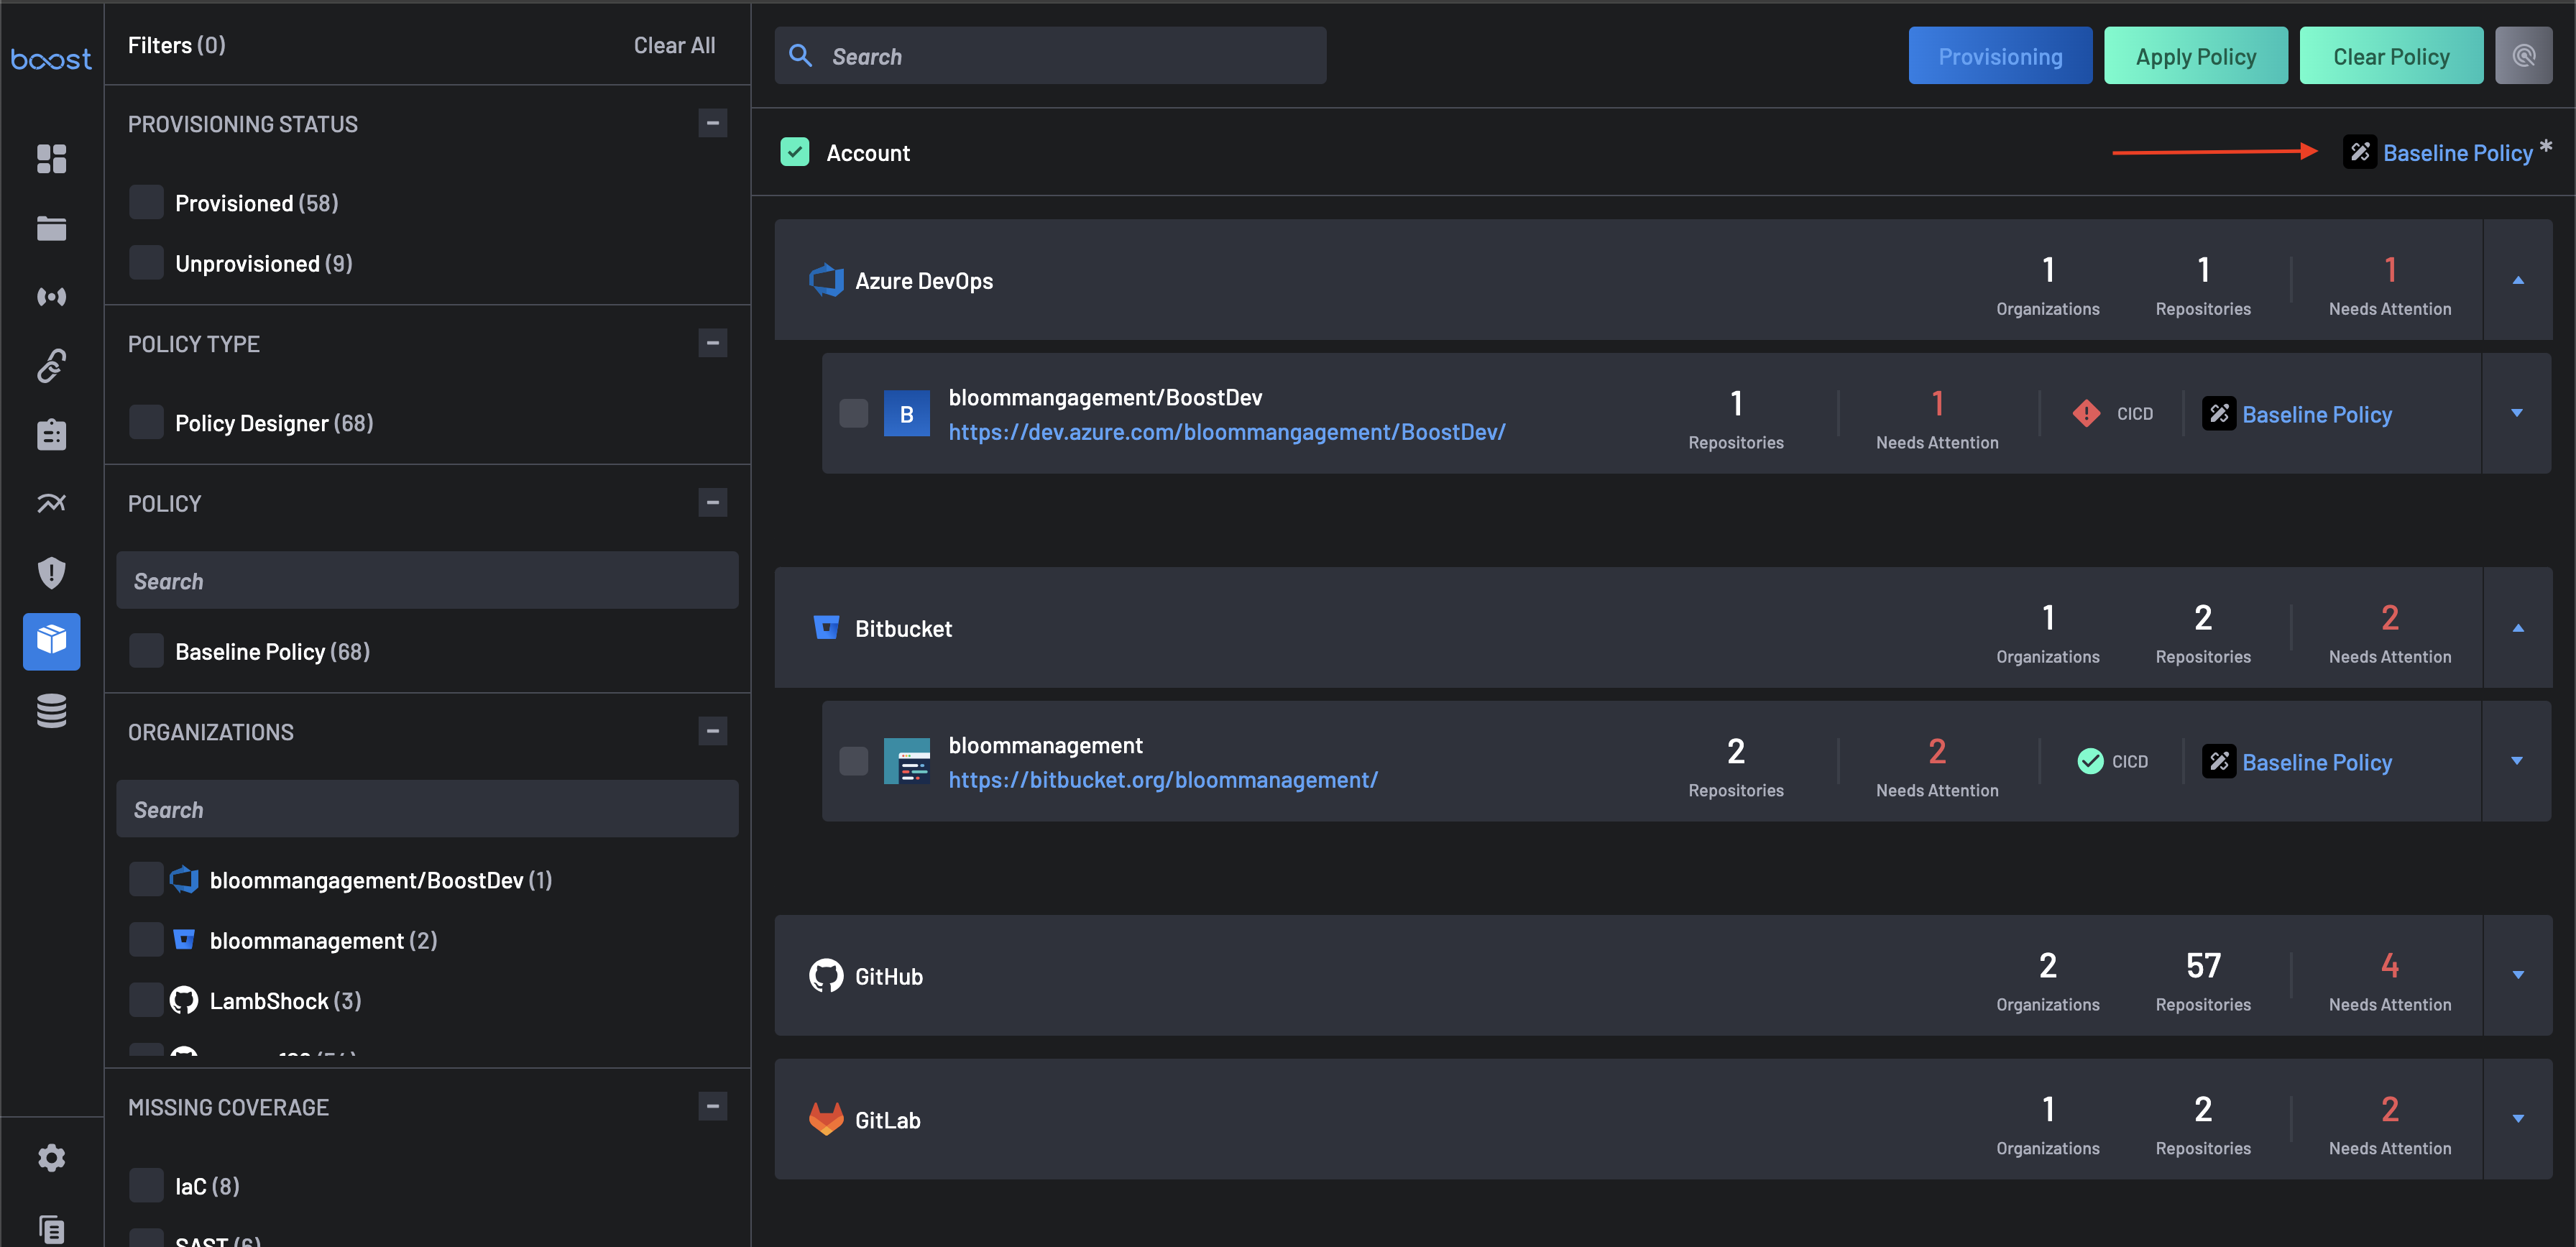
The final step is applying the custom policy to a Resource, an Account, so the policy is inherited by default on all repos. To do this:
- Navigate to the Scanner Coverage page.
-
Select your Boost Security Account and click on the Apply Policy button at the top-right corner.

-
Select your created policy from the list and click on the Apply button.

-
Return to the Scanner Coverage page, and you can see that the newly created policy now applies to your account and all organizations under it alongside their repositories.
Congratulations! You've successfully created a custom policy and assigned a resource. As stated in the beginning, this is a very targeted policy that will only surface some violations to the user. Hopefully, this lays the groundwork for you to create additional policies more in line with your needs.
The next time scans run on your selected resource(s), the configured actions will be executed if your custom policy rules are triggered.