Asset Management
The Asset Management page offers a user-friendly interface for viewing and managing your asset relationships and data. It enables you to handle data for archived repositories, define and manage monorepository structures, and efficiently clean up any residual findings from scanning technologies that you may have removed or replaced.
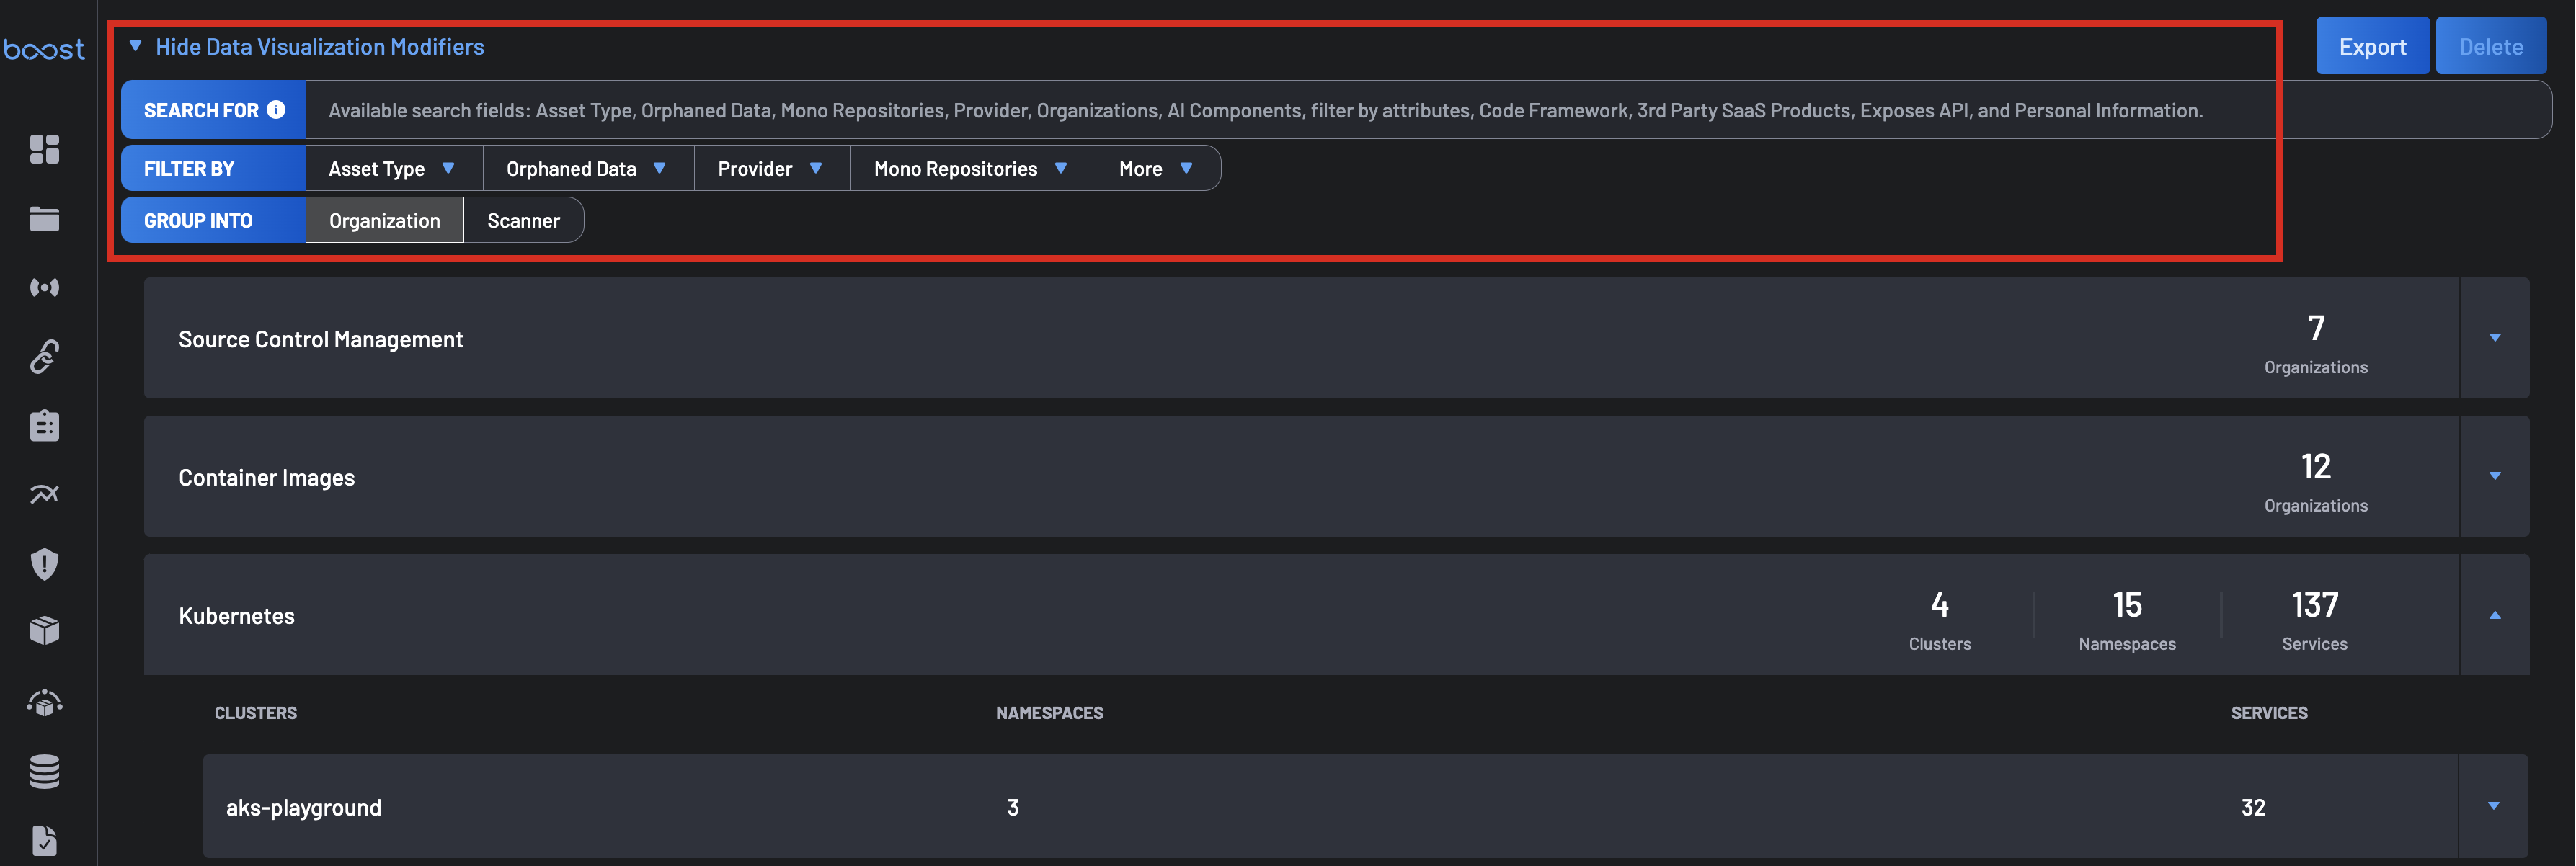
Asset Management Grouping
All assets can be grouped either by their Organization or by the Scanner that contributed data to them. Grouping by Organization helps users define monorepository assets and effectively identify and remove orphaned assets within Boost. On the other hand, grouping by Scanner allows users to clean up orphaned findings within Boost more efficiently.
Group By Organization
Grouping by Organization enables users to categorize assets according to their respective organizations. This method simplifies the management of monorepository structures and facilitates the identification and cleanup of orphaned assets. By providing a clear overview of assets within each organization, it enhances the efficiency of asset management processes within Boost.
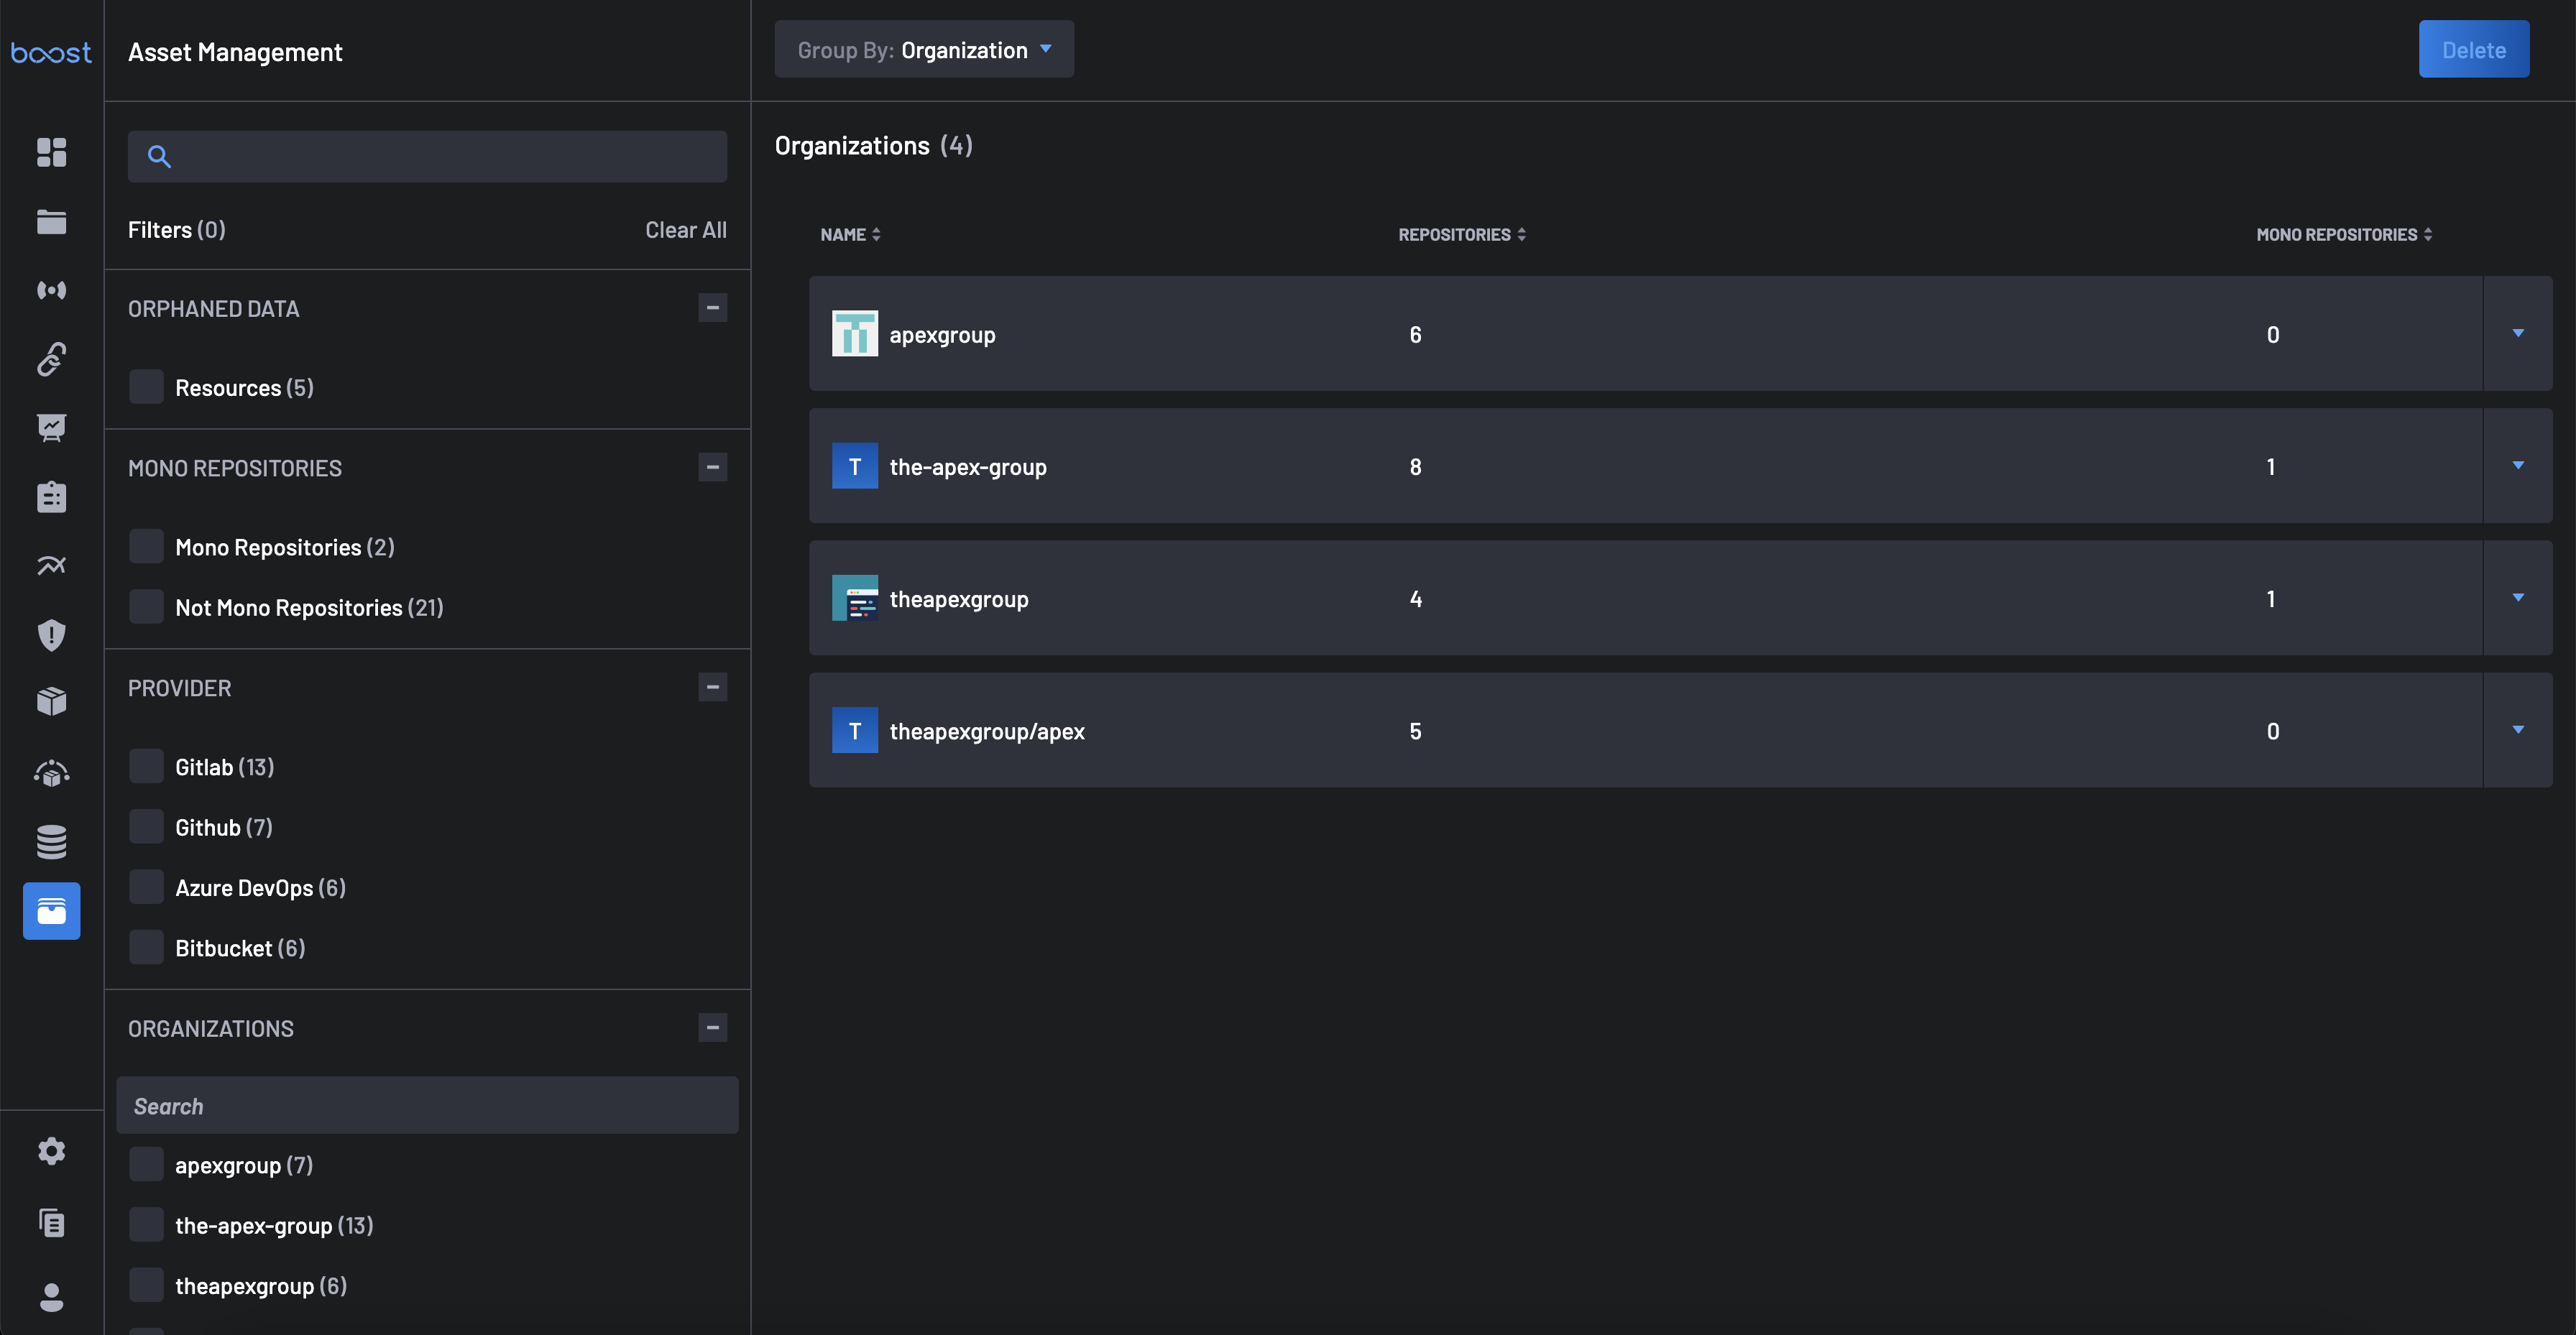
Each organization is displayed with its details, providing better context for managing assets within multi-organization setups.
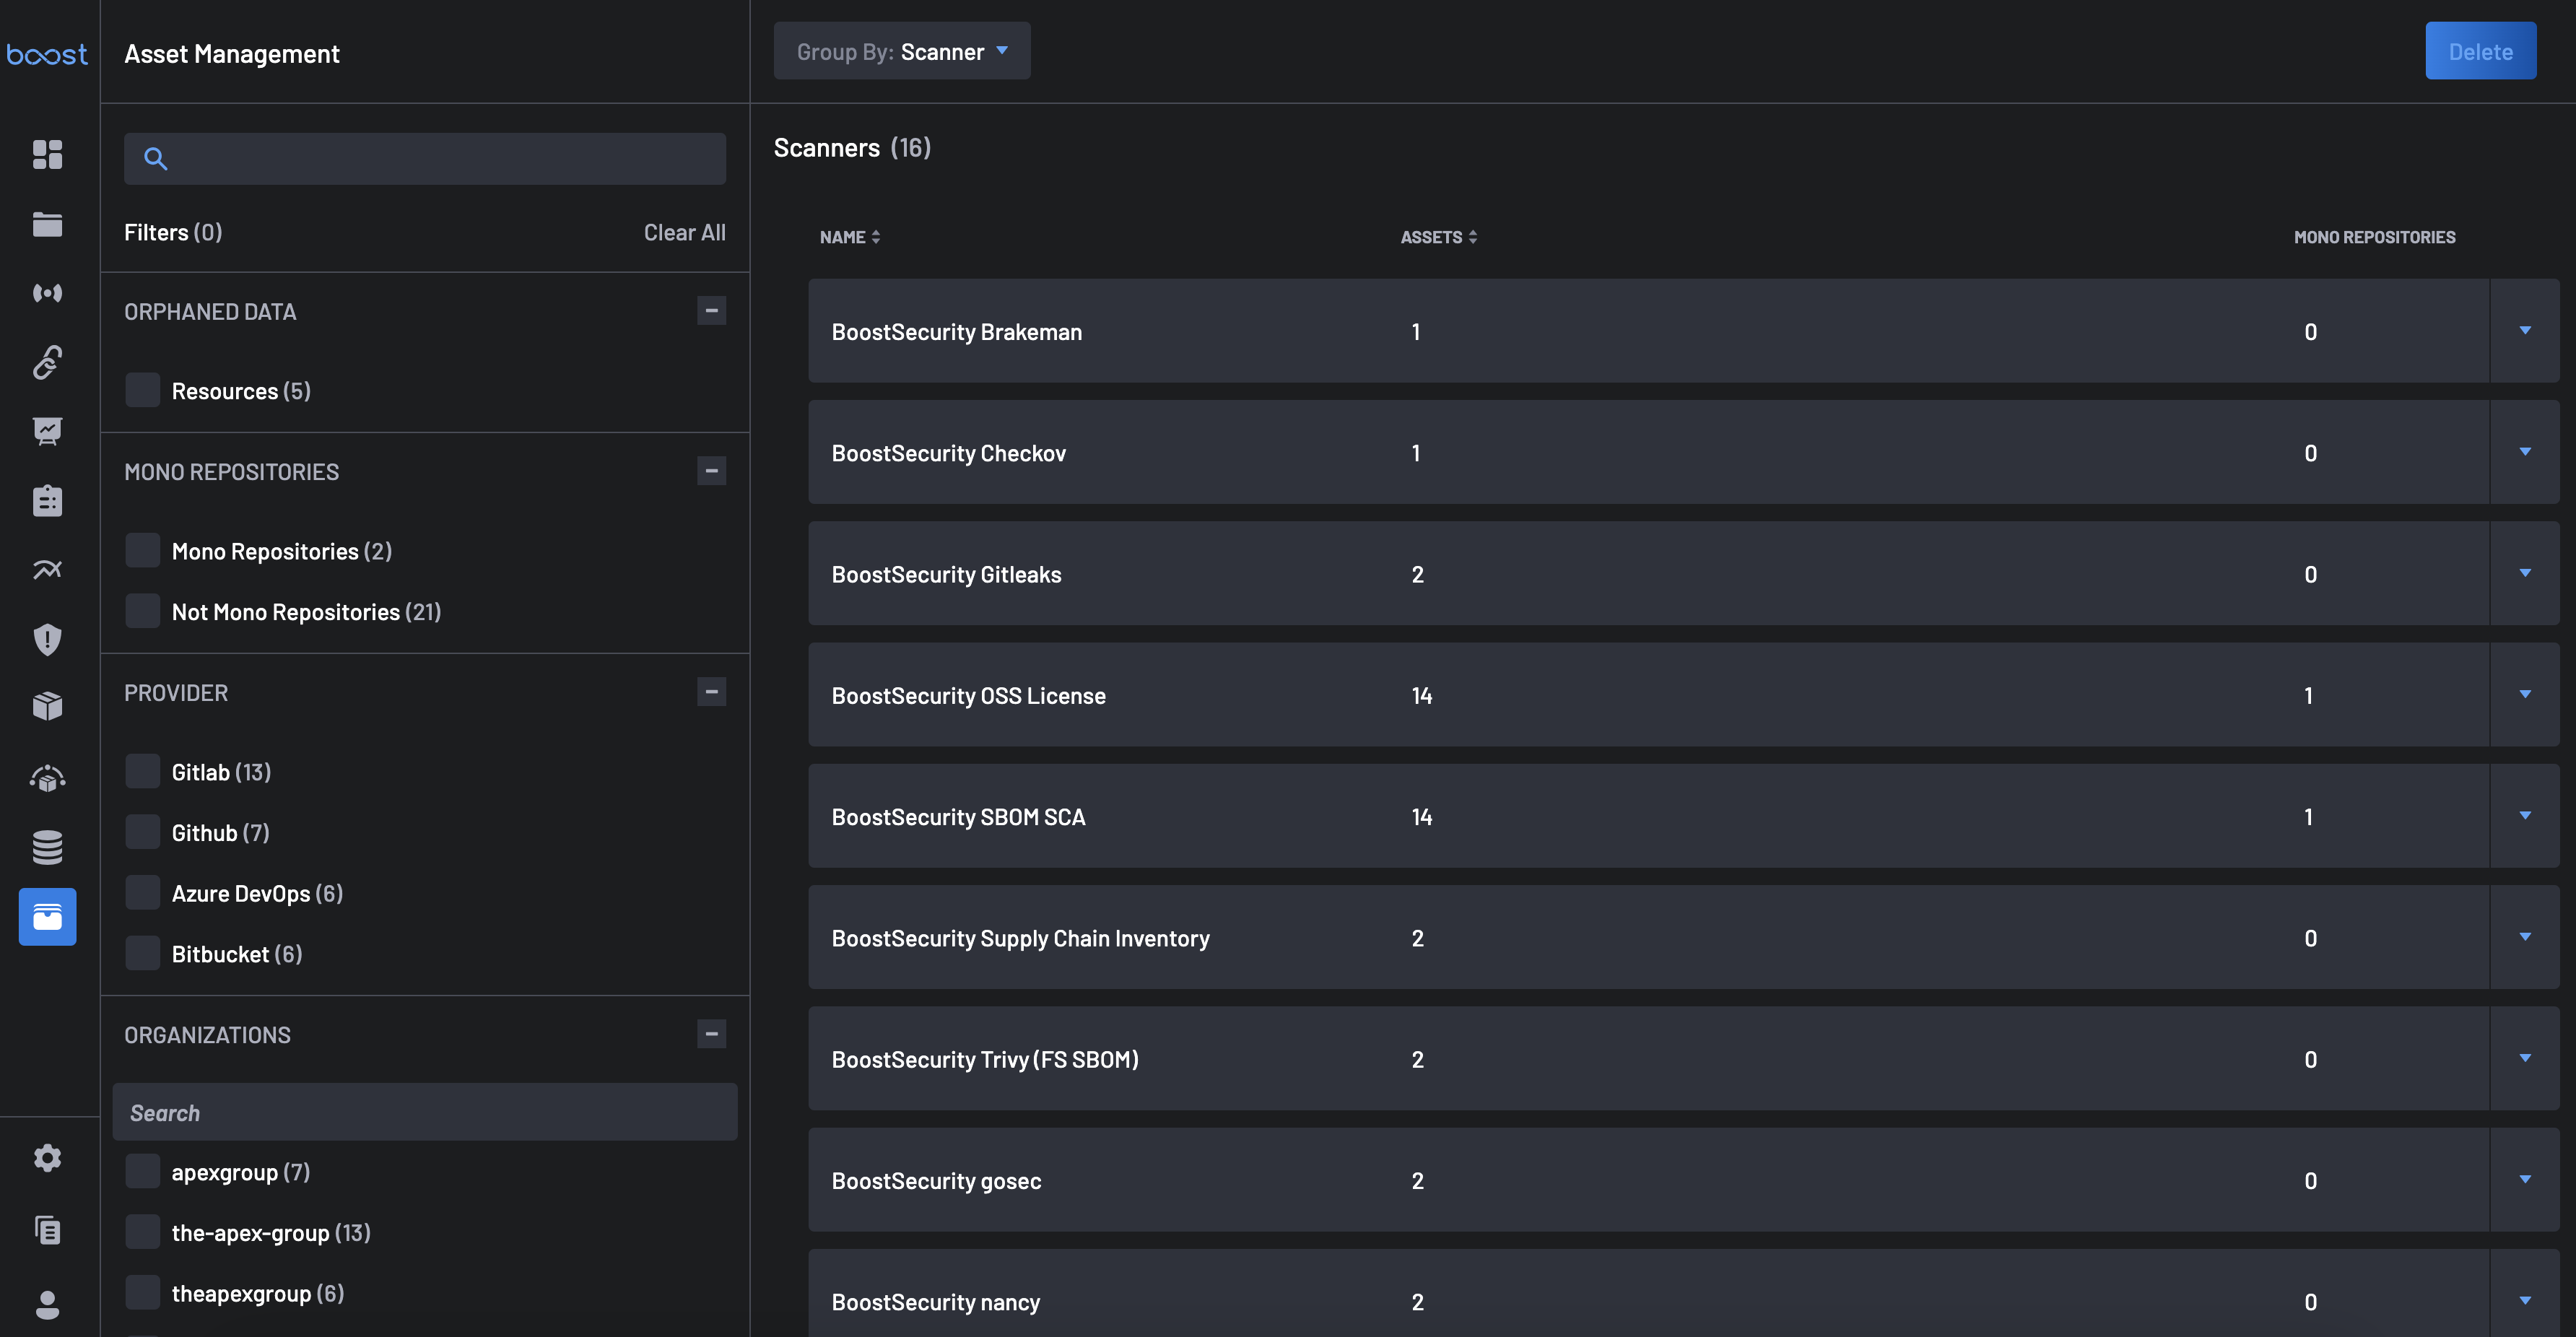
Group By Scanner
Grouping by Scanner enables users to categorize assets according to the scanning technologies that provided data for them. This method allows for efficient management and cleanup of orphaned findings linked to scanners that are no longer active, resulting in a more streamlined and accurate asset management process within Boost.
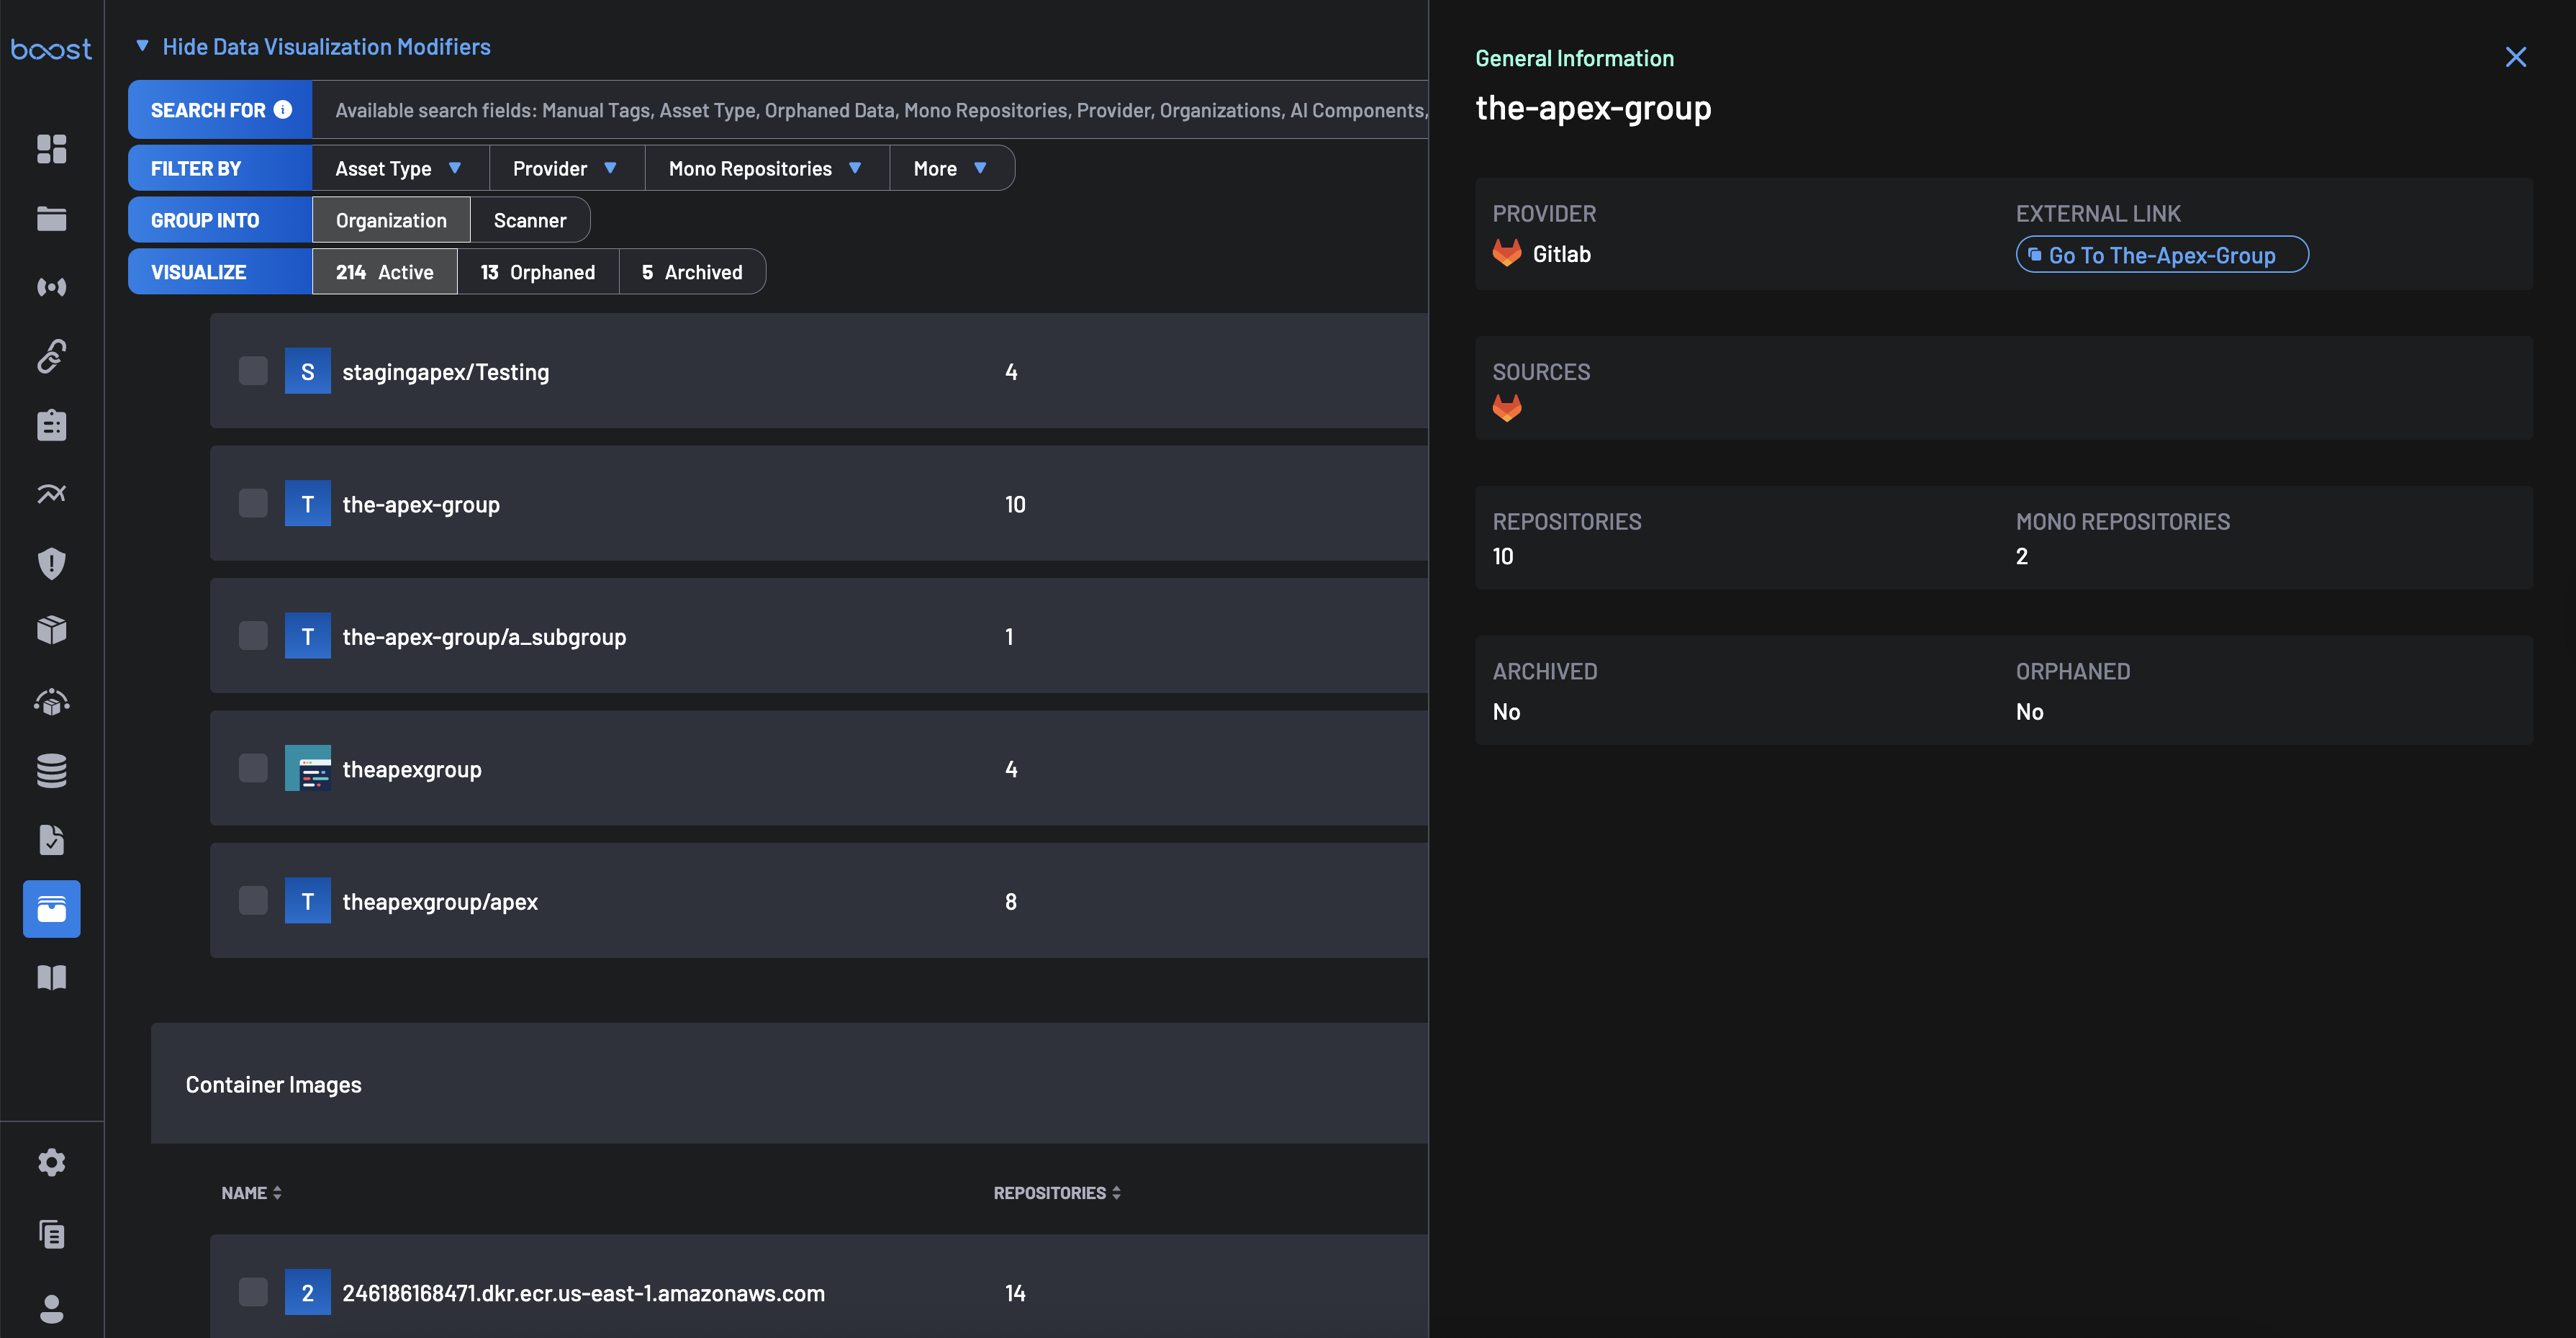
Orphaned Assets & Finding
An Orphaned Asset refers to any asset that was previously linked to a third-party system but is no longer accessible to Boost due to its removal or changes in permissions. By default, Boost retains the data for these assets to accommodate any temporary issues. However, users have the option to permanently delete this data once it is confirmed that the asset is no longer available. This can be managed through the Asset Management page.
An Orphaned Finding is defined as any finding associated with an asset that originated from a scanner that is no longer provisioned for that asset. Essentially, it is a finding that cannot be automatically resolved because the source that detected the finding is no longer able to provide information to Boost.
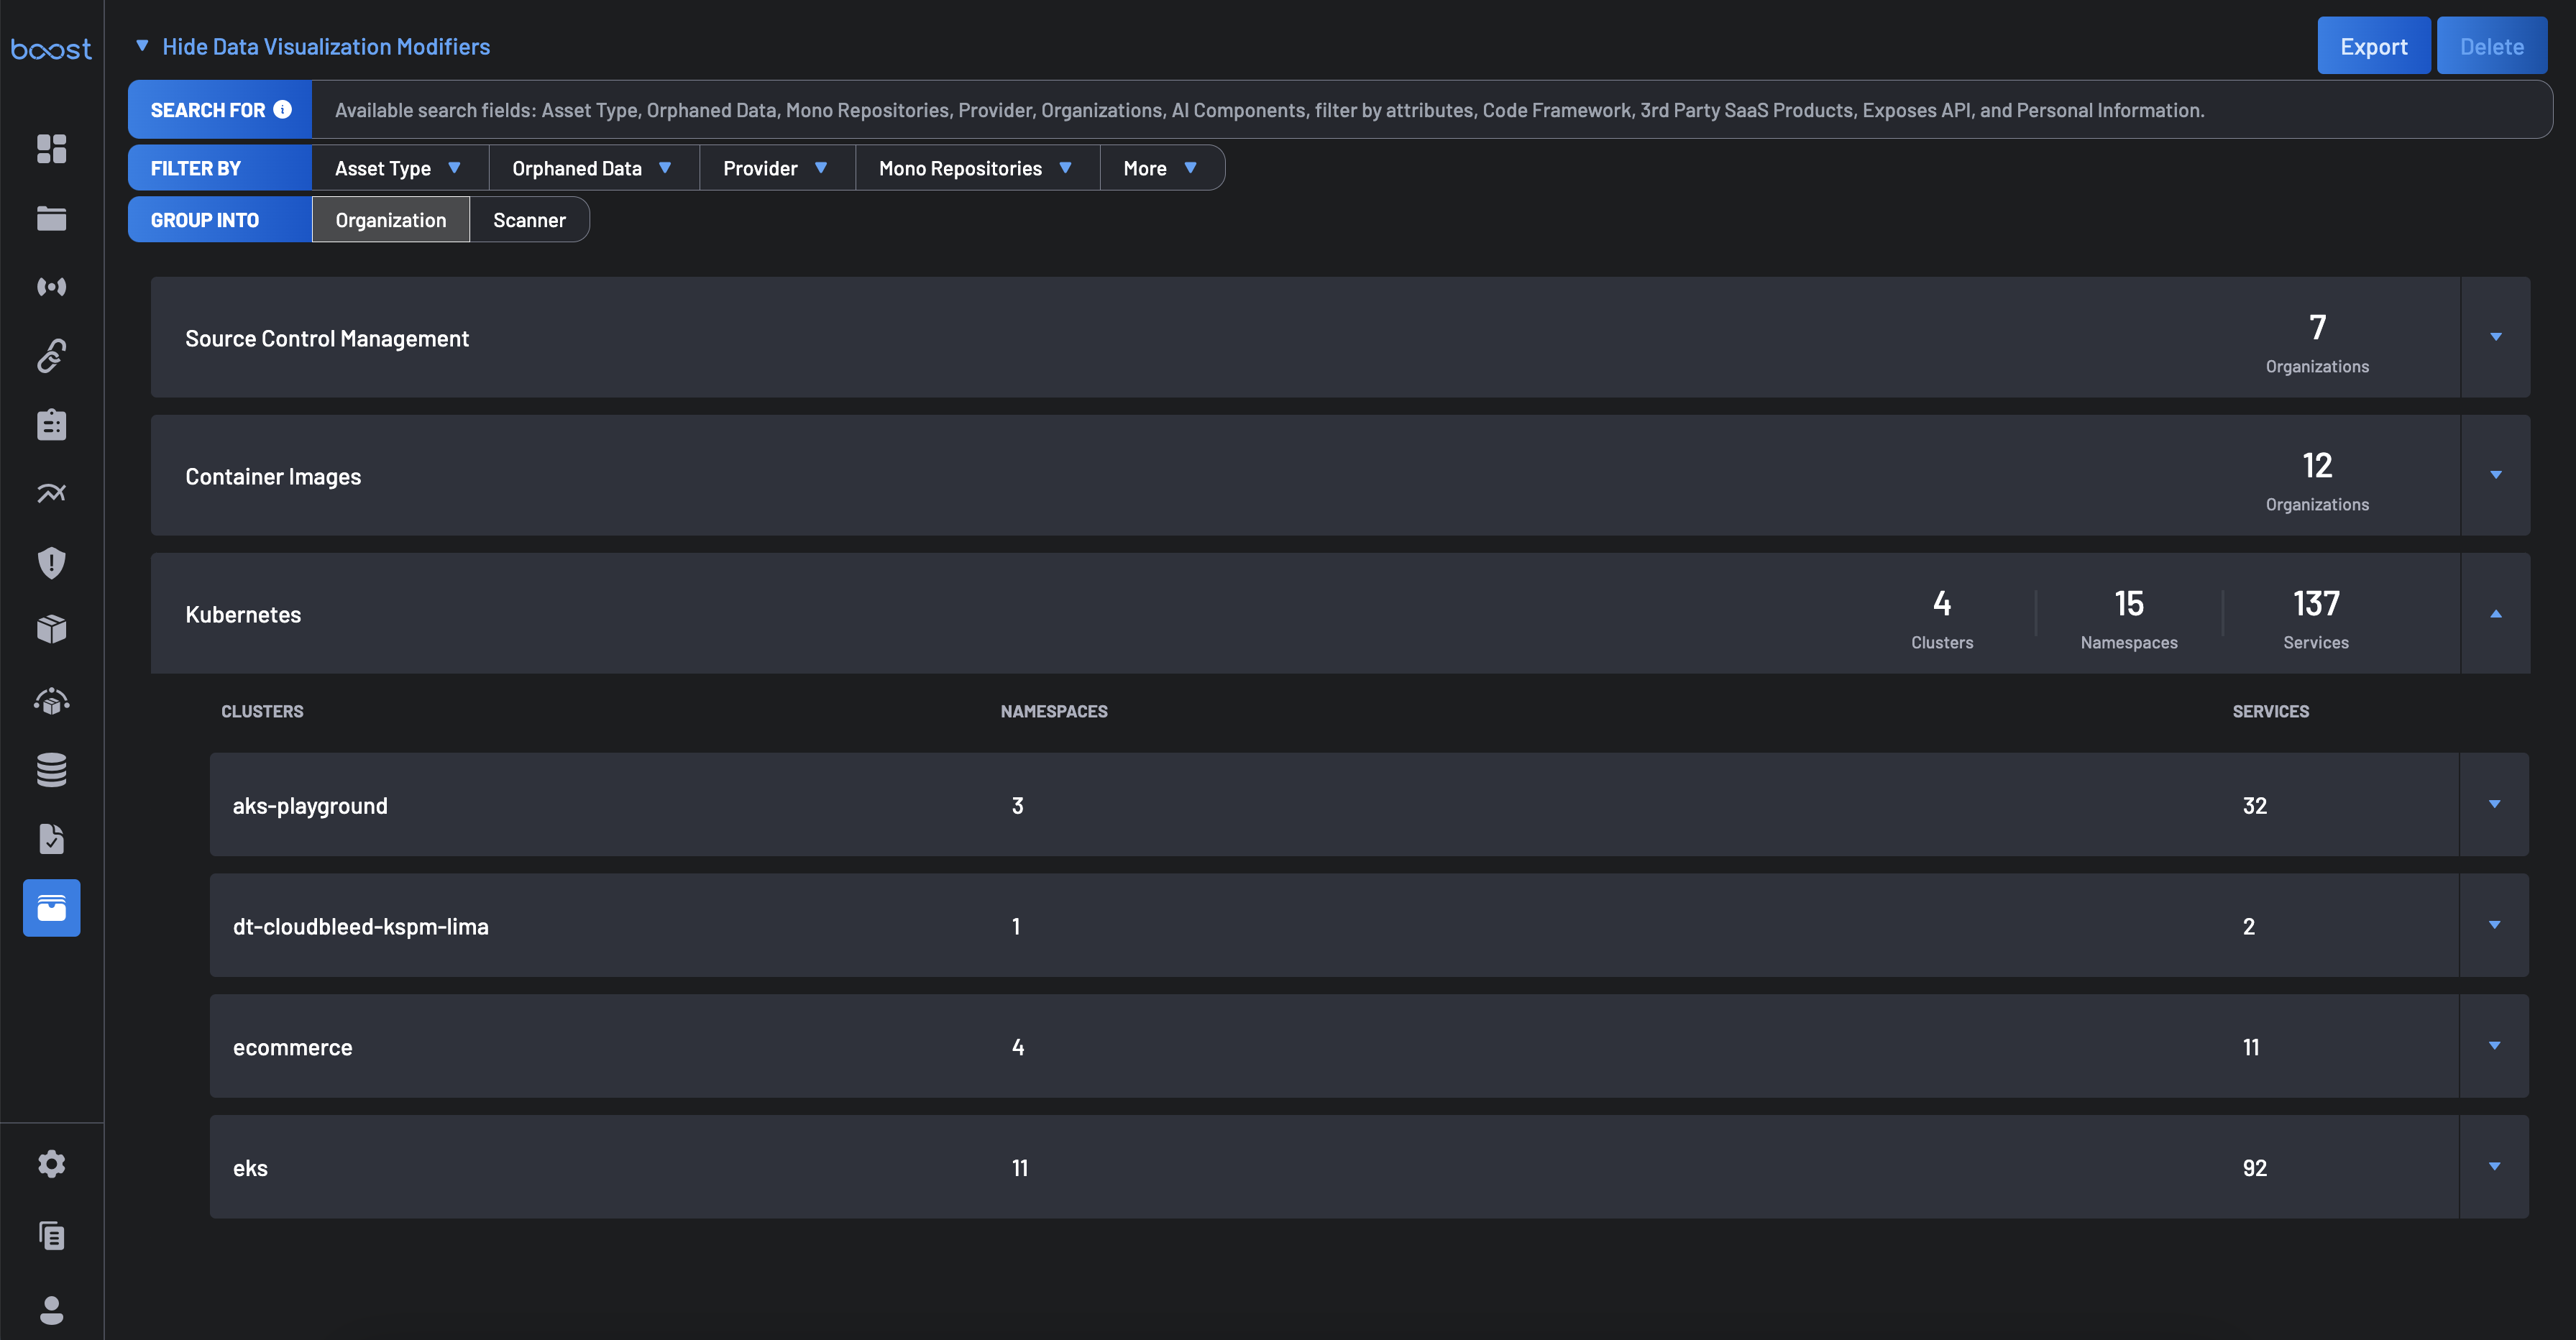
Asset Management Filters
To refine your view and manage orphaned assets more effectively, the asset management page offers advanced filtering options:
- Search: Locate assets by Manual Tag or other identifiers.
- Filter By: Refine results using options like Asset Type, Provider, and more.
- Group Into: Organize assets by Organization or Scanner.
- Visualize: View assets by status — Active, Orphaned, or Archived.
By clicking the More dropdown, several more filters are provided:
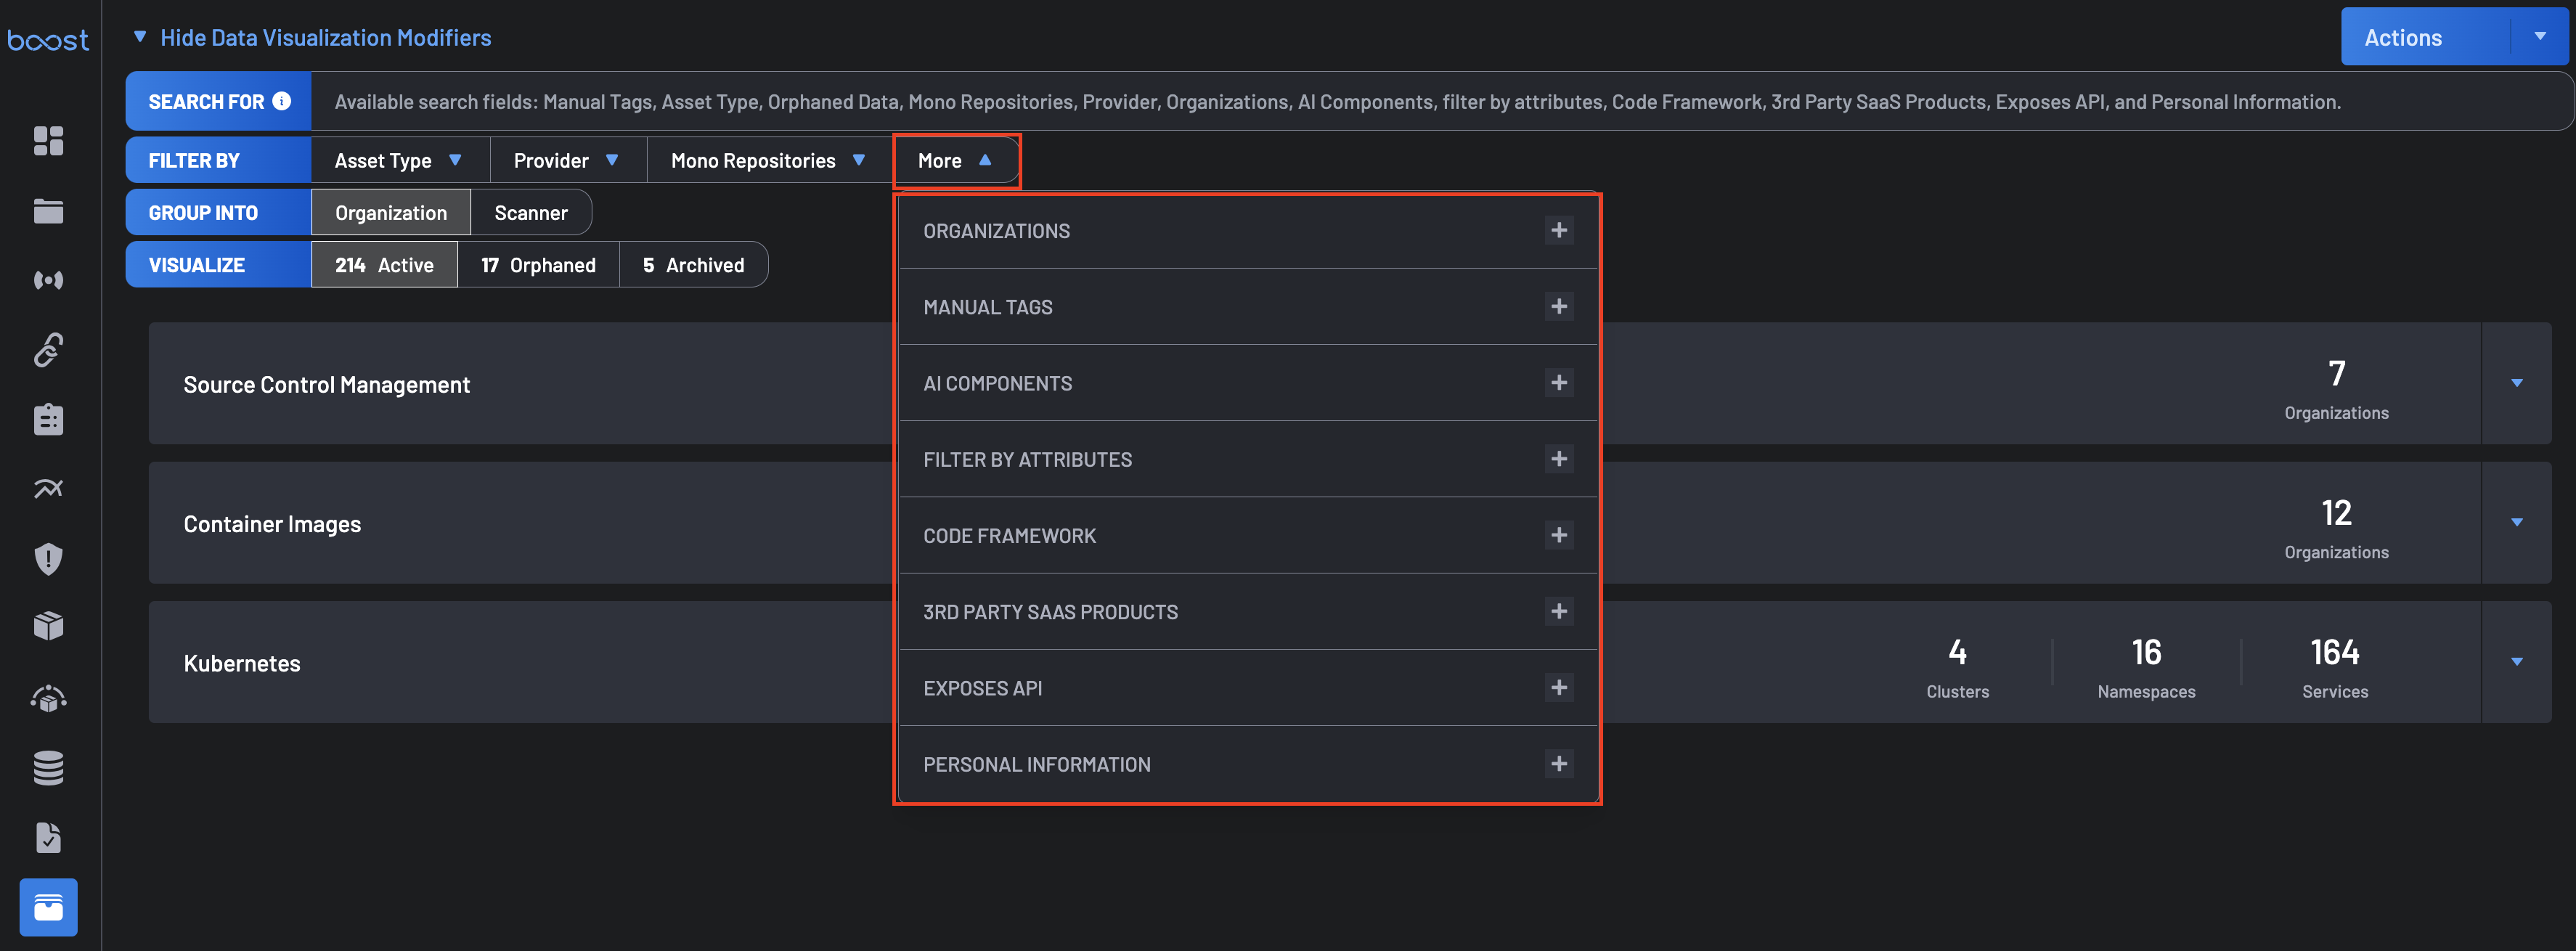
- Mono Repositories: Filter assets to display those within or outside mono repositories, simplifying the management of large, consolidated codebases.
- Provider: Filter assets by the source code management providers, such as GitLab, BitBucket, AWS Code Commit, etc., enabling focused management based on the source of your repositories.
- Asset Type: Filter results based on asset type, i.e., Container Image, Repositories, Kubernetes.
- AI Components: Filter assets that include AI-related components, such as machine learning models, AI-driven tools, or frameworks like TensorFlow or PyTorch.
- Filter By Attributes: Filter assets based on specific attributes, i.e., assets containing specific technologies like HTML, JavaScript, or Python.
- Code Framework: Filter assets by frameworks used in the codebase, such as Django, Express, or NestJS.
- Manual Tags: Filter assests by custom tags assigned to resources such as repositories and organizations.
- 3rd Party SaaS Products: Filter assets linked to external SaaS products, such as AWS, Azure DevOps, GCP, or Slack.
- Exposes API: Filter assets that expose APIs, enabling users to focus on API-related resources.
- Personal Information: Filter assets containing sensitive personal information, such as financial data, medical records, or personal identifiers.
- Organizations:
These filters ensure you can efficiently navigate and manage your assets, keeping your security posture robust and up-to-date.
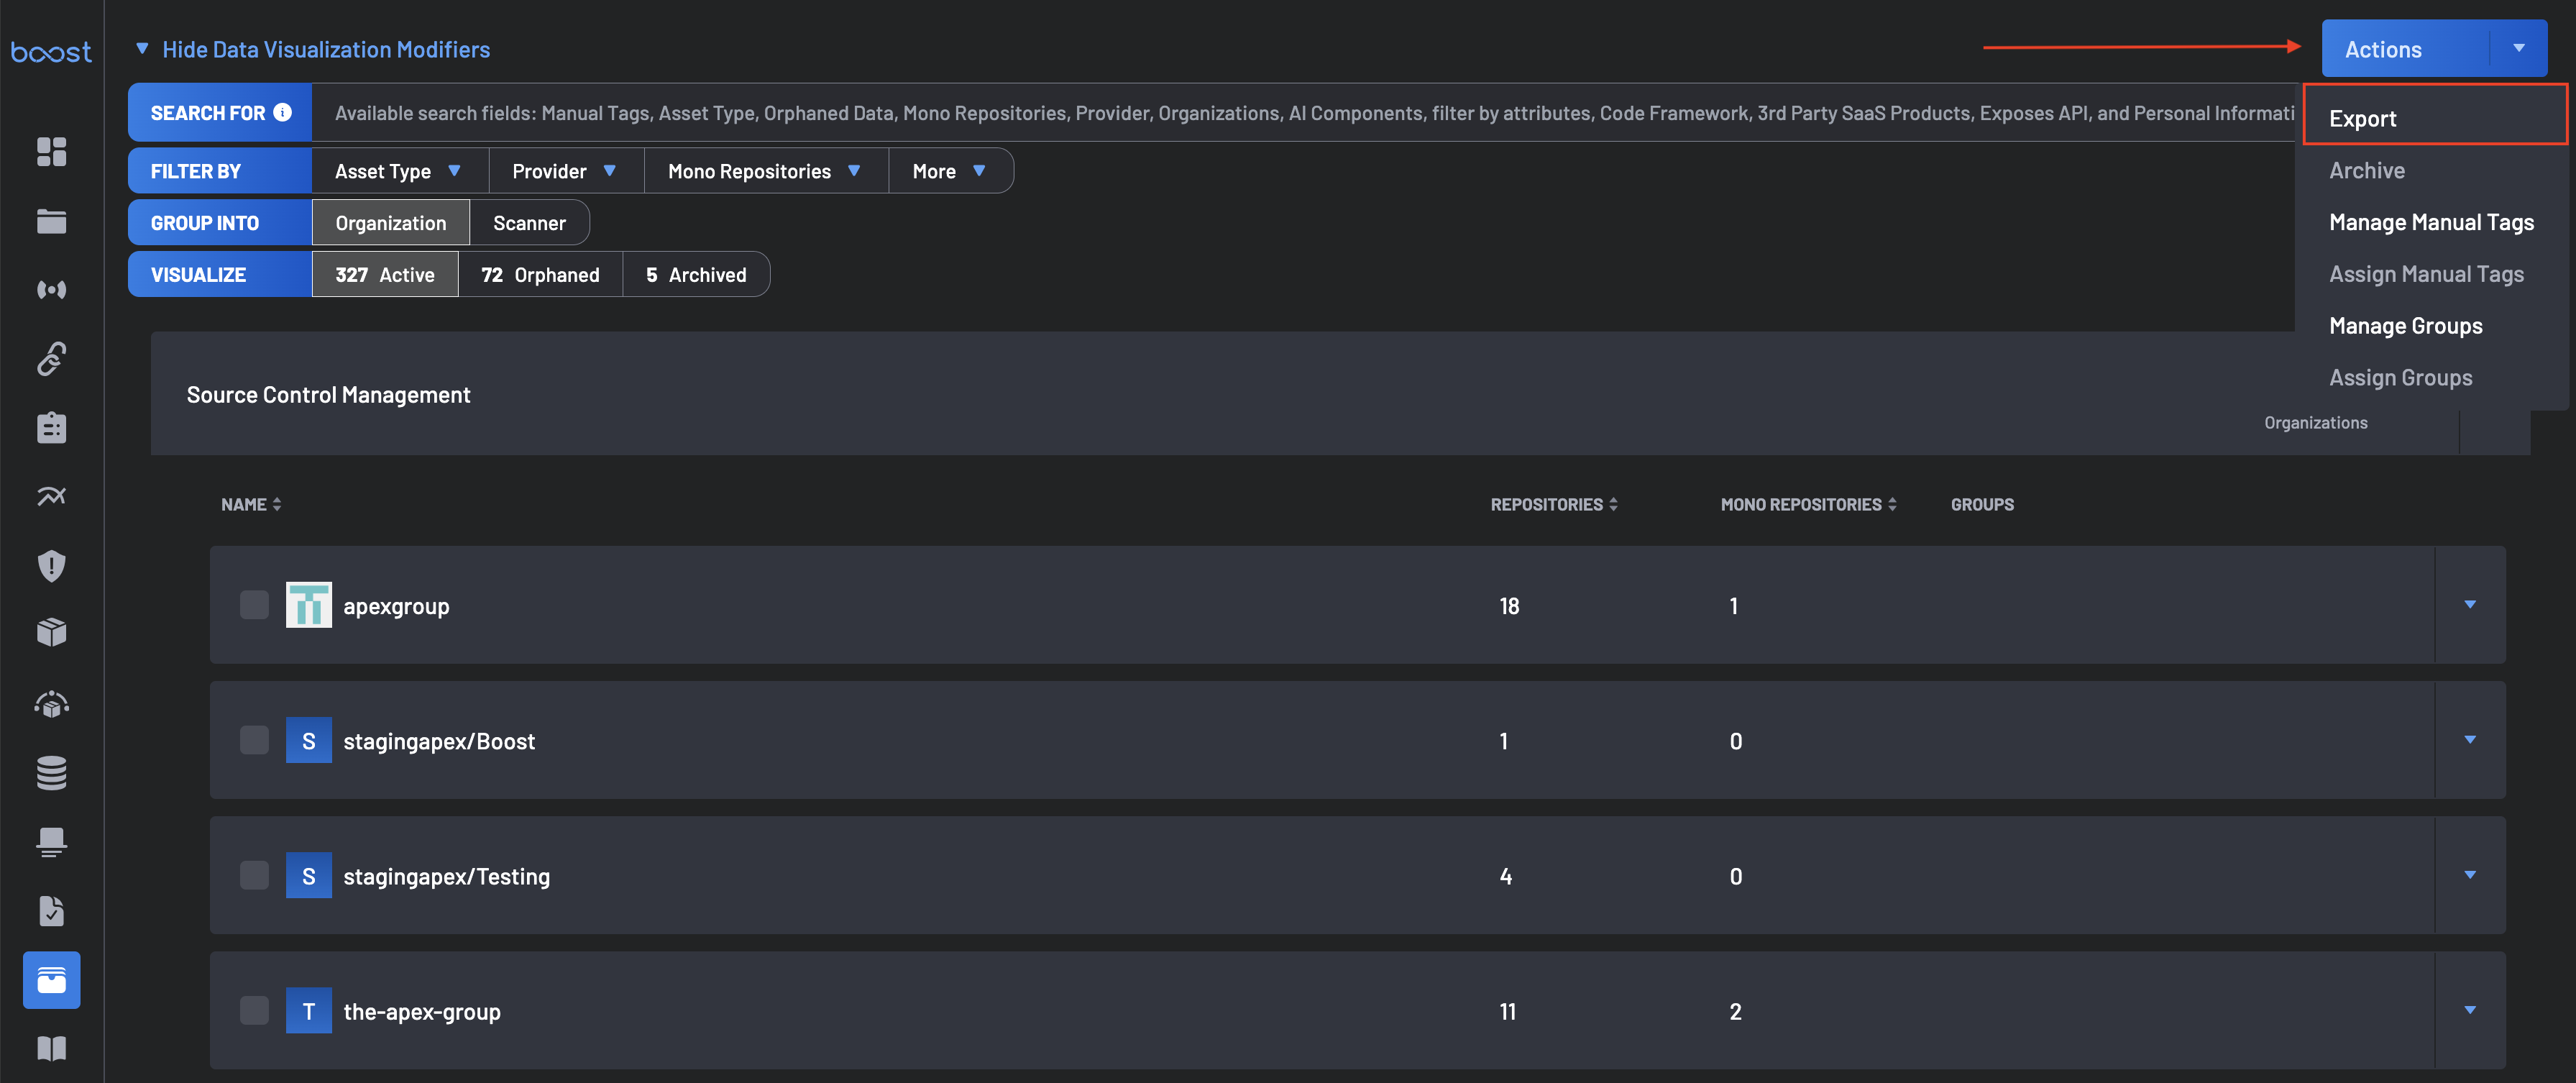
Export Assets
This functionality allows users to easily export detailed information about all or selected assets into a CSV file.
Key Benefits
- Comprehensive Data Export: Export detailed asset information, including organization name, repository type, repository attributes, and more, in a structured CSV format.
- Enhanced Data Management: With the exported CSV file, users can easily filter, sort, and analyze asset data using tools like Excel or Google Sheets.
- Quick Access: The export feature is readily accessible via the Export button on the Asset Management page.
How to Export an Asset
- Navigate to the Asset Management page.
-
Click the Actions button located at the top-right corner of the page and click on Export. This returns details about all assets within your organization in a CSV file.
Important
You can use the "search filter" to restrict the assets to export.
-
The CSV file will be generated and downloaded, containing all relevant asset details.