Scanner Coverage
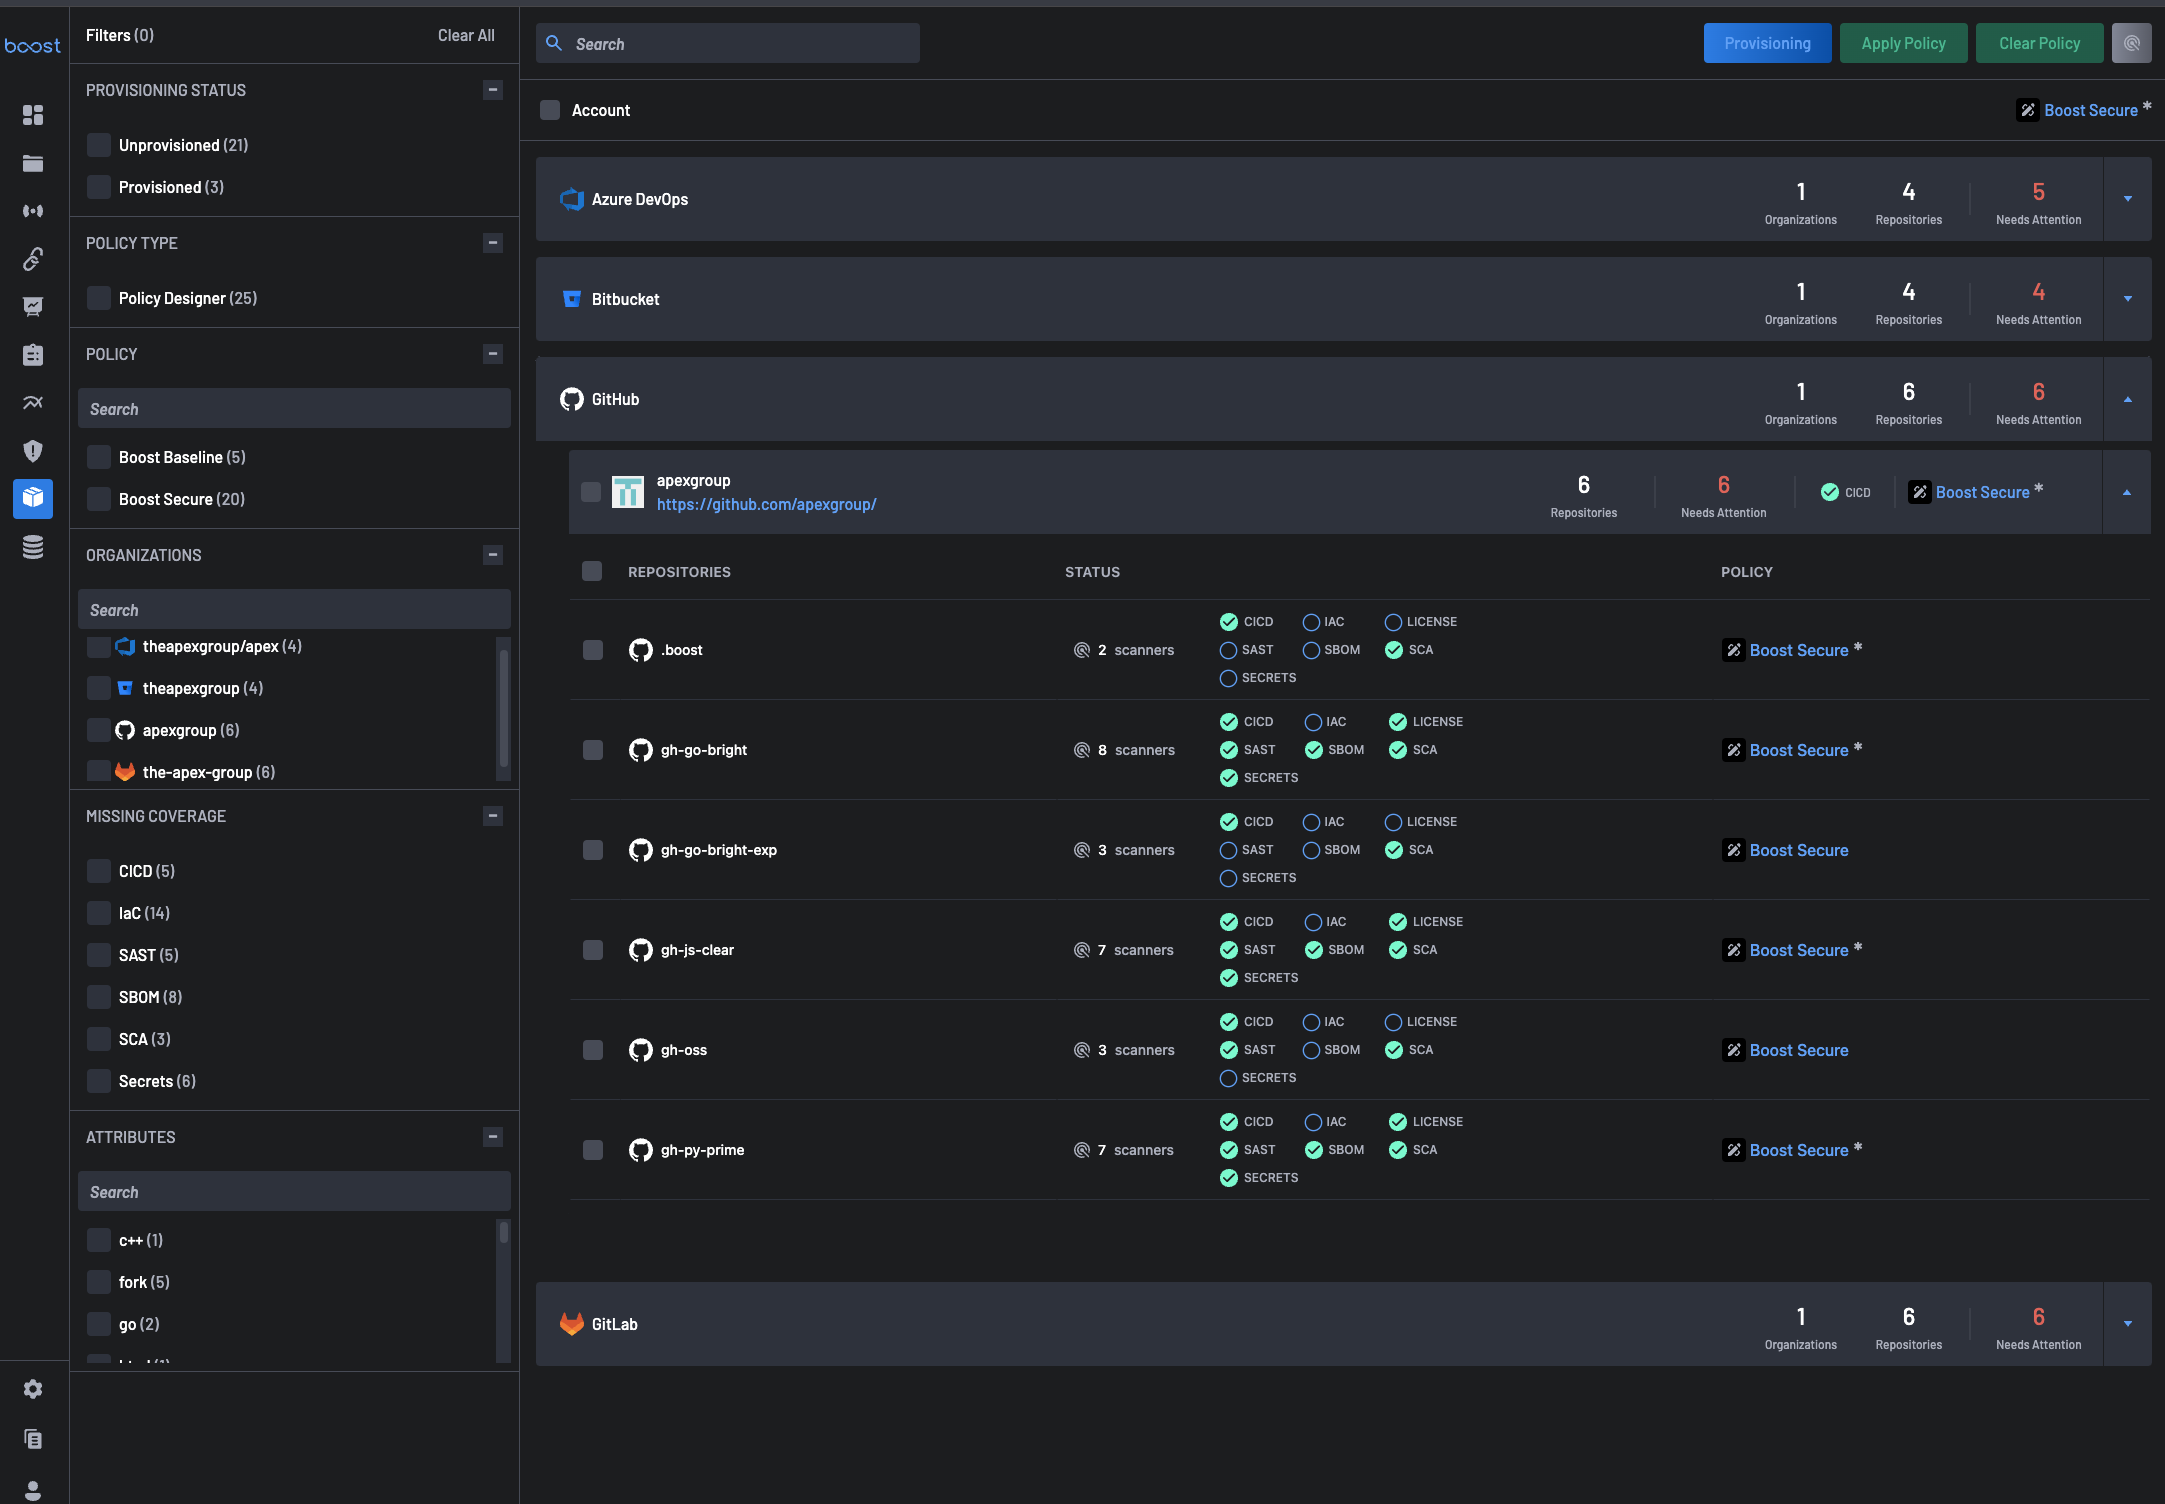
The Scanner Coverage page serves as a centralized dashboard for monitoring the Scanner Coverage status of your organizations. It enhances your ability to manage and improve the security posture of your applications. By providing insights into the coverage of security measures across your repositories, the Scanner Coverage page empowers teams to identify and address potential security gaps effectively.
It offers a comprehensive view of the provisioning status, policy types, organizations, and missing coverage details.
Key Features
Account
The Account section provides users comprehensive visibility and management capabilities across all organizations for Source Code Management (SCM) tools associated with their entire account. It serves as a centralized hub for monitoring Scanner Coverage and repository information.
One of the primary purposes of this section is to enable users to set policies for the entire account that propagate to all assets associated with their account automatically. It eliminates the need for manual policy assignment to individual repositories and ensures consistent enforcement of security standards throughout the organization. By setting policies at the account level, users can streamline policy management and reduce the risk of security gaps or inconsistencies across assets.
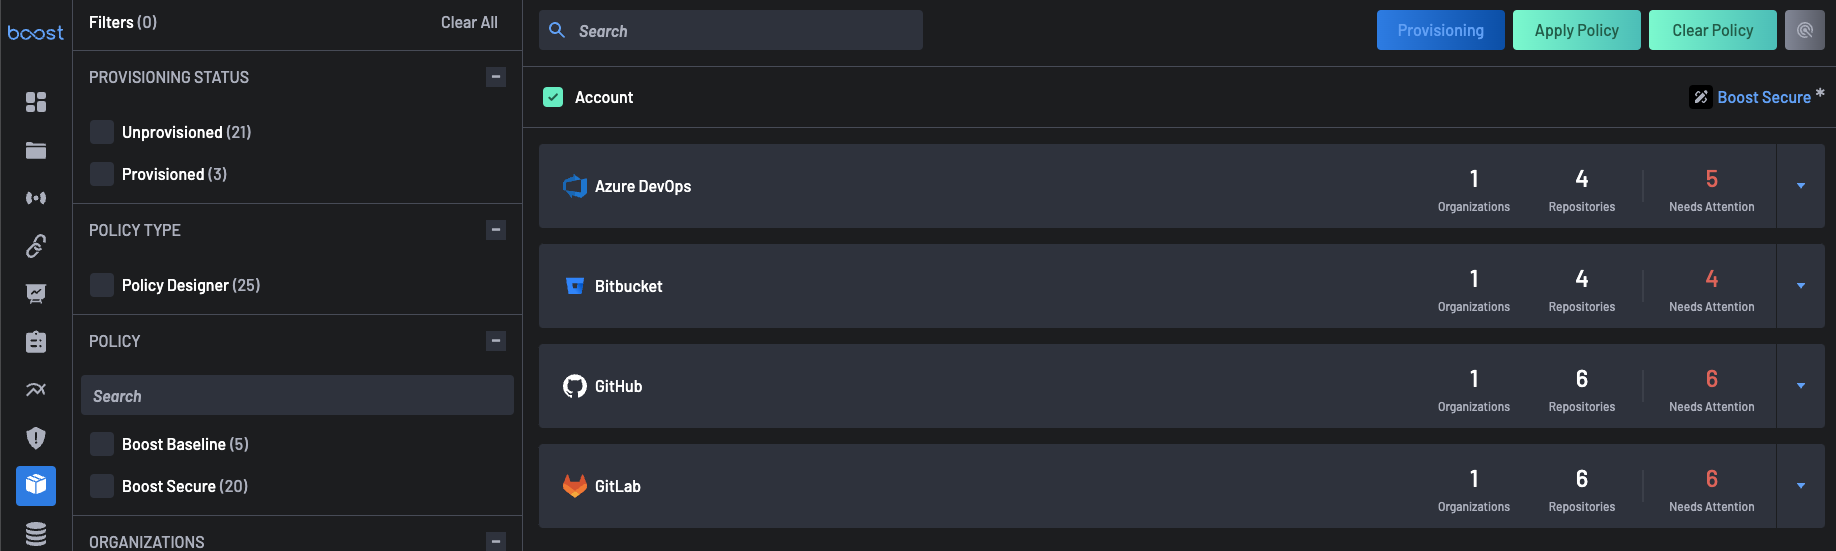
Organizations and Repositories
Users can expand on each SCM to view all the organizations and repositories associated with them alongside their scanner coverage status.

Actions
The Actions section on the Scanner Coverage page offers users a range of functionalities to streamline security management and policy enforcement across assets. Each button serves a distinct purpose in enhancing security posture management within the software supply chain.

1. Provisioning
The Provisioning button lets users initiate provisioning tasks for scanners against selected assets (organizations and repositories). When an asset that can have scanners provisioned against it is selected, the provisioning button becomes active, allowing users to seamlessly navigate to the Provisioning Scanners page for further configuration and deployment.
2. Apply Policy
The Apply Policy button facilitates the application of security policies to selected assets. Users can apply policies defined on the Policy page to all the selected assets, ensuring uniformity and consistency in policy enforcement. Boost Security employs an inheritance behavior, where account-level policies apply to all assets that do not have an explicitly applied policy.
Similarly, organization-level policies apply to all repositories under the respective organization. The UI distinguishes between explicitly set policies and inherited policies by displaying an asterisk (*) next to explicitly set policies.
3. Clear Policy
The Clear Policy button removes any explicitly set policies from selected assets, reverting them to their inherited policy state. This functionality allows users to reset policy configurations and align assets with organizational or account-level policies as needed.
4. Configure Scanners
The Configure Scanners button allows users to set global scanner configurations on specific scanners, which are utilized whenever users provision these scanners. It is essential to note that users can only provision these scanners once they have been configured. The scanners in this category include:
- Gitleaks
- CodeQL
- Semgrep
- Semgrep Pro
- Snyk
Filters
Filters play a crucial role within the Scanner Coverage page, enabling users to refine their analysis and focus on specific aspects of Scanner Coverage. By harnessing the power of filters, users can efficiently navigate through repositories, policies, and organizational structures to gain deeper insights and take targeted actions.
1. Needs Attention
This filter helps prioritize assets that require immediate action. It offers two options:
-
Needs Attention: Highlights repositories with configuration issues, i.e., failing scans that may need urgent intervention.
-
Doesn't Need Attention: Filters for repositories that are currently compliant and don’t require changes.
2. Provisioning Status
This filter enables users to view results based on the provisioning status of repositories. There are two types of provisioning status:
- Provisioned: This signifies the resources provisioned with security scanners.
- Unprovisioned: These are resources that are yet to be provisioned.
3. Policy Type
Users can filter repositories based on policy types, such as
- Policy Designer: These policies were designed for specific purposes.
- Built-in: Filter results based on built-in policies.
4. Manual Tags
This filter allows users to narrow results based on custom manual tags applied to assets. These tags are user-defined metadata used to group assets by business logic, environments, ownership, or other internal categorizations.
Example use cases include:
- Filtering for repositories tagged as
criticalto prioritize mission-critical coverage. - Selecting assets tagged as
accepted-riskto exclude known, acknowledged issues from triage. - Tagging legacy systems or temporary projects for specific scanning rules.
5. Policy
Users can filter only those resources with a specific Policy or Policies applied to them either explicitly or via Policy inheritance.
6. Organizations
With the search bar, users can find just those Organizations they wish to review, apply policies to, or provision scanners against. Select those Organizations with this filter to remove all other Organizations and their child repositories from your view.
7. Missing Coverage
This is one of the more powerful filters on this page, allowing you to quickly view resources with gaps in scanner coverage within a particular detection category. For example, you can quickly use these filters along with Attributes to identify all assets missing SAST coverage that are Ruby applications and then bulk provision Brakeman to fill that need.
8. Attributes
Boost Security automatically populates attributes with data from your SCM to help you quickly identify repositories written in a specific language or with a particular type of visibility. Use these filters to focus your attention on the subset of repositories to which you would like to assign specific Policies or provision specific scanners.
9. Scanner
Users can filters repositories based on scanners provisioned against them.