Scans
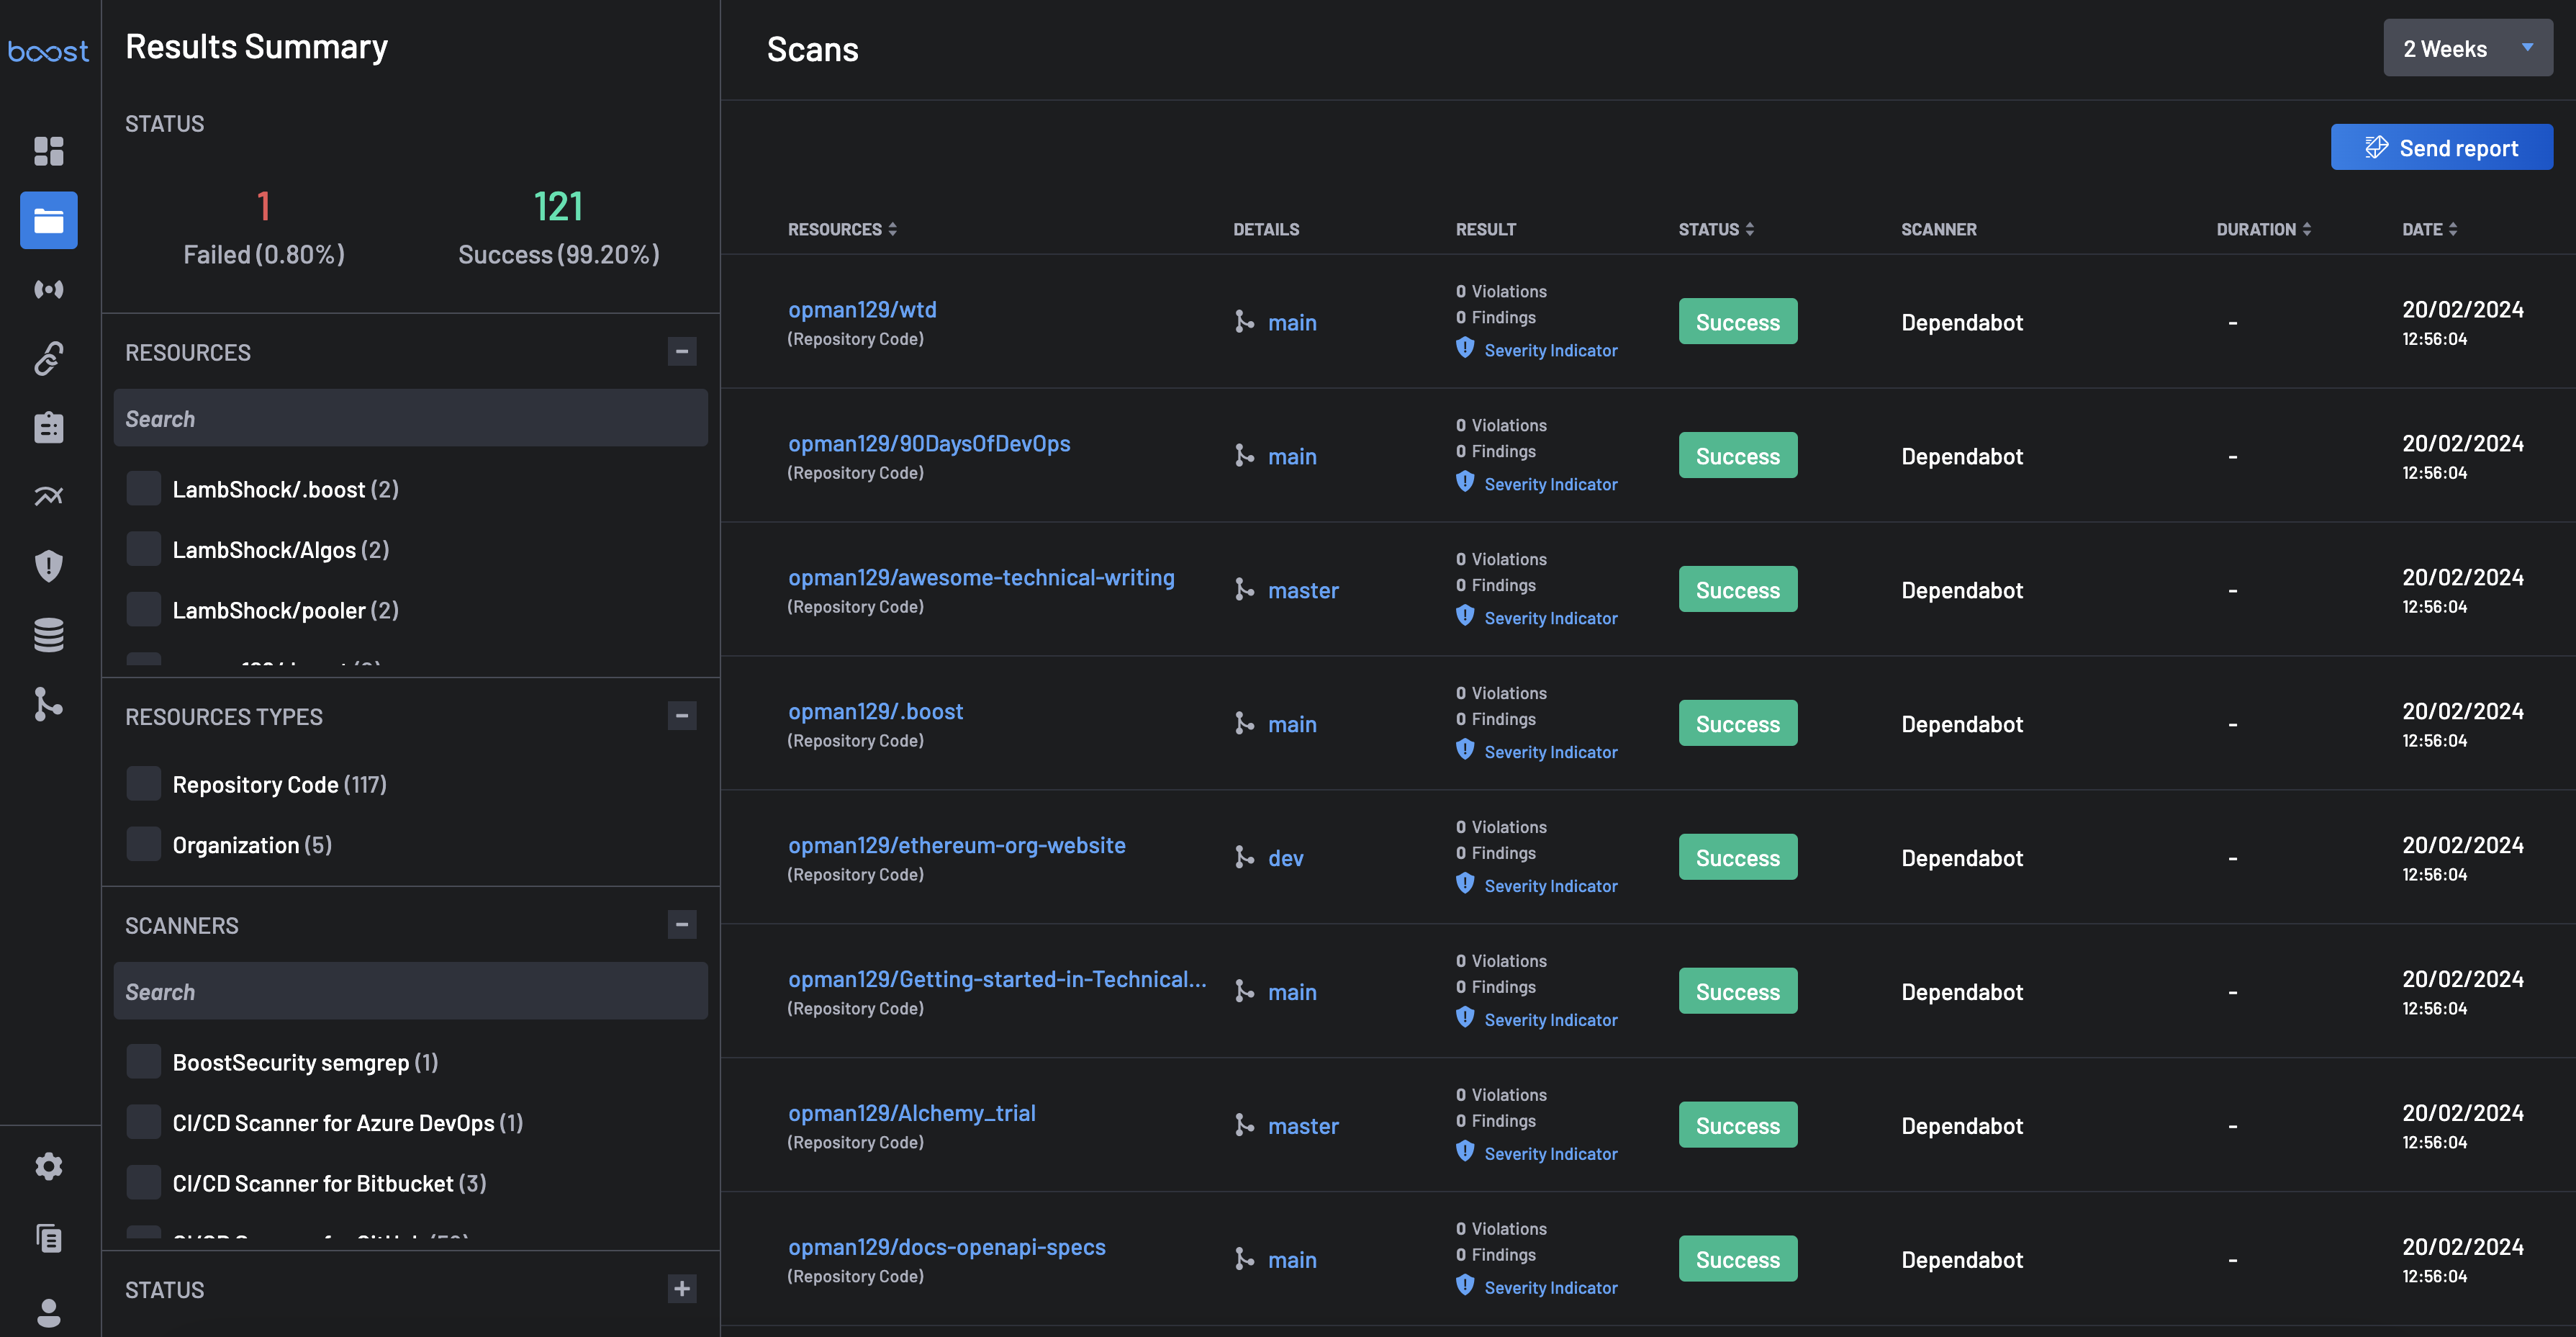
The Scans page contains all the details about security scans that have happened across your account. Here, you'll find detailed resources to help you understand and manage the scanning process within the Boost Security platform.
The scan history shows the applied policy, which provides more insight into how individual scans were processed to create the Findings and Violation counts you see in your scans.
Scan Filters
The filters functionality on the Scans page provides powerful capabilities for navigating, organizing, and analyzing large volumes of scan results.

This panel allows you to fine-tune the scan data you're viewing based on multiple contextual dimensions:
View Filter
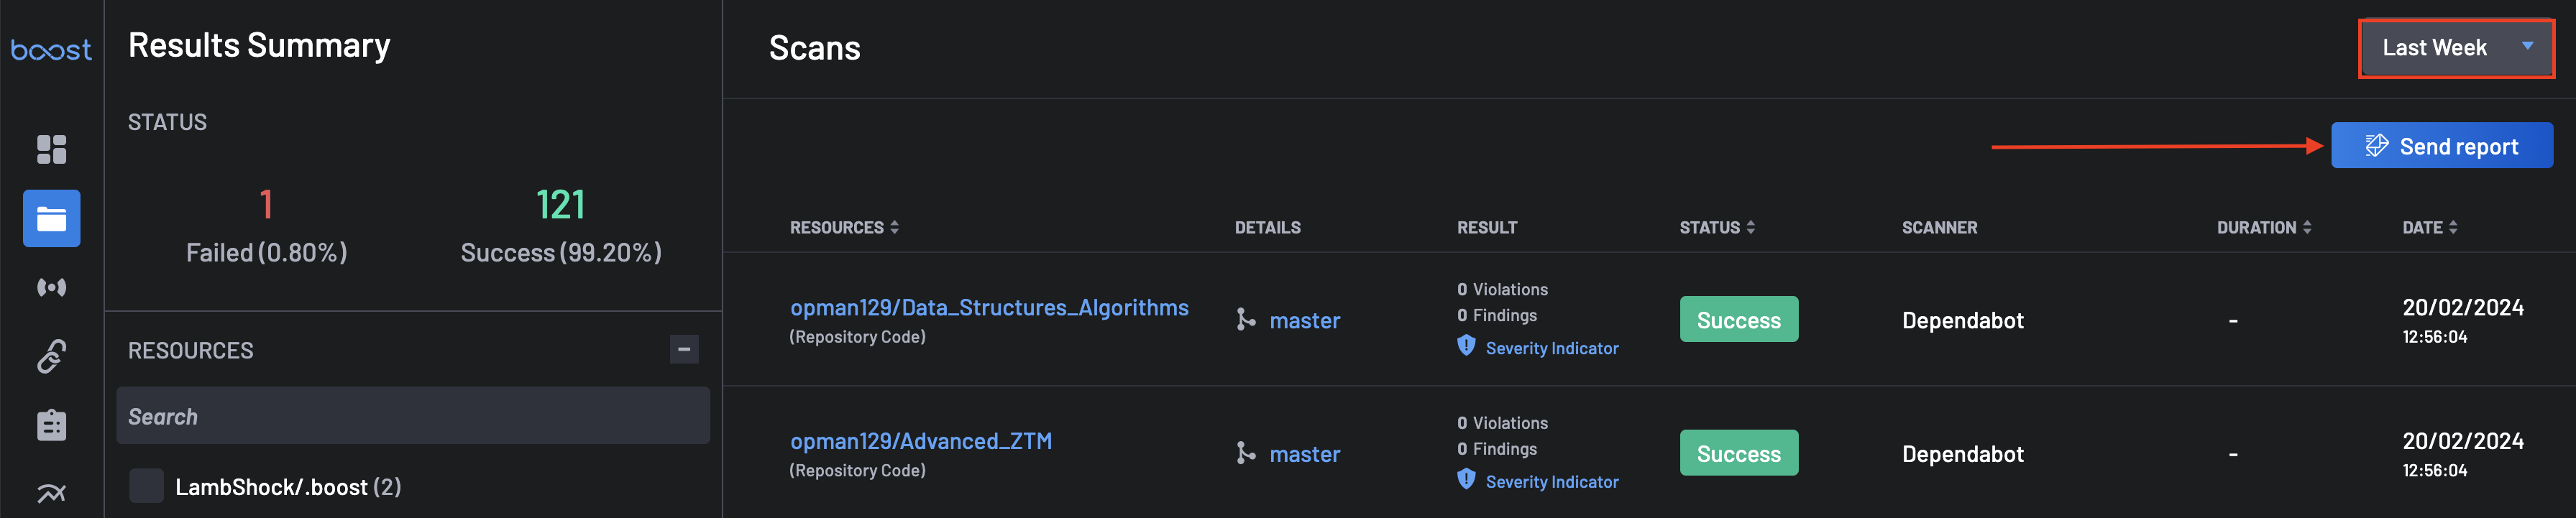
- Period Selector: Choose a time range for scan data visualization. The default option is Last week, but you can switch to other preset periods e.g., 2 weeks or 4 weeks, depending on your reporting needs.
Filter By
These dropdown menus allow you to refine your view using various metadata:
- Resource Types: Filter scans by the category or type of resource scanned (e.g., Repository Code, Organization, Container Image).
- Resources: Narrow down scans to specific resource names (repositories, organizations) within your environment.
- Scanners: Choose from different integrated scanners used in your organization (e.g., Boost Security Scanner, Semgrep, Supply Chain, etc.).
- Status: Filter by the state of the scan, such as
SuccessorFailed. - Period: Another quick access to change the time range of data displayed without leaving the page.
- Result Types: View scans that resulted in specific outcome categories, typically
Failed Check,Findings, orViolations. - Manual Tags: Futher narrow down scan results by the assigned manual tags to resources.
Visualize
- Failures / Successes Summary: This visual section offers an immediate glance at the overall scan results. For
Scan History Reports
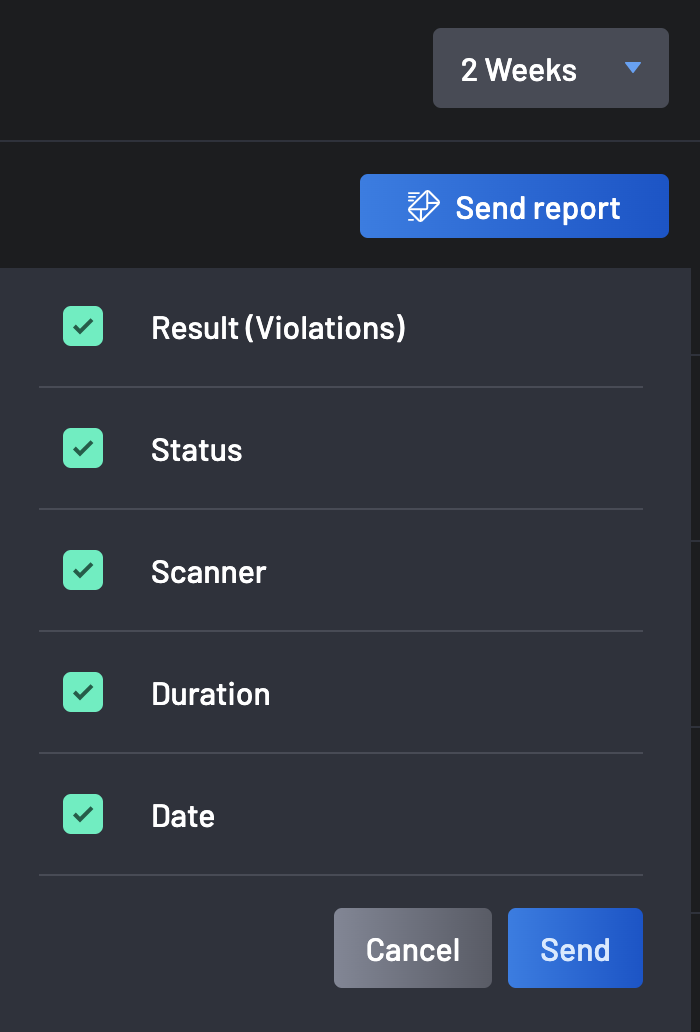
The Scan History report provides a detailed history view of all your scans in your organization. Using the Scan History PDF Report feature is straightforward:
-
Navigate to the Scans page.
-
Using the Period, select the time period for the report: Last Week, 2 weeks, 4 weeks.

-
Click on the Send Report button located at the top-right of the screen.
-
All scan history columns are selected by default. You can choose to deselect some columns if necessary. They include Resources, Resources(Manual Tags) Status, Scanner, and Result(Violations). Click on the Send button to proceed.
-
The PDF report will be sent to your registered email address within a few minutes from "no-reply@boostsecurity.io" titled "Boost Scans Report".