Managing Multiple Branches
Boost supports multi-branch monitoring, giving teams the flexibility to scan, track, and manage multiple branches within a single repository. This is especially valuable for organizations that maintain multiple environments (e.g., development, staging, production) or support parallel application versions (e.g., v1.x, v2.x).
With this feature, you’re no longer limited to monitoring a single branch or relying solely on pull request workflows. Boost enables full baseline scanning, automated ticket creation, and comprehensive reporting across every defined branch.
Why Multi-Branch Support Matters
Multi-branch configuration allows you to:
- Run independent security or quality scans per branch.
- Align issue tracking and reporting with your branching strategy.
- Support parallel release cycles and long-lived version branches.
- Avoid reconfiguring repositories when switching environments.
How to Configure Multi-Branch Monitoring
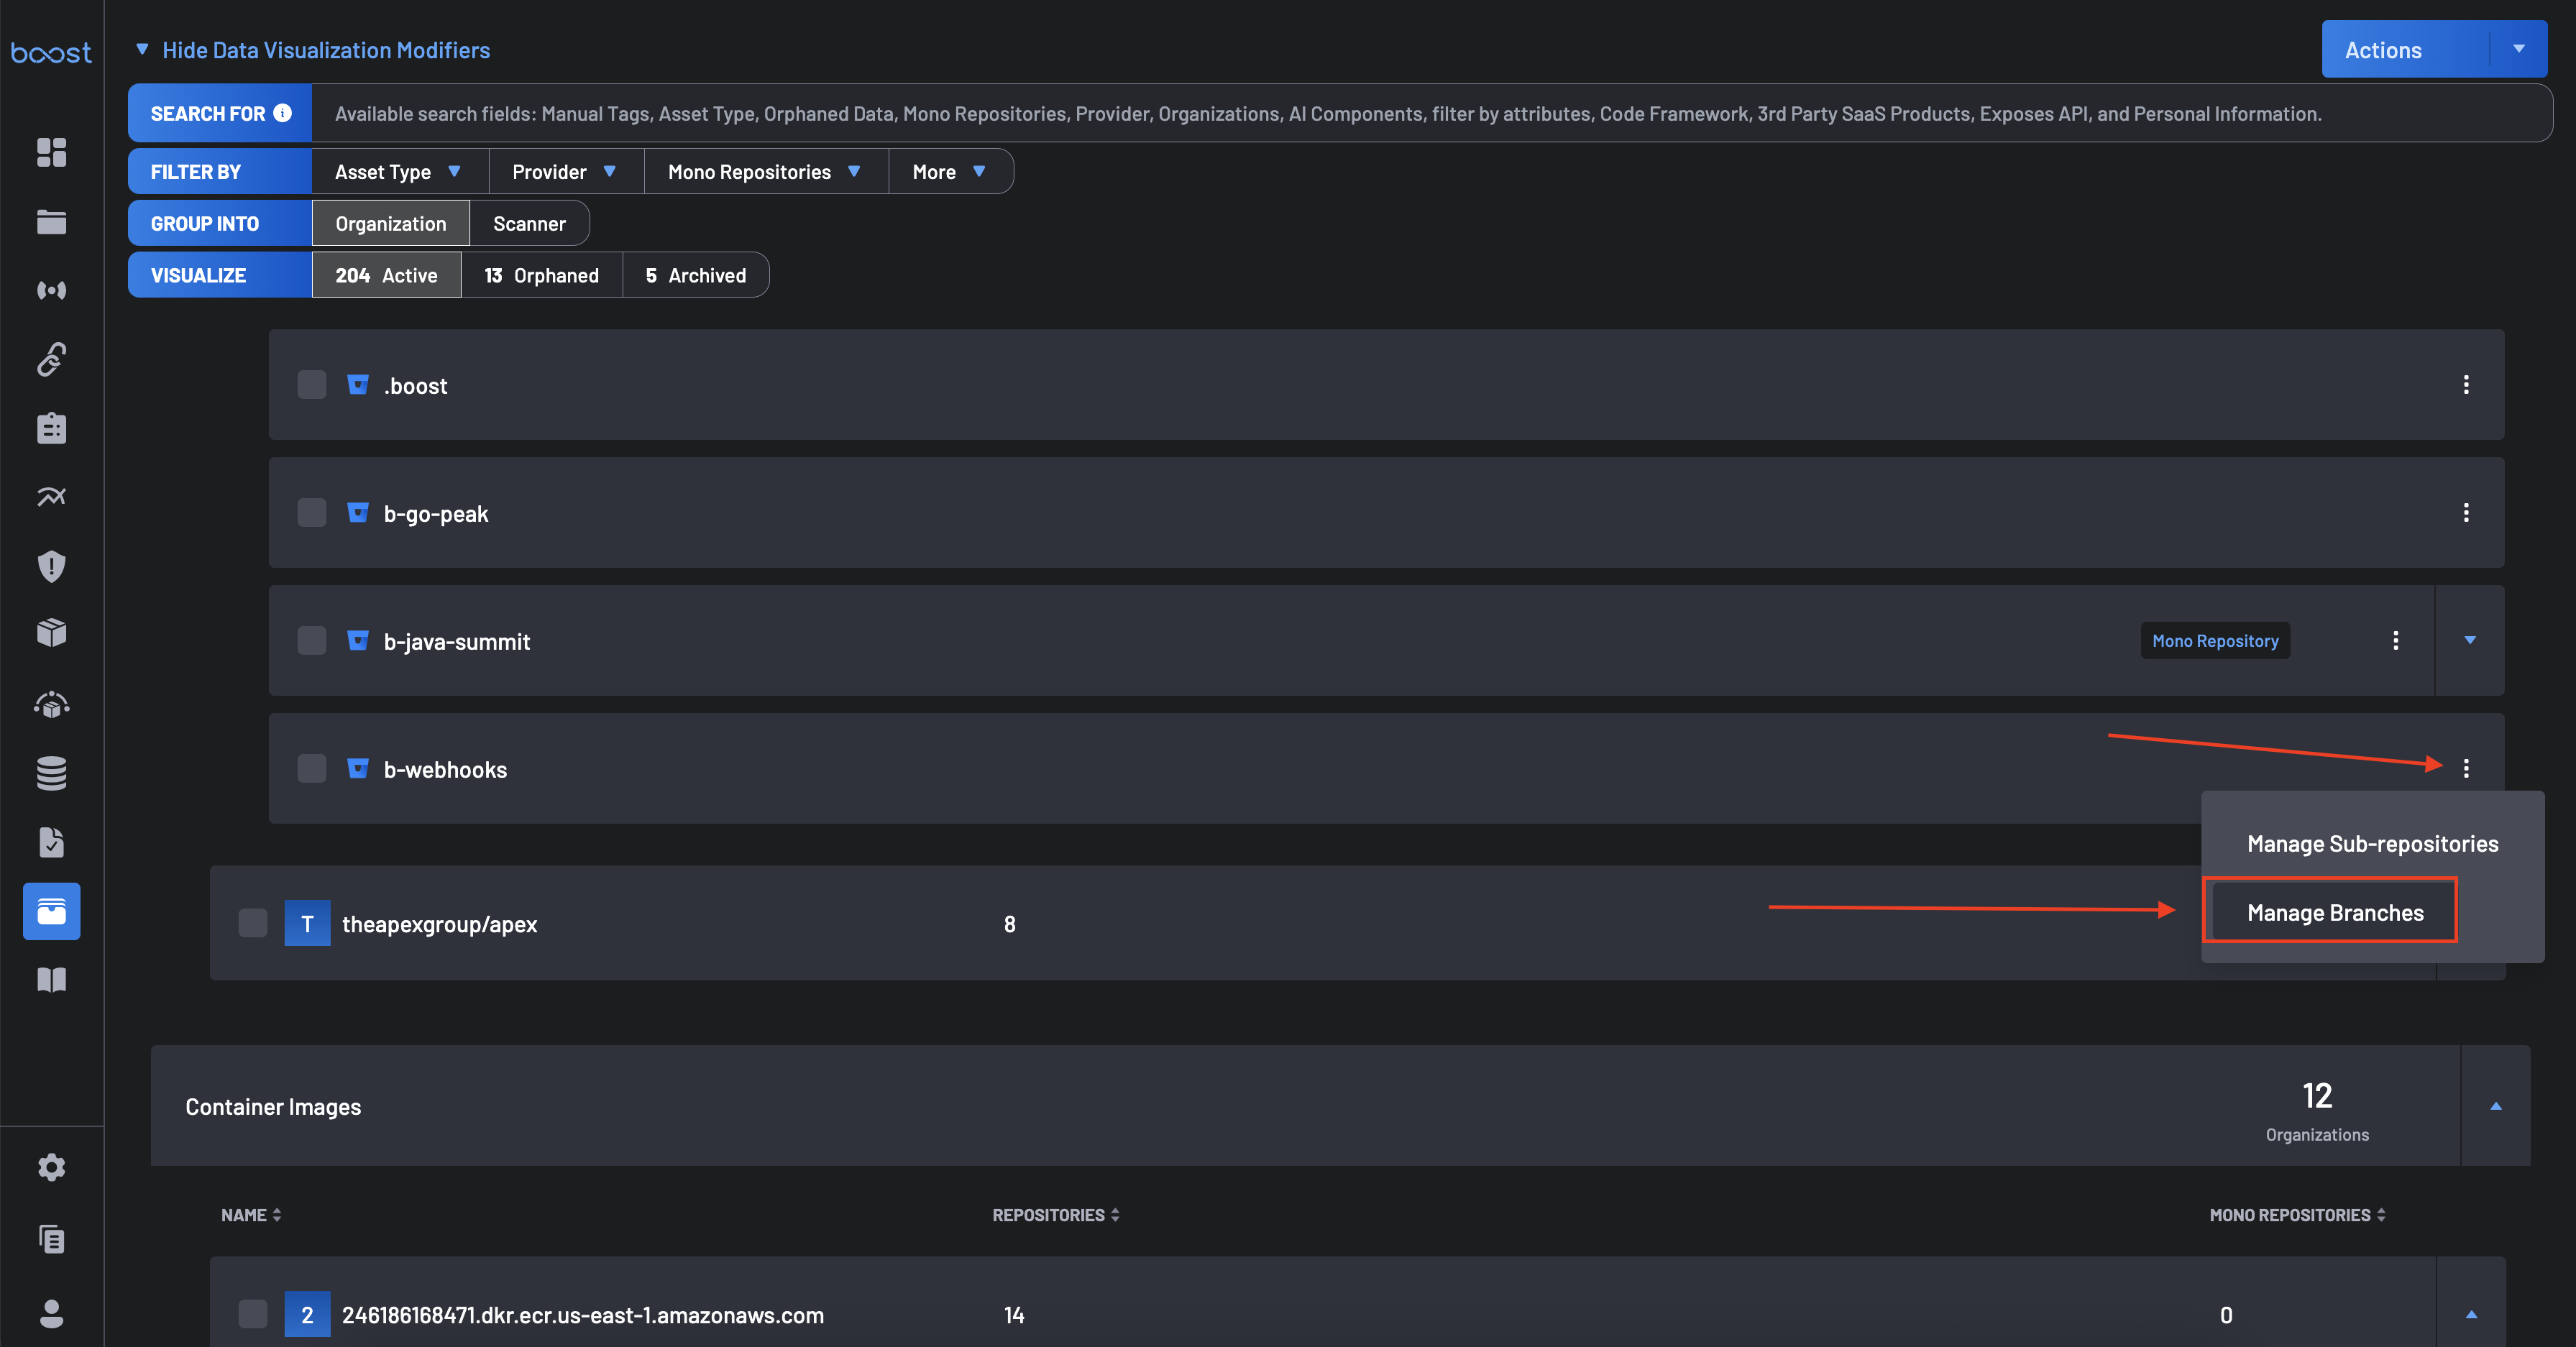
- Navigate to the Asset Management page.
-
From the Source Control Management configuration panel, select the repository you wish to configure. Click the Manage Branches button.
-
Under the Add Branches section, enter the name of the branch you want to monitor. Click the Add button to confirm.
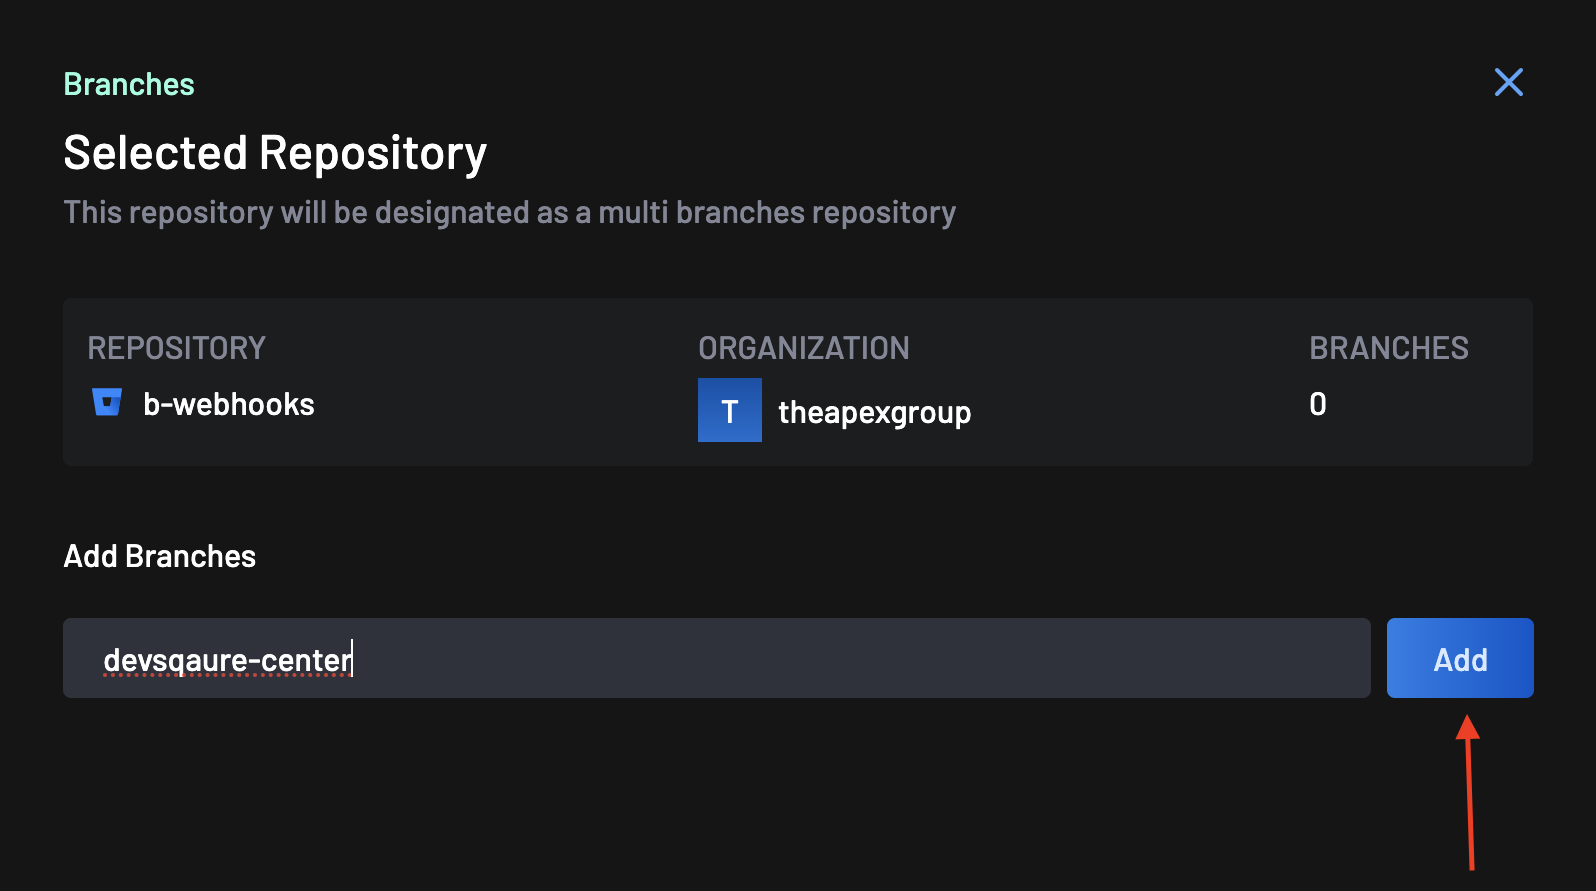
-
Once added, the branch will appear in the list below, confirming it’s now included for scanning and tracking.

Branch successfully added
Note
Repeat for Additional Branches: You can add as many branches as needed. Each one will be treated independently.
Managing Branches
Each branch added is fully configurable and will inherit the repository’s baseline settings. To remove a branch, use the trash icon (🗑️) beside its name.
Best Practices
- Use consistent naming across repositories and branches to simplify filtering and report segmentation.
- Add long-lived branches like
main,dev,release, andhotfixfor persistent visibility. - Avoid adding temporary or feature branches unless specifically required for QA or compliance.