Manual Tags
Manual Tags allow you to categorize and group related resources such as repositories and organizations, based on custom-defined labels. These tags improve visibility, prioritization, and filtering across the platform, especially in the dashboard and findings pages.
Examples of common tags include:
critical— for infrastructure-critical repositories.outsourced— for third-party maintained assets.non-prod— to differentiate staging or development environments.
These names are all custom and not standard. Once created and assigned, Manual Tags become accessible across Boost’s filtering tools to streamline audits, reporting, and triage.
Some Important Use Cases
- Prioritize critical infrastructure by filtering security findings from assets tagged
critical. - Track outsourced codebases to apply different risk review policies.
- Segment dashboards based on business unit or environment (
marketing,non-prod, etc.). - Support governance efforts by grouping
legacy,shadow, or manually maintained repositories.
Creating Manual Tags
Follow the steps below to create a manual tag:
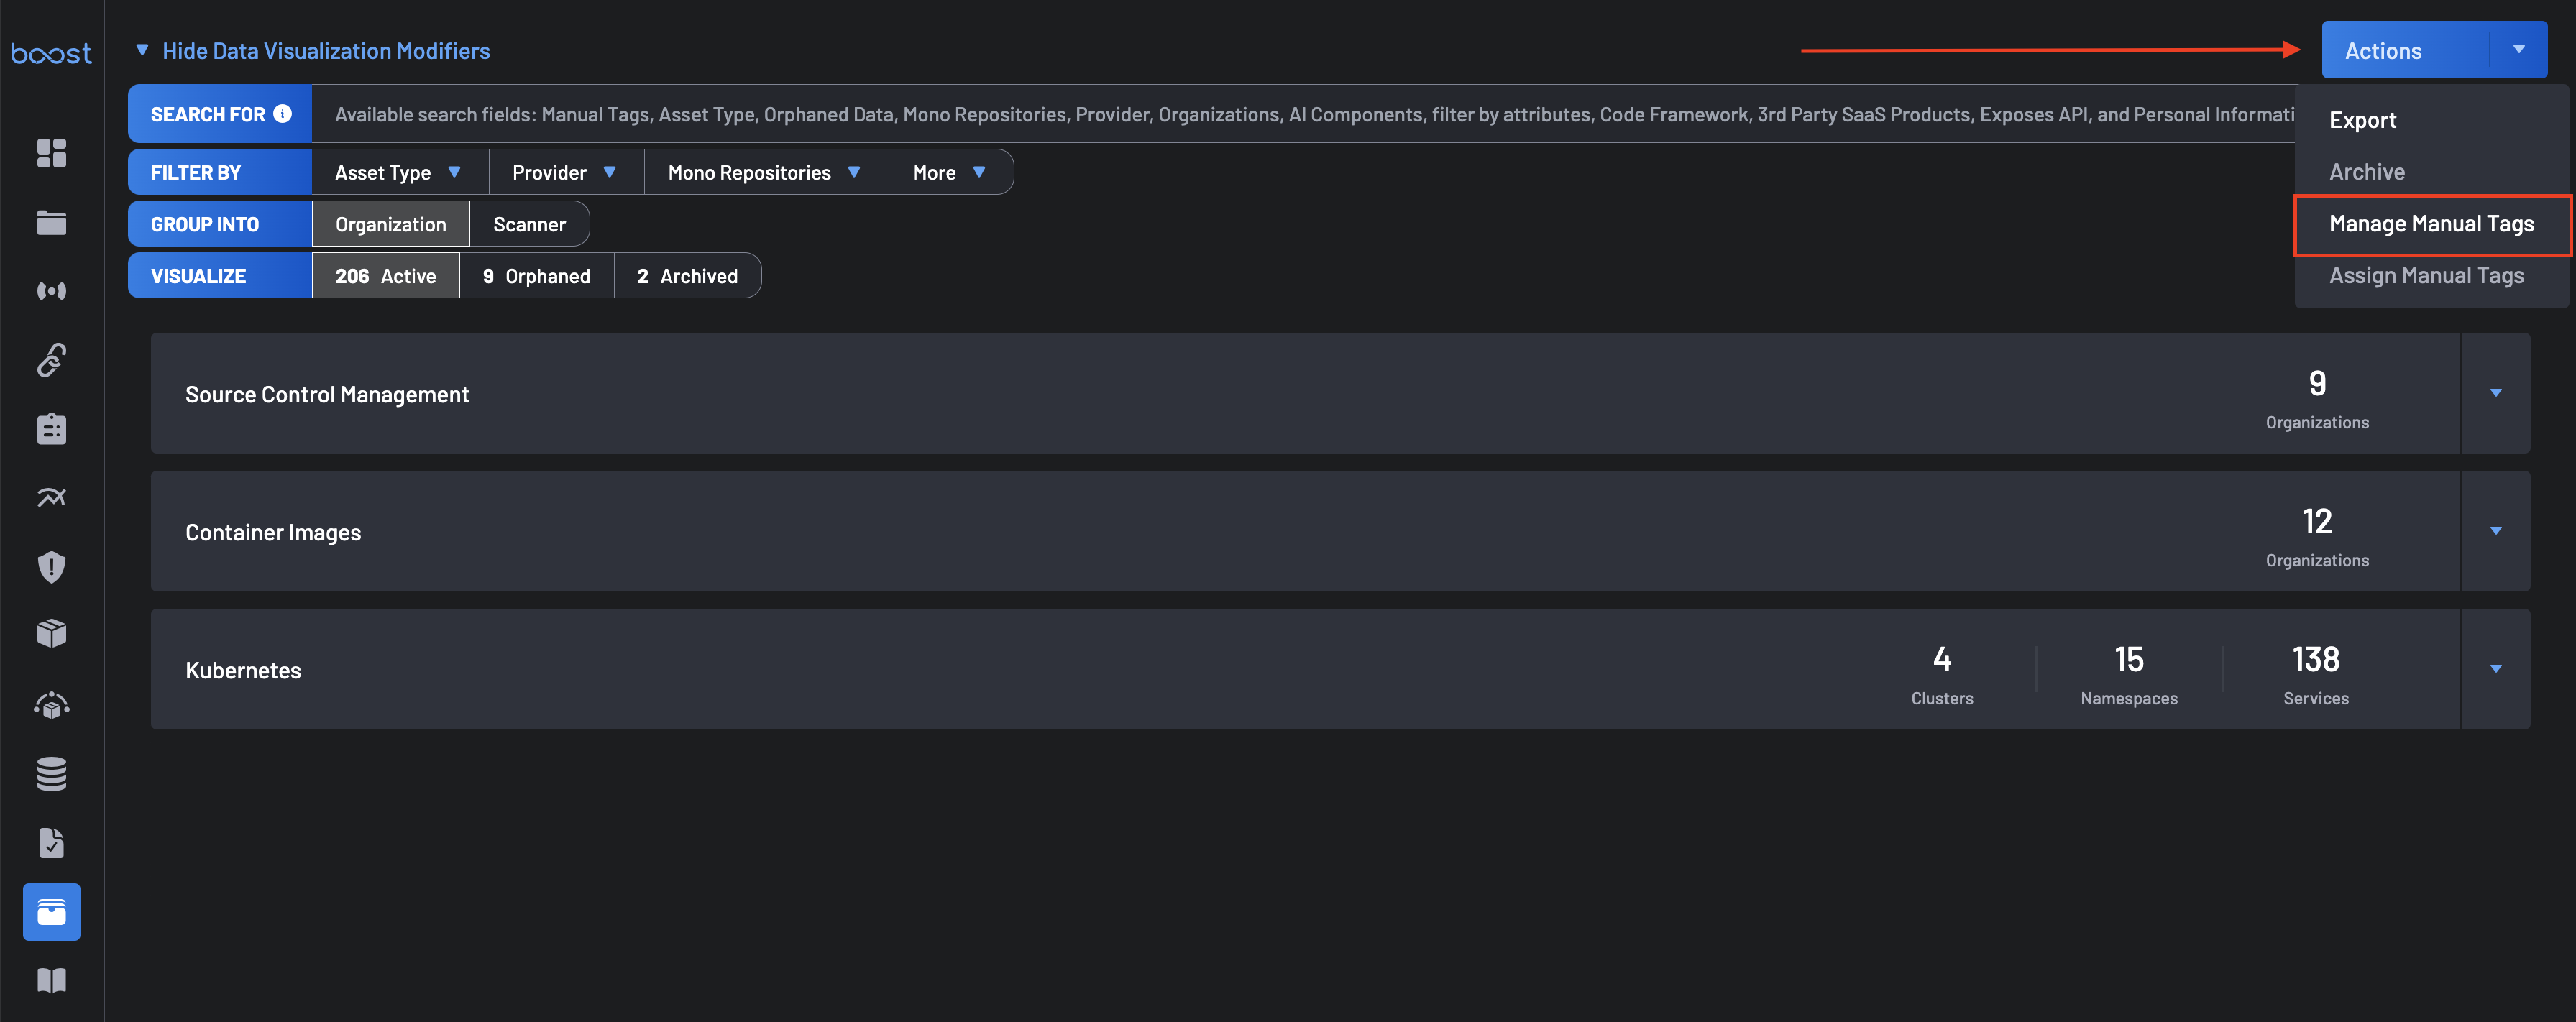
- Navigate to the Asset Management page.
-
Click the Actions dropdown in the upper right corner of the page and select Manage Manual Tags.
-
In the pop-up modal, type your desired tag name (max 25 characters), and click the Add button.
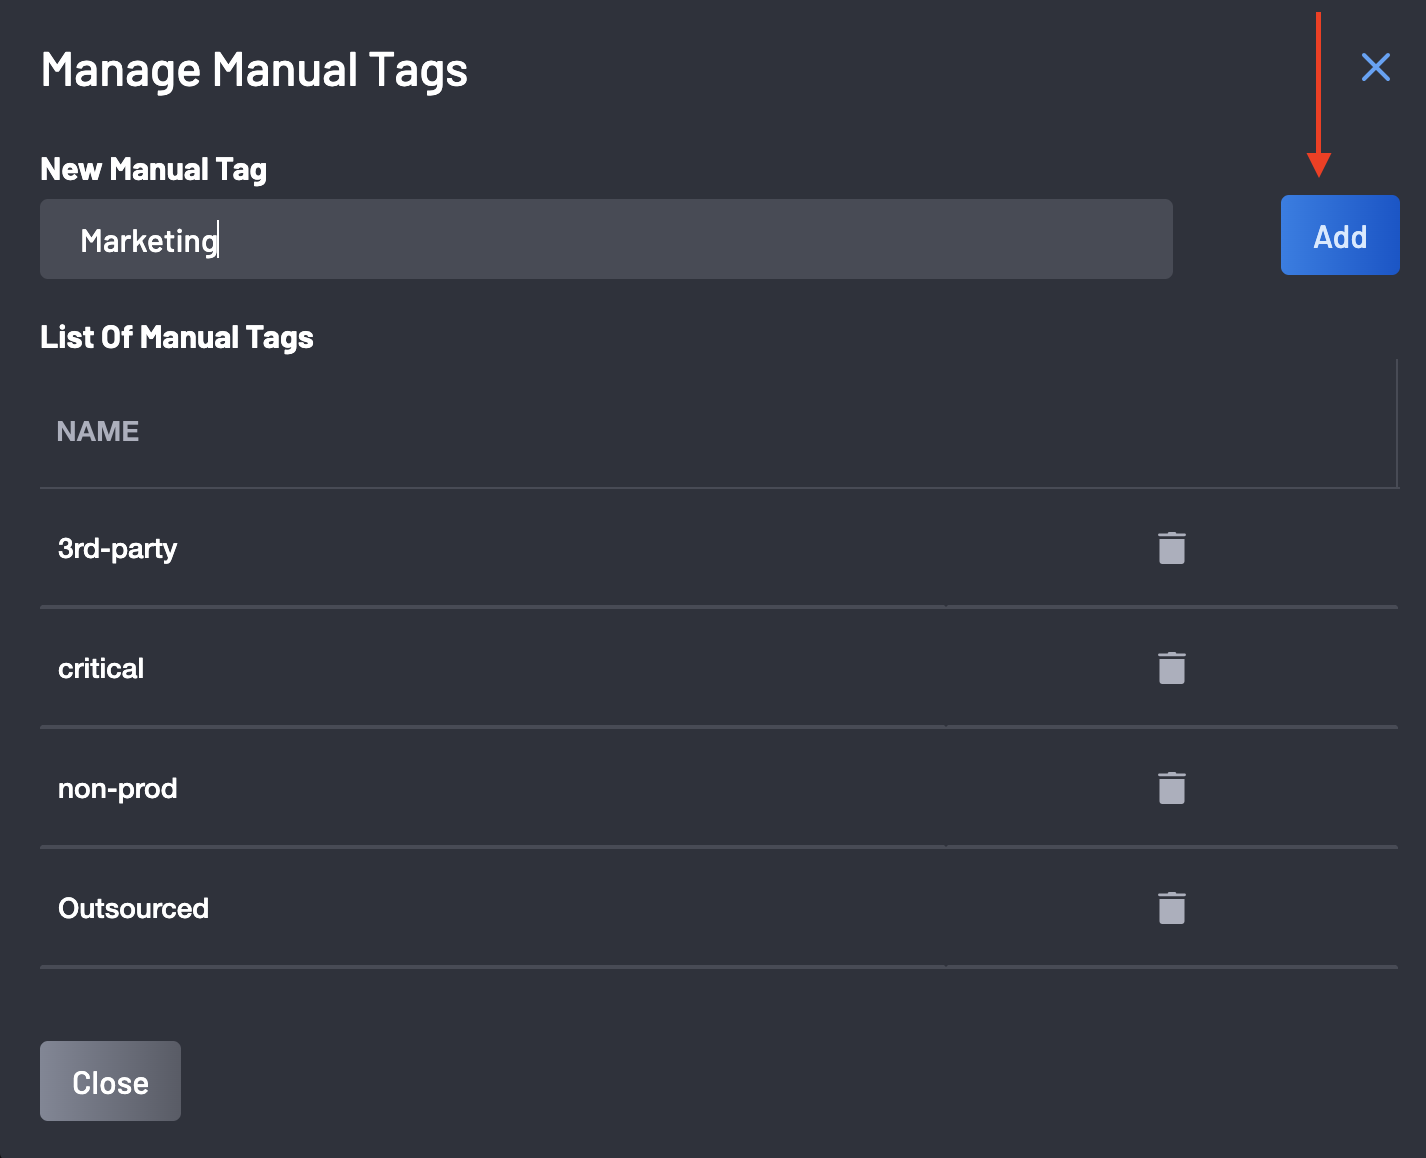
Note
⚠️ Tags must be unique. Use consistent naming conventions (e.g., critical, non-prod, 3rd-party).
Assigning Tags to Resources
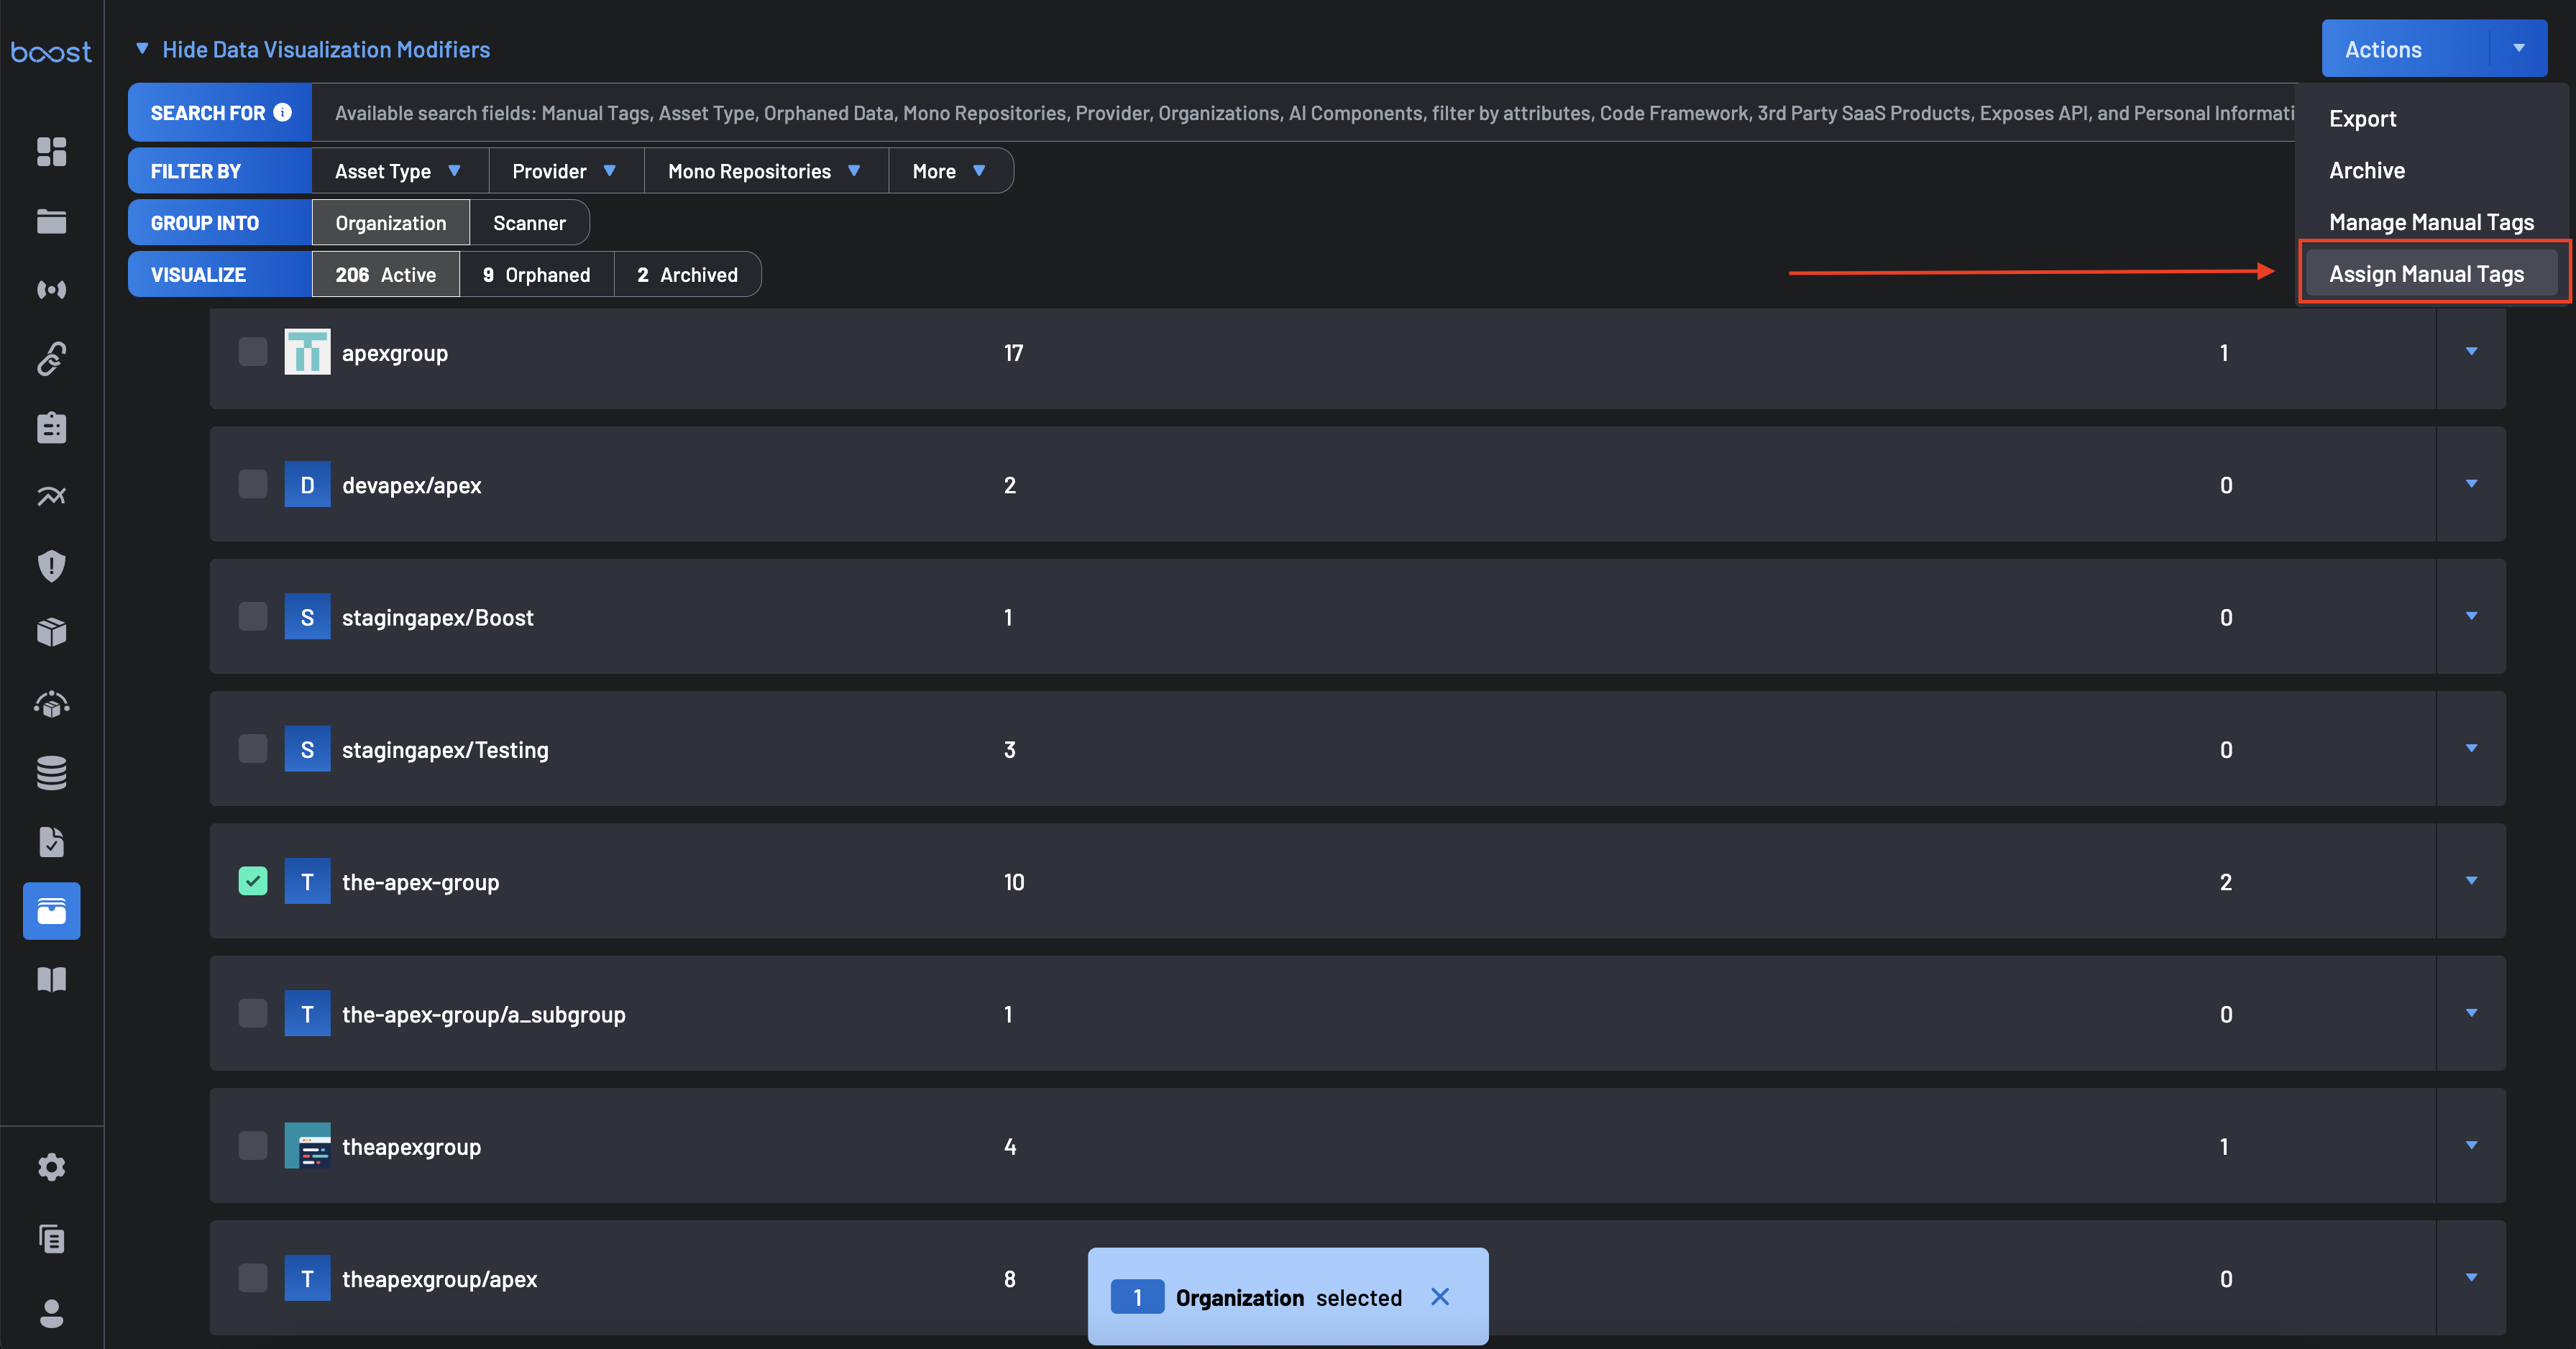
Once created, you can assign Manual Tags to one or more repositories:
- Select one or more repositories from the Asset Management page.
-
Click the Actions button and choose Assign Manual Tags.
-
In the modal, check the boxes next to the tags you want to apply and click Update to finalize.

Note
You can assign multiple tags to a single resource.
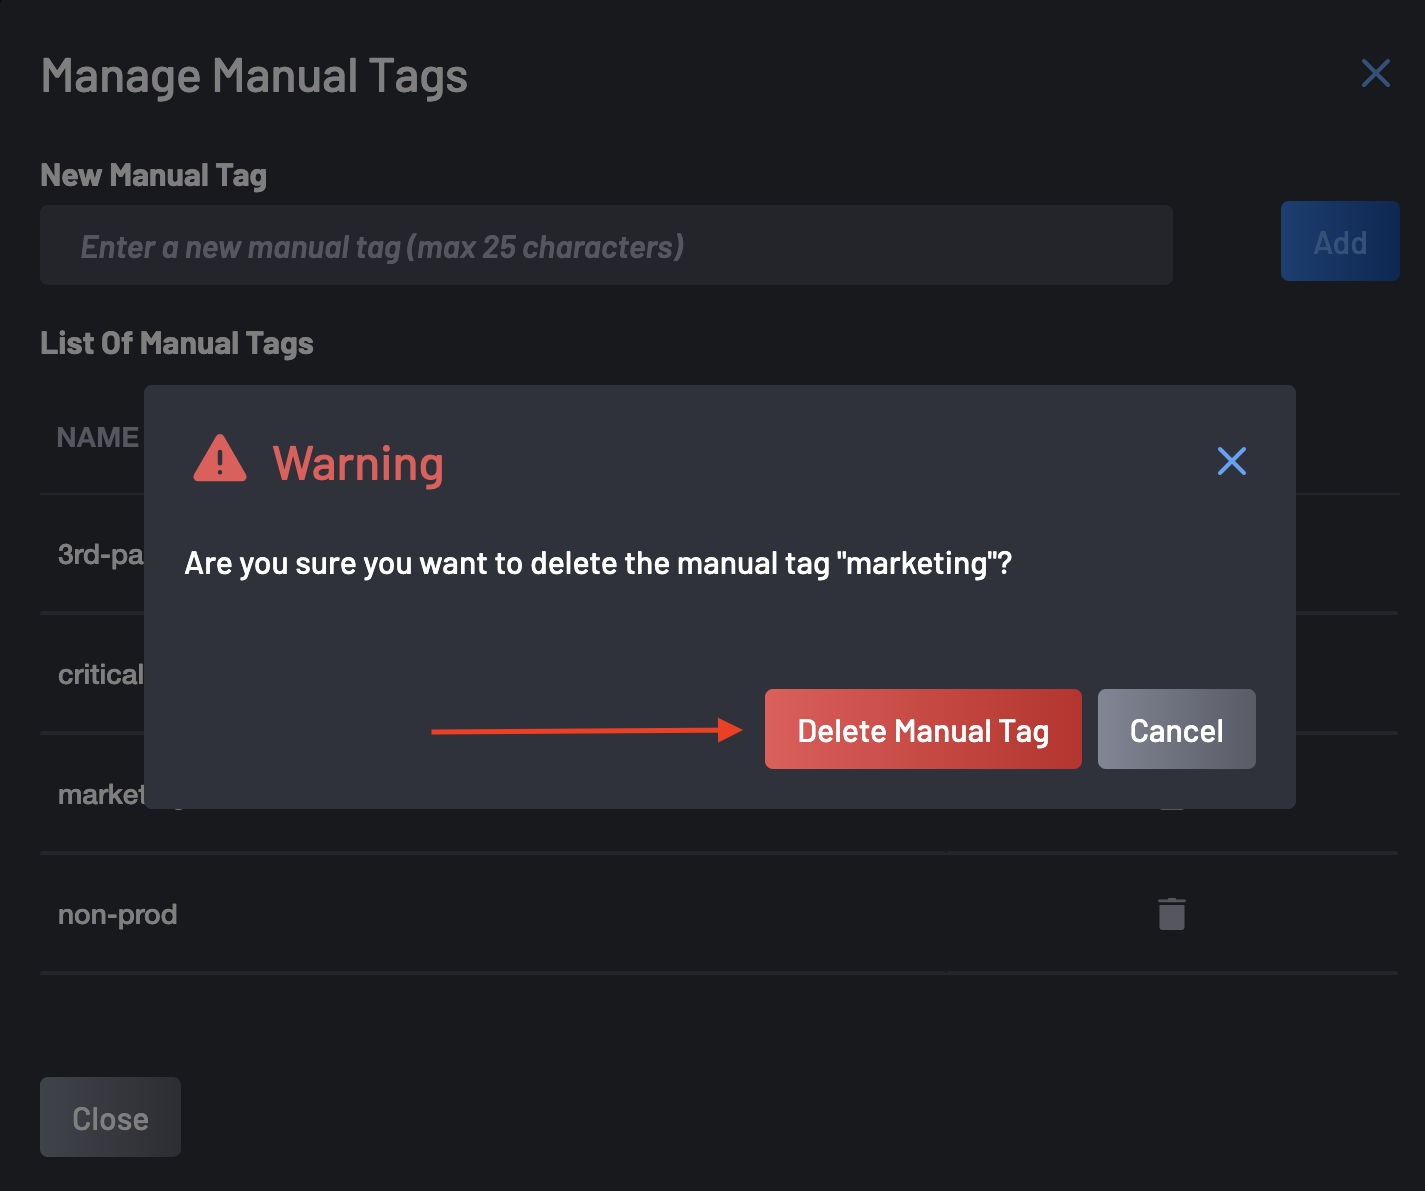
Deleting Manual Tags
To delete a tag:
-
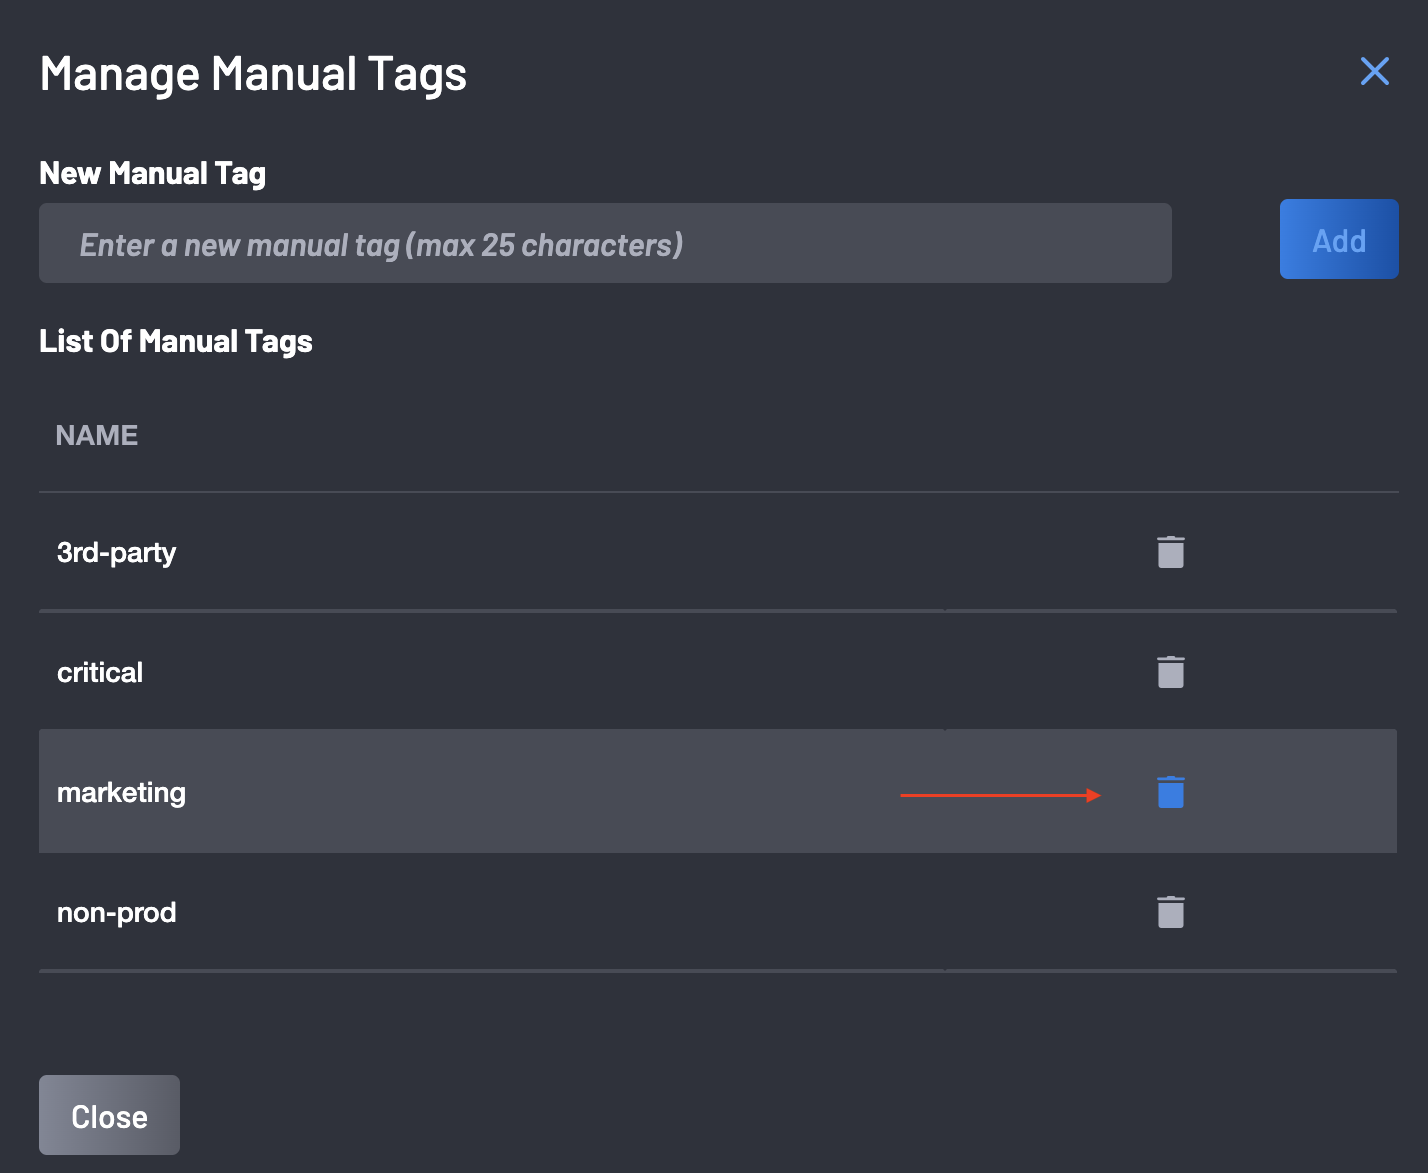
Click the Actions dropdown in the upper right corner of the page and select Manage Manual Tags.
-
Click the trash icon next to the tag you want to remove.
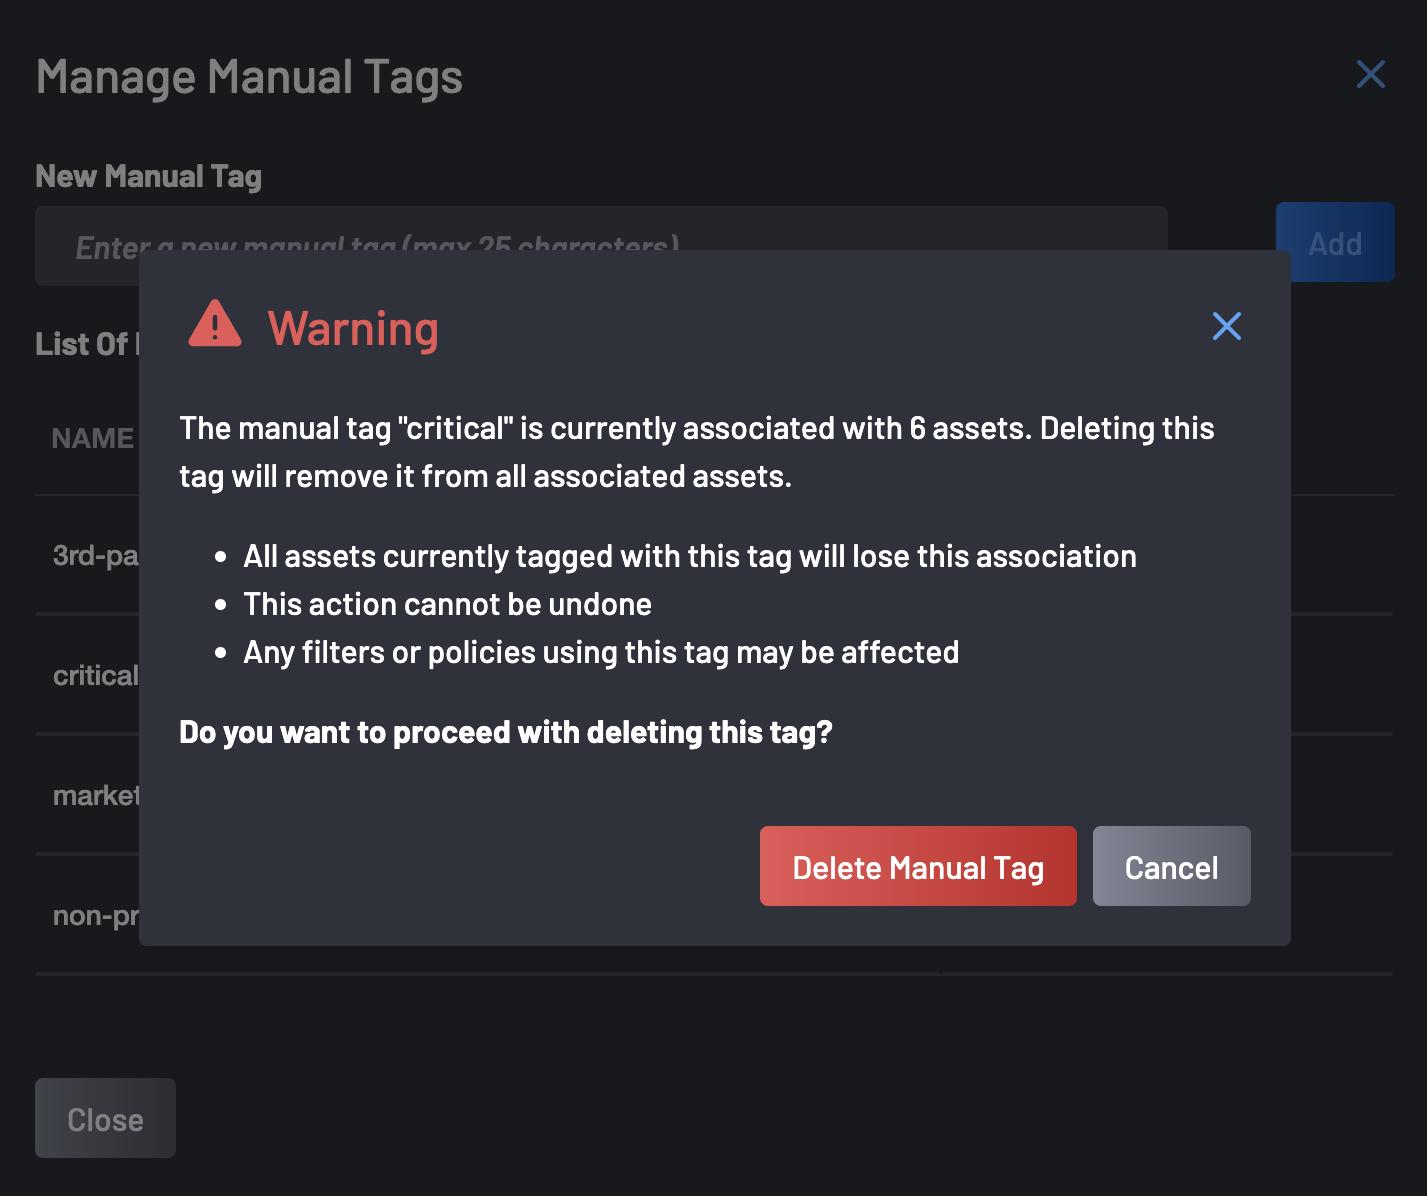
-
Based on whether the tag is currently in use, one of the following confirmation prompts will appear:
-
Unassigned Tag: If the tag is not associated with any assets, a simple confirmation dialog will appear. Click the Delete Manual Tag button to confirm the removal of the tag.
-
Assigned Tag: If the tag is currently applied to one or more resources, a warning dialog will notify you: "🚫Deleting a tag will remove it from all associated resources. This action cannot be undone." Review the impact carefully, then click Delete Manual Tag button to confirm and proceed with deletion.
-