Configuring Entra ID and Azure DevOps Integration with Boost Security
This guide provides detailed instructions for configuring Microsoft Entra ID and Azure DevOps (ADO) to integrate with Boost Security. The configuration establishes a secure connection using an Entra ID app registration, service principal, and associated permissions. By following the steps outlined in this guide, you will:
- Create and configure an Entra ID application registration.
- Assign the required Azure DevOps API permissions.
- Generate and manage client secrets.
- Connect Azure DevOps to your Entra ID tenant.
- Configure Boost Security to integrate with your ADO environment.
- Enable webhook installation and Zero Touch Provisioning (ZTP).
This process ensures Boost Security can securely interact with your Azure DevOps organization while adhering to best practices for access control and automation.
Entra ID Configuration
-
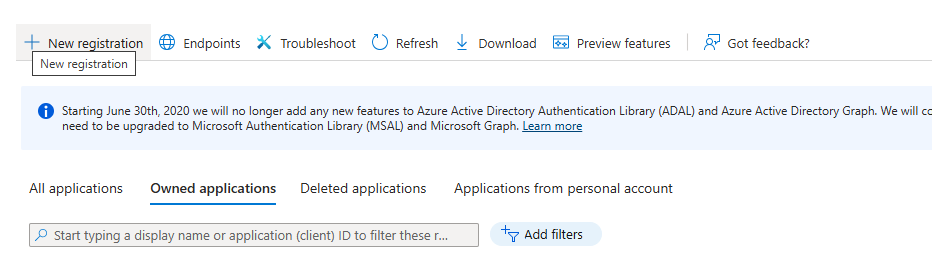
In the Azure Portal, navigate to Entra ID → Manage → App Registrations , and create a new app registration.
-
Assign a descriptive name and configure the Web Redirect URL to:
https://api.boostsecurity.io/scm-public/msal/callback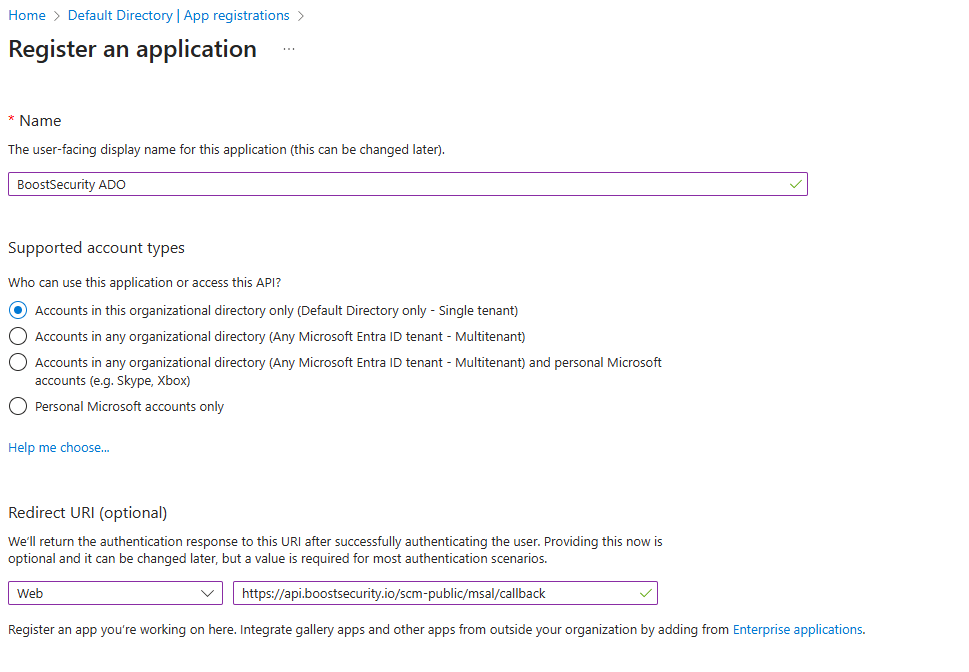
-
After creating the registration, open the Overview page and copy the Client ID. You will need this value in later steps.

-
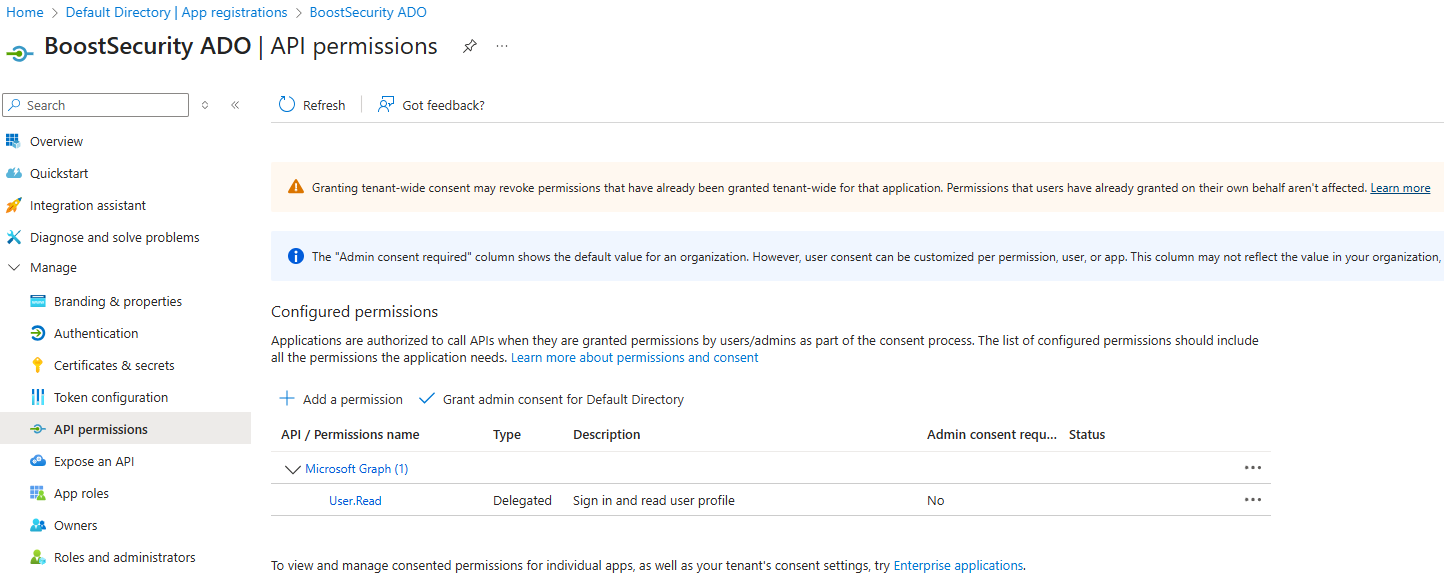
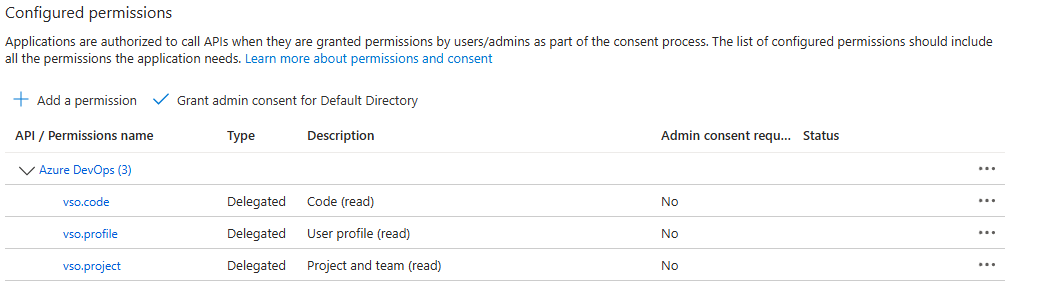
Configure API permissions:
-
Select Add a permission.
-
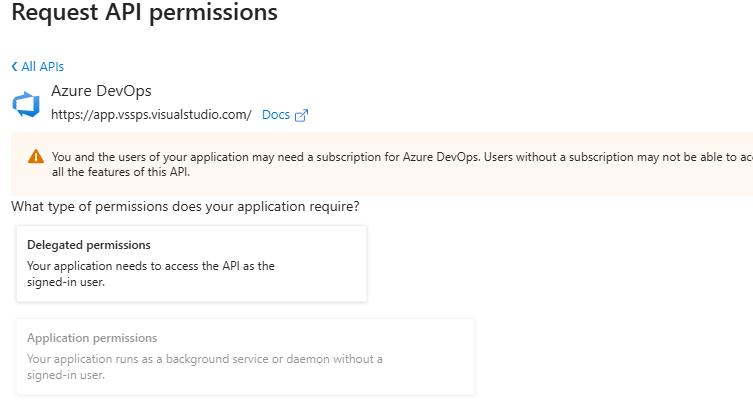
Under Microsoft APIs, choose Azure DevOps API.
-
Add the following delegated permissions:
vso.code (read)vso.project (read)vso.profile (read)
-
-
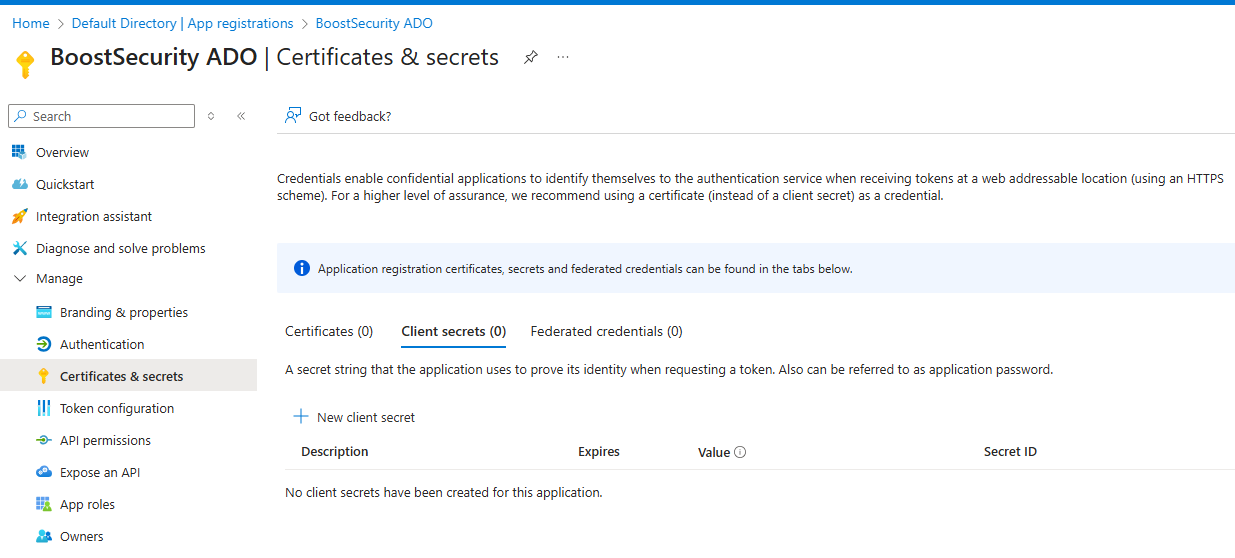
Generate a client secret:
-
Go to Manage → Certificates & Secrets.
-
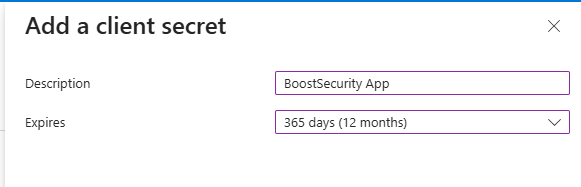
Create a new client secret with a 1-year expiration period.
-
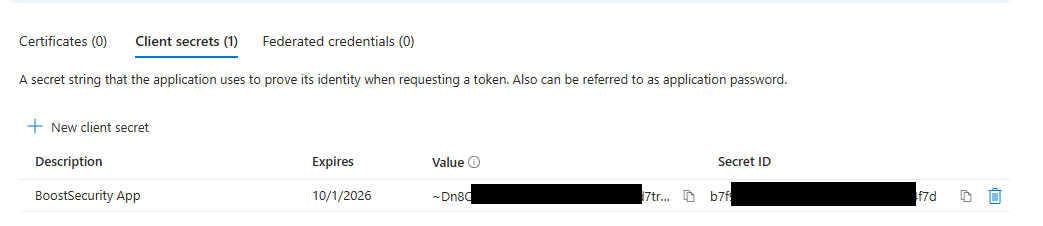
Copy and securely store the secret value, as it cannot be retrieved again after you leave the page.
-
Azure DevOps Configuration
-
In your Azure DevOps organization settings, confirm that the organization is connected to your Entra ID tenant:
https://dev.azure.com/{ORGANIZATION}/_settings/organizationAad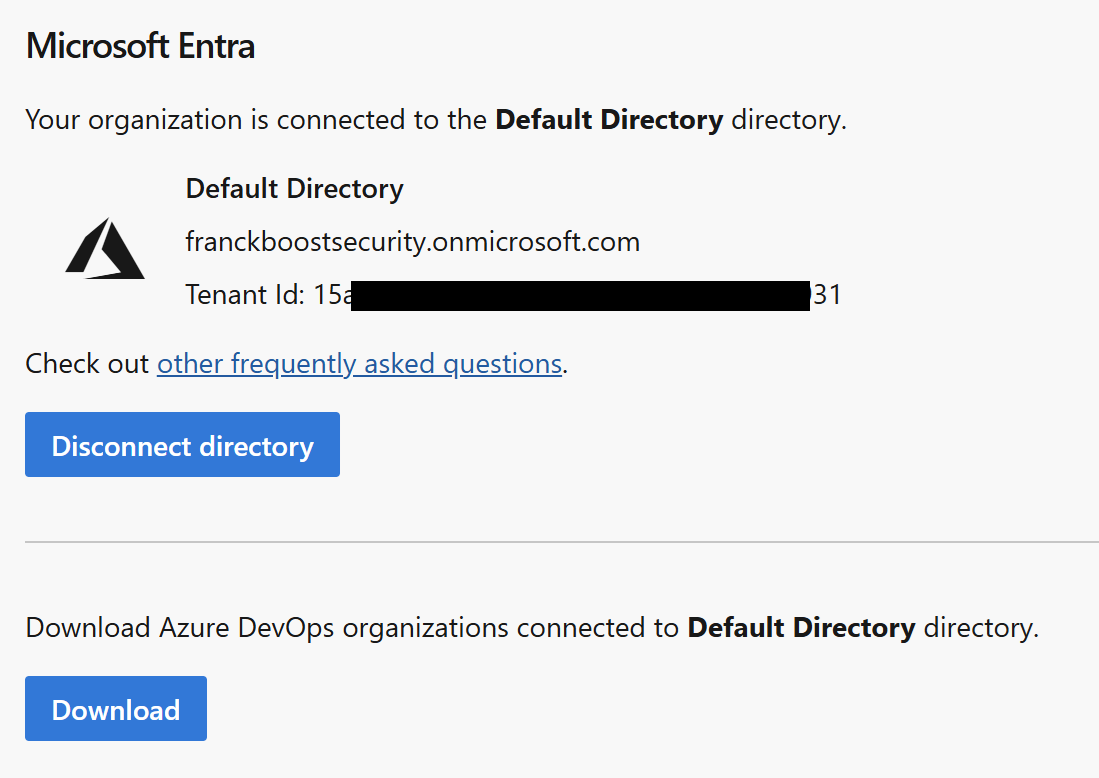
-
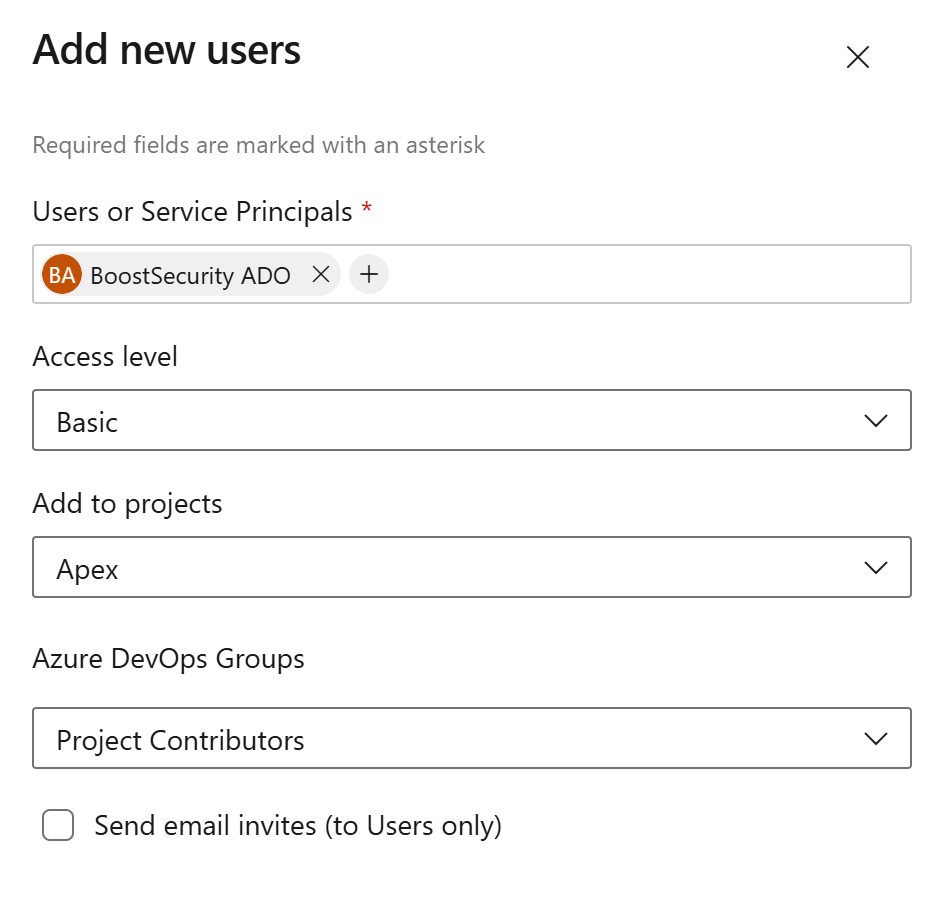
Add the Entra ID service principal as a user:
- Go to
https://dev.azure.com/{ORGANIZATION}/_settings/users. - Search for the service principal by name.
- Assign the service principal the role of Project Contributor with Basic access level.
- To ensure seamless integration, it is recommended to assign access to all projects.
- Go to
Boost Security ADO Account Integration
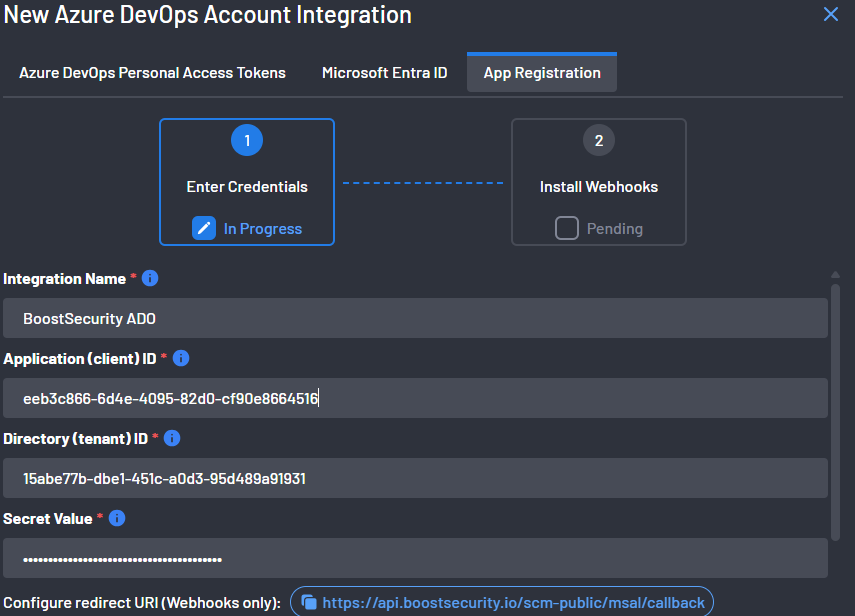
- In the Boost Security console, navigate to Settings → Integrations → ADO Account Integration , and select the App Registration tab.
-
Provide the following details:
- Integration name
- Client ID from the Entra ID app registration
- Tenant ID (available at: Active Directory)
- Client Secret generated during the Entra ID configuration
-
Install the webhook:
- Boost Security will request temporary authorization to act on your behalf in ADO.
- Approve the authorization request when prompted.
-
Enable Zero Touch Provisioning (ZTP):
- Install the Boost Security ADO application from the Visual Studio Marketplace: Boost Security Scan App
- Once installed, enable ZTP to complete the configuration.